Beans and Sardines

  • Home
  • About
  • Recipe of the week
  • Recipes
  • Wines
  • Contact

Prežganka – Traditional Flour Based Soup Recipe

Beans and Sardines
February 26, 2025 by tina oblak in Adriatic Recipe, All year round recipe, Appetizers, breakfast, Central European recipes, child friendly dish, child friendly meal, comfort, dinner, Easy recipe, entrée course, family friendly dish, family friendly meal, first course, first course dish, first course meal, Hearty soups, Istrian cuisine, Istrian dish, Istrian food, Istrian gastronomy, Mitteleuropean cuisine, Mitteleuropean dish, Mitteleuropean food, Mitteleuropean recipes, Rustic dish, simple recipe, Slovenian cuisine, Slovenian food, Slovenian gastronomy, Soups, Starters, Vegetarian

This humble and modest flour-based soup, that used to feed the poorest of the poor, offers a lot more than eyes can meet. It is quite incredible how much taste this dish can deliver considering it only uses a handful of very basic cupboard ingredients.

It is an easy and super quick soup to cook when feeling a bit under the weather, it helps with indigestion problems and alleviates colds and flu.

In the olden days this soup used be served for breakfast along with some slices of bread, and offered to unexpected guest, if there was nothing else in the household, in fact, this dish was created when times were tough with not much available.

This type of soup is sometimes compared to the Roman Egg drop soup, or also known as, Stracciatella in brodo or Stracciatella alla Romana, and to the German variation Einbrennsuppe.

In Slovenia it is called Prežganka, from a word prežgati, meaning browning the flour in butter or oil.

It is very popular up and down the country, not found in the restaurants and exclusively made in the households, particularly liked by small children and elderly.

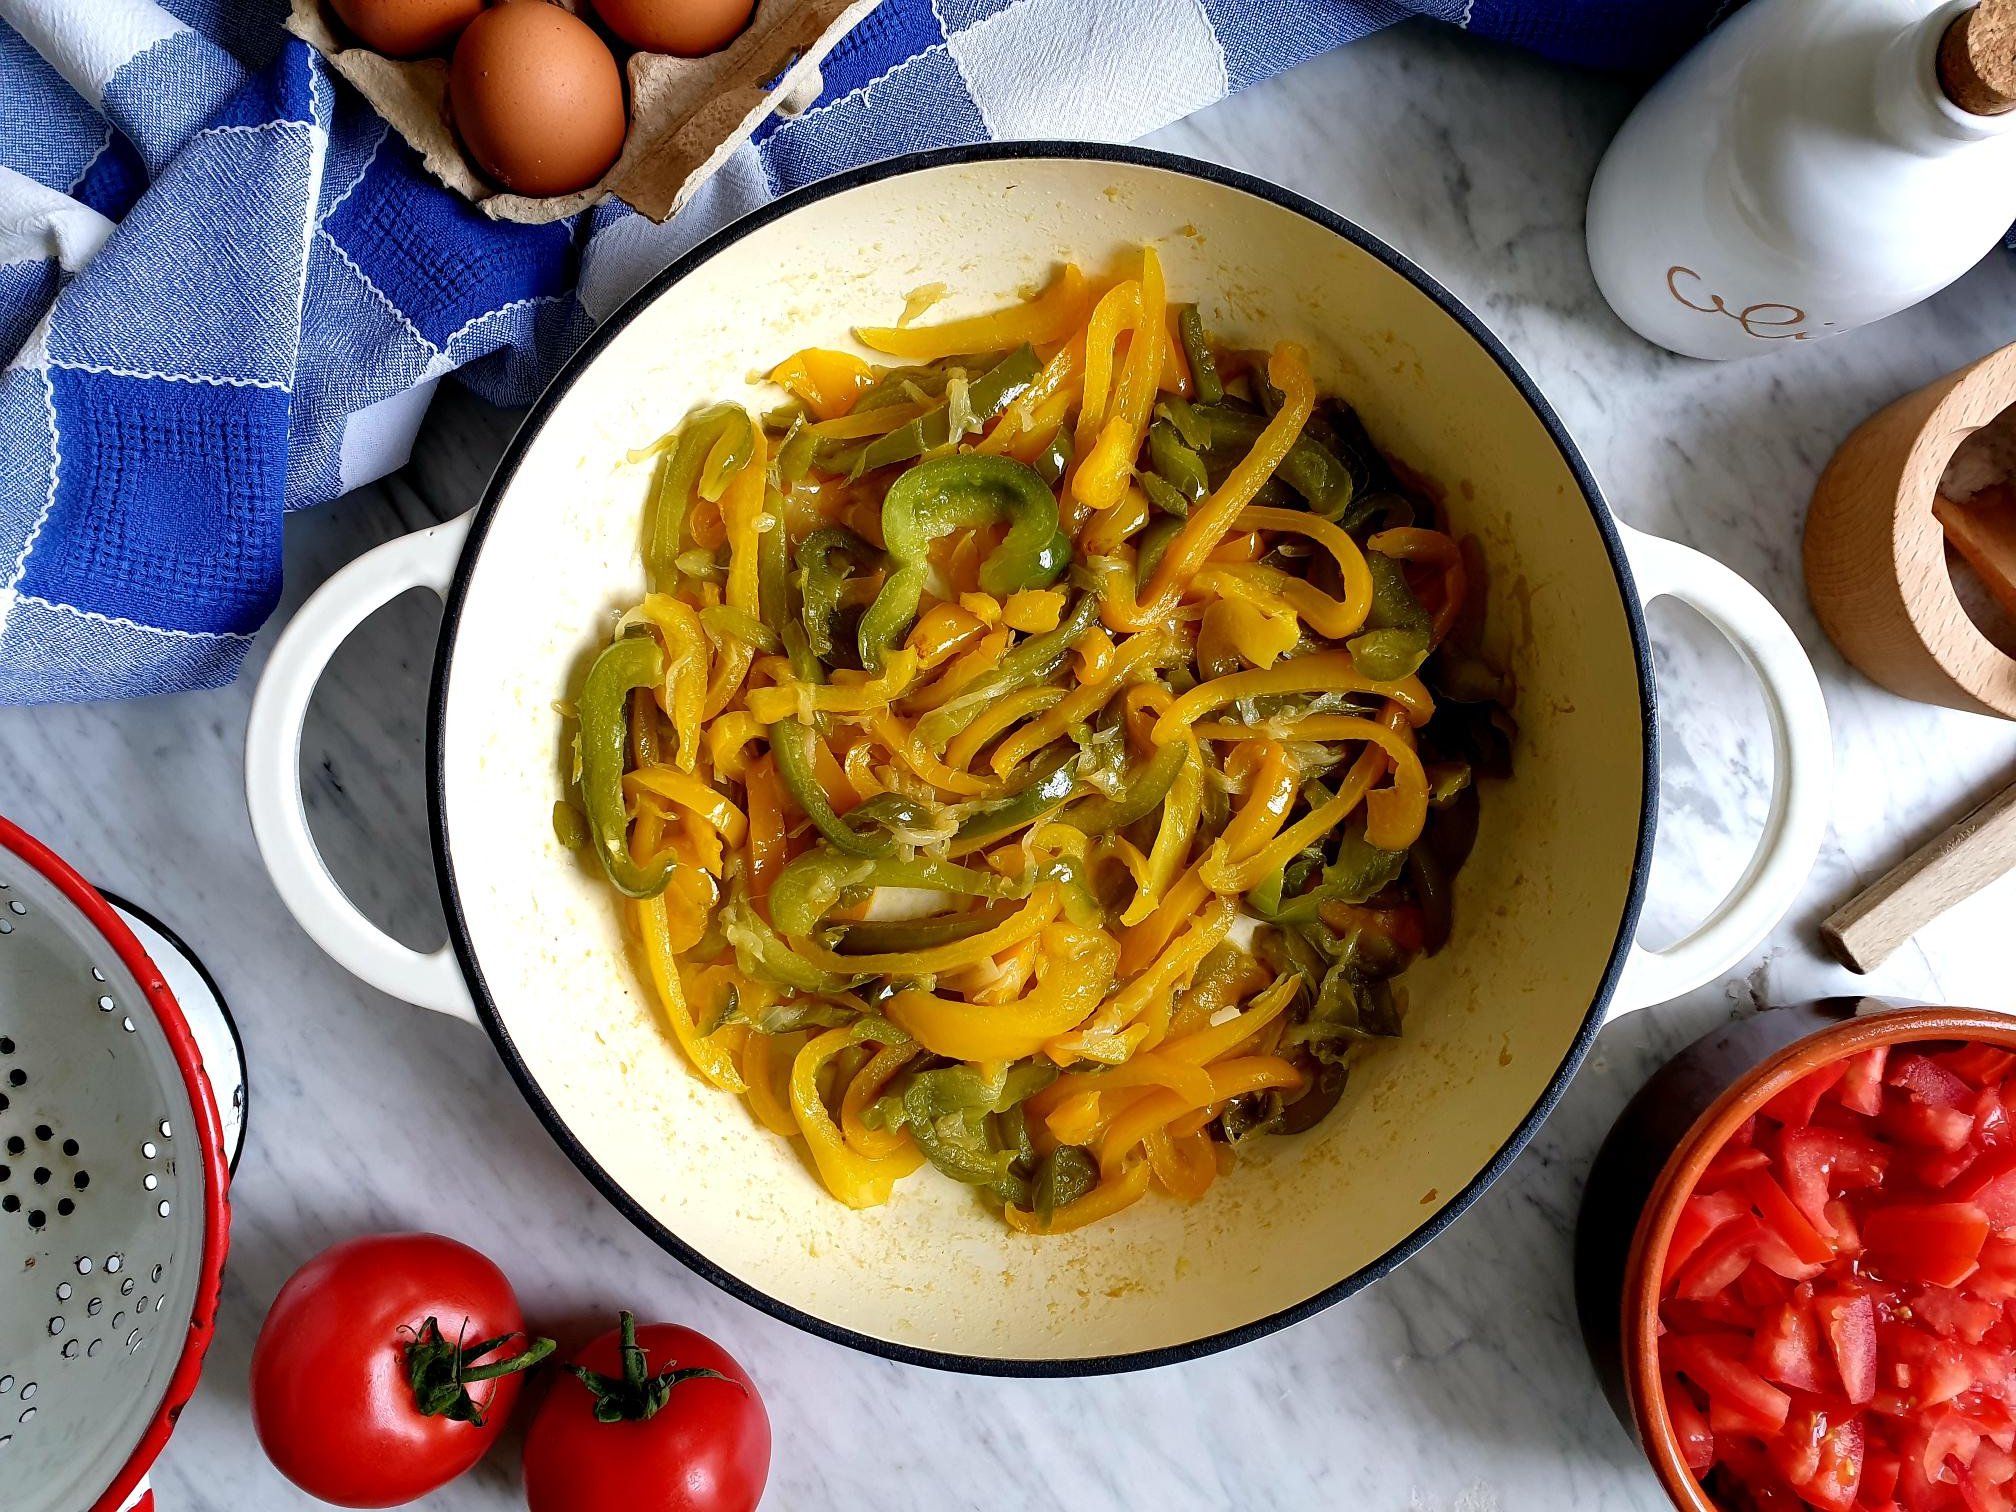
It offers variations from region to region, for example the use of olive oil, garlic and fresh parsley is more typical of the coastline region, while the use of butter and lard with addition of 1 teaspoon of whole caraway seeds or ground cumin is more typically found in inland, bay leaf and ground paprika are also used.

I am sharing here the recipe for Preažganka from Slovenian Istra how has been made in my family for generations.

Recipe

Ingredients

Serves 4

  • 2 Tbsp olive oil or butter

  • 1 clove of garlic, peeled

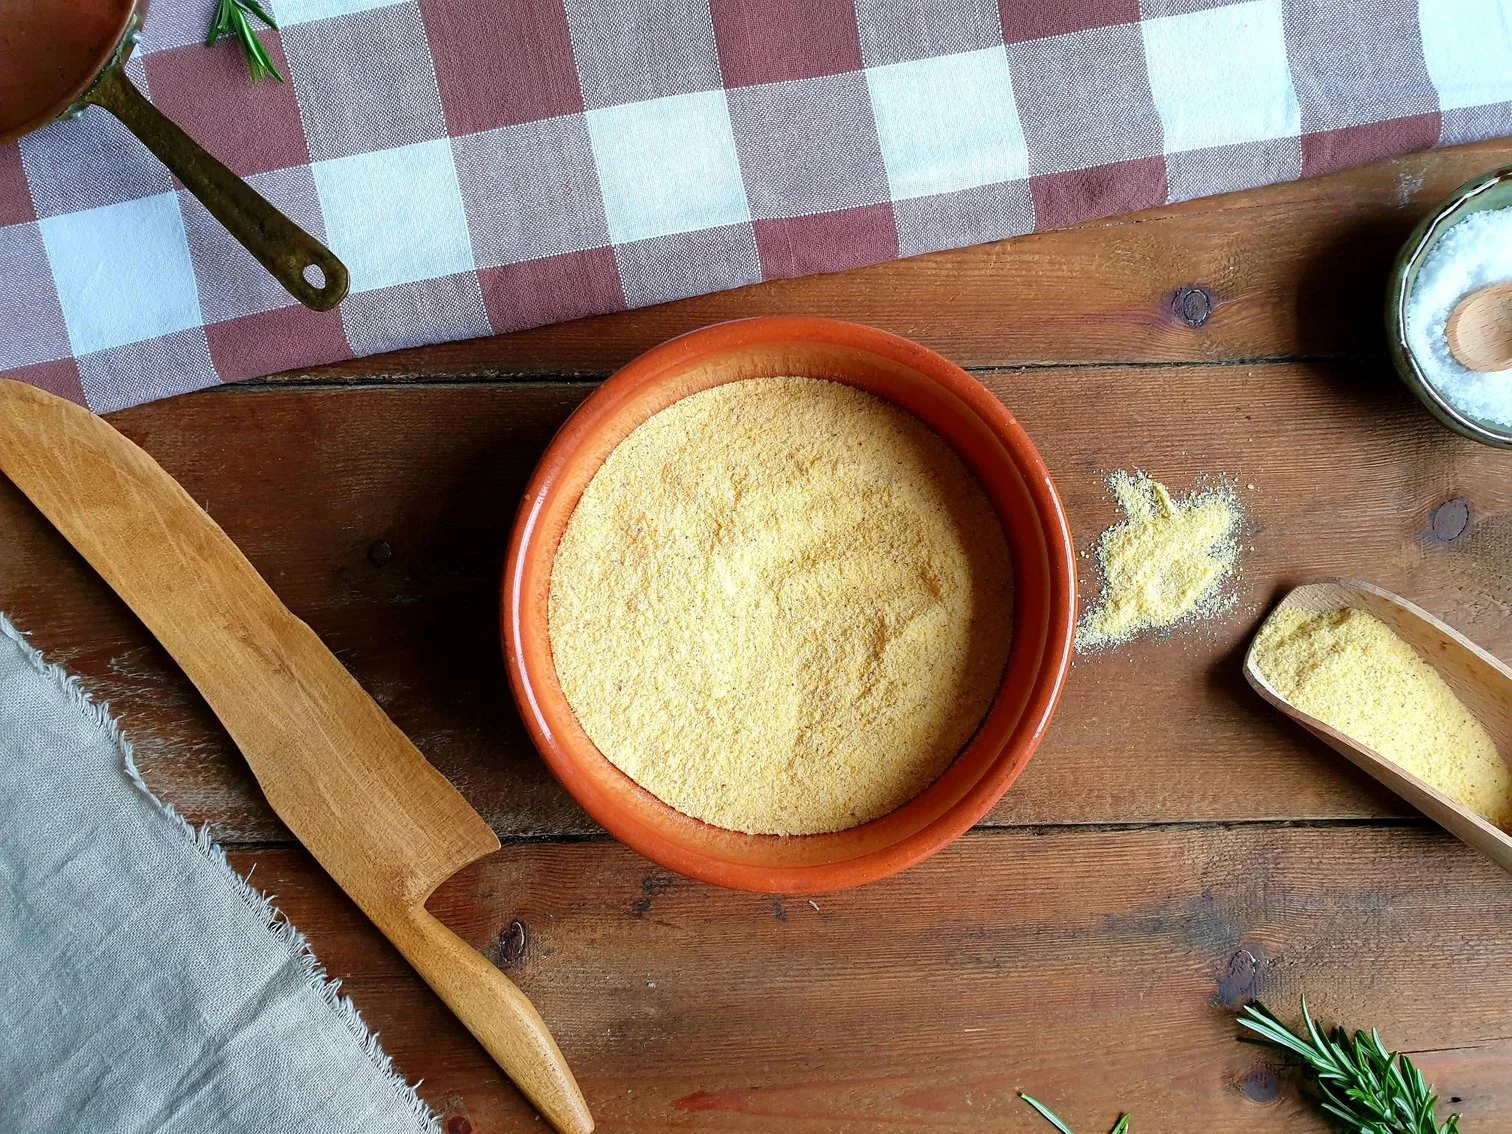
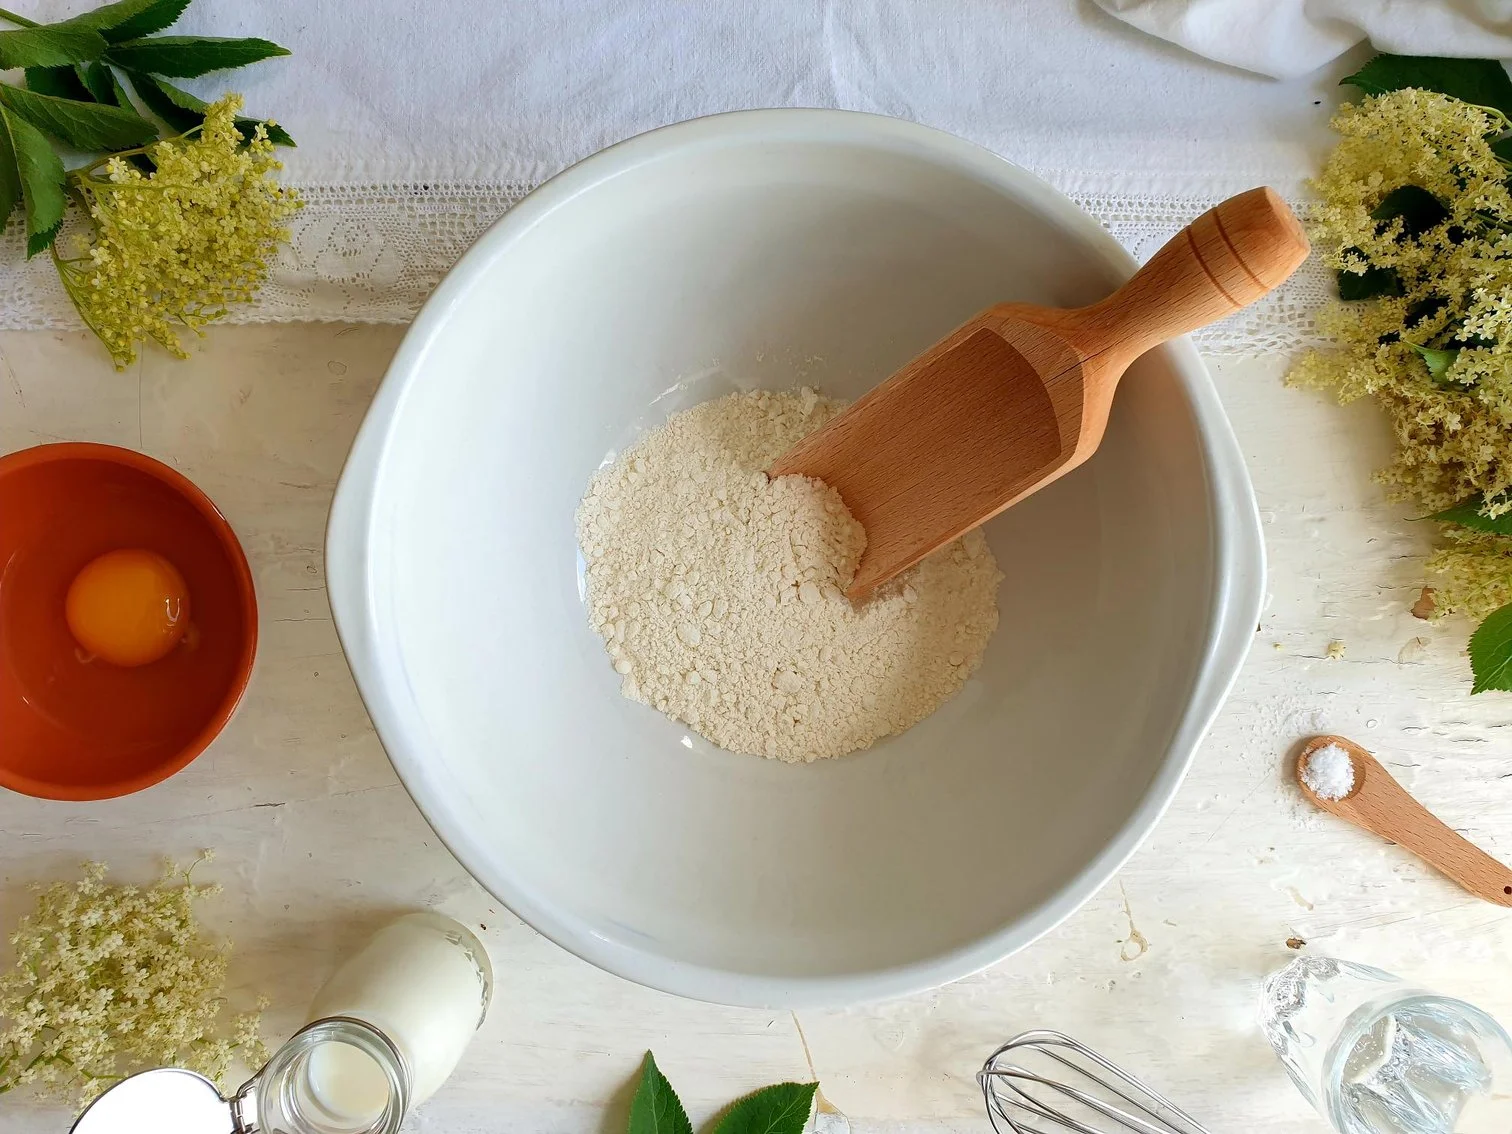
  • 3 Tbsp white all-purpose flour

  • 1litre water

  • 1 Tsp, or to taste, fresh flat leaf parsley, finely chopped (plus some extra to garnish, optional)

  • 2 eggs

  • sea salt, to taste

  • black pepper, to taste

  • bread croutons, to serve, optional

Method

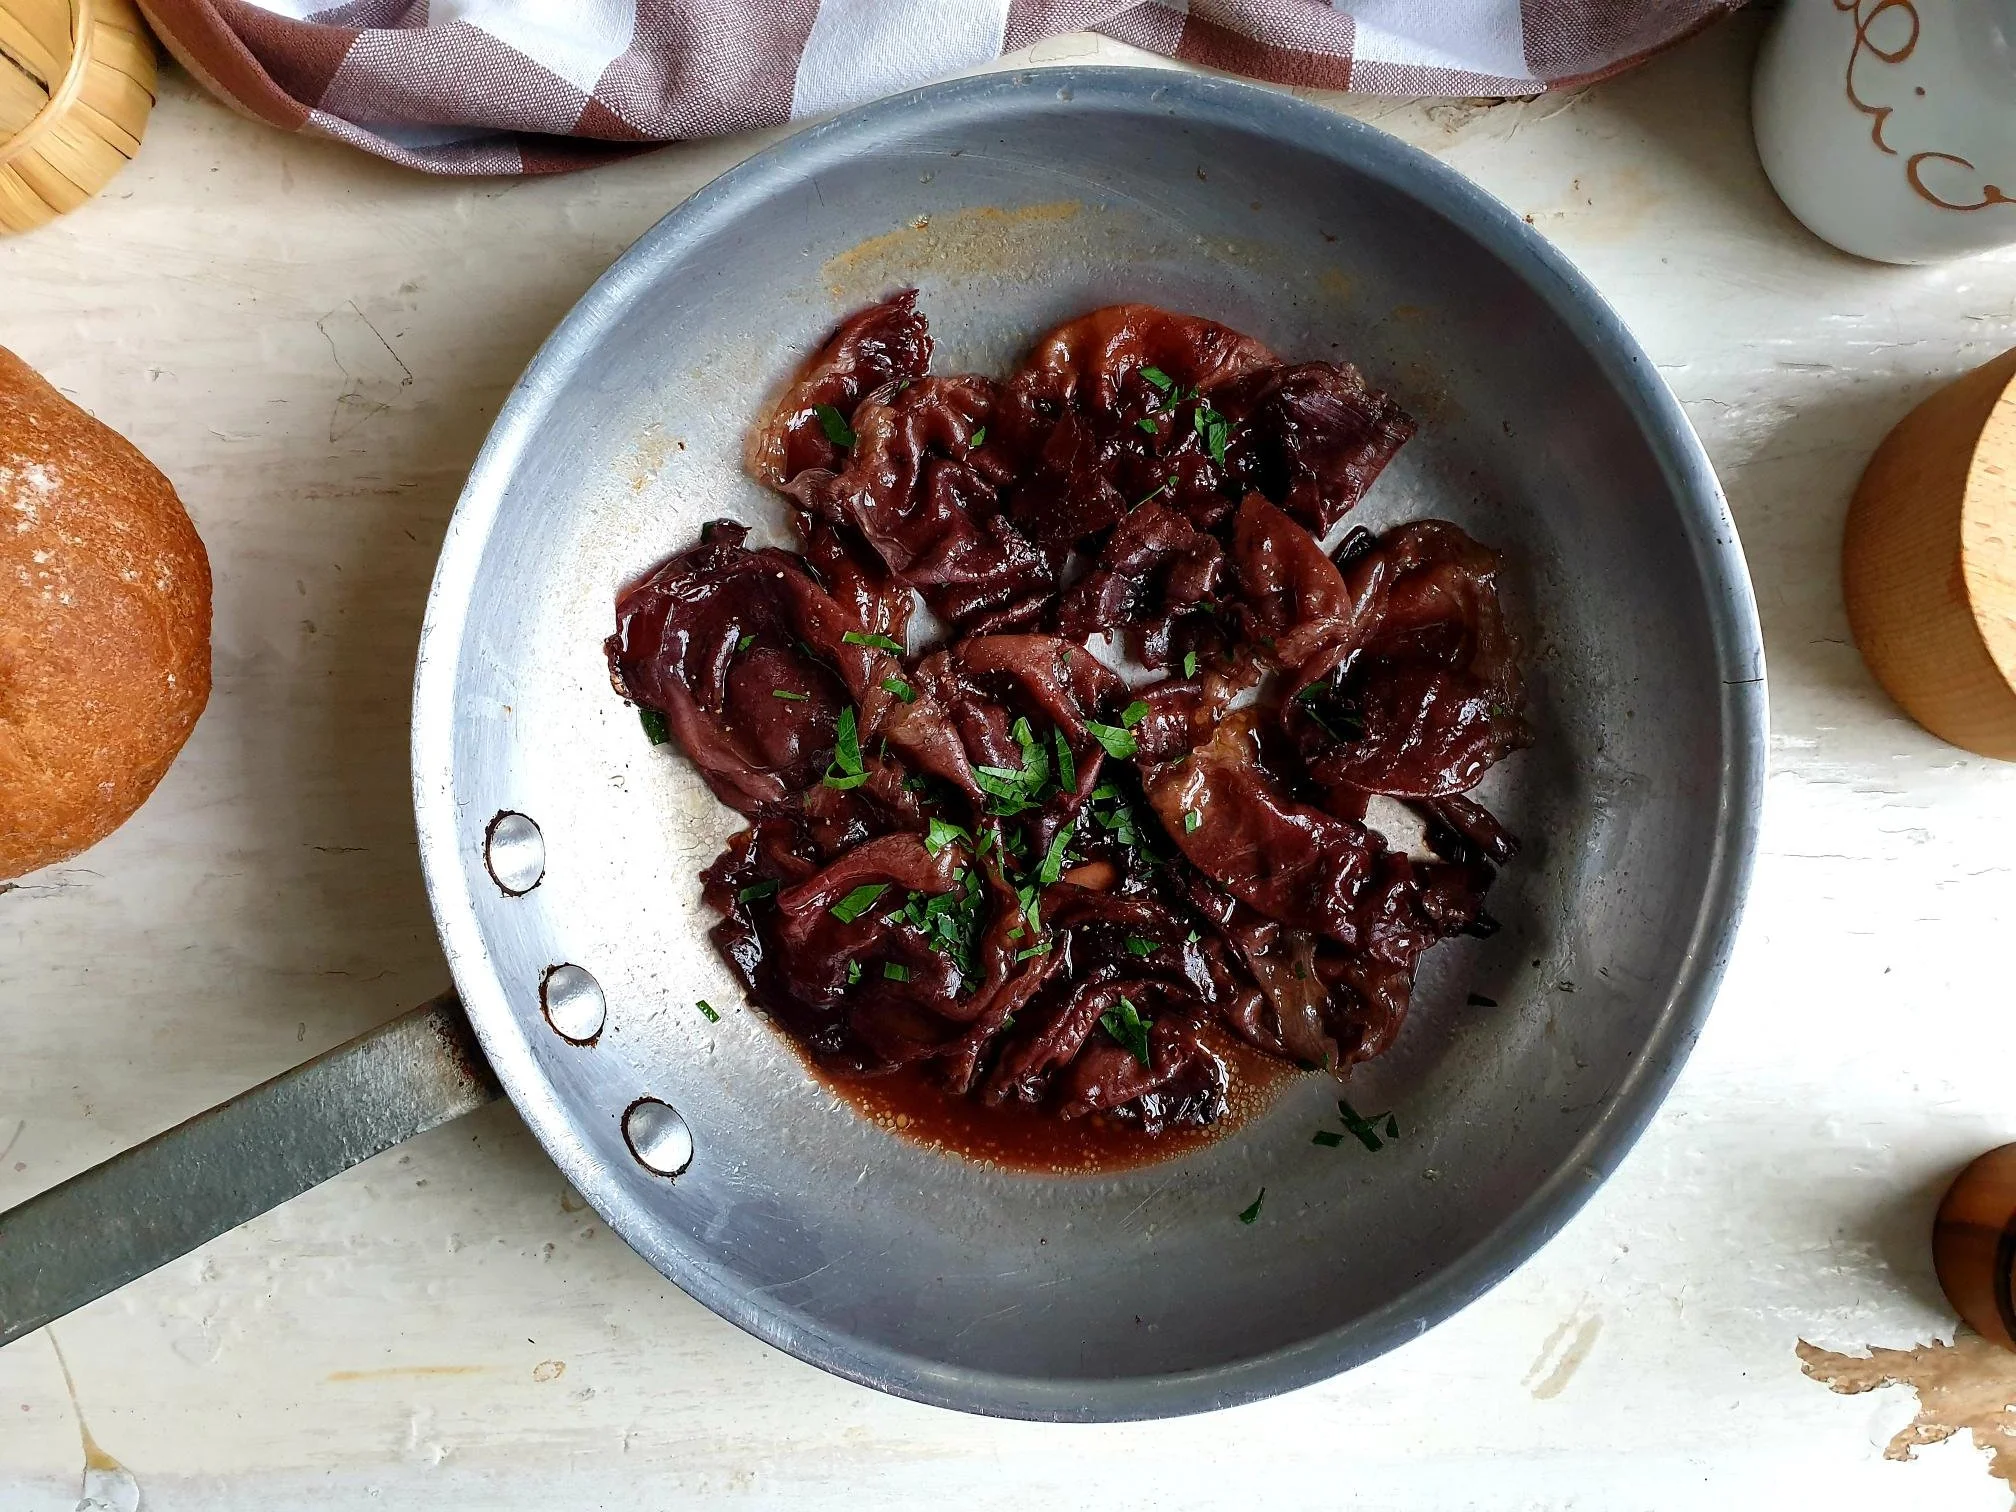
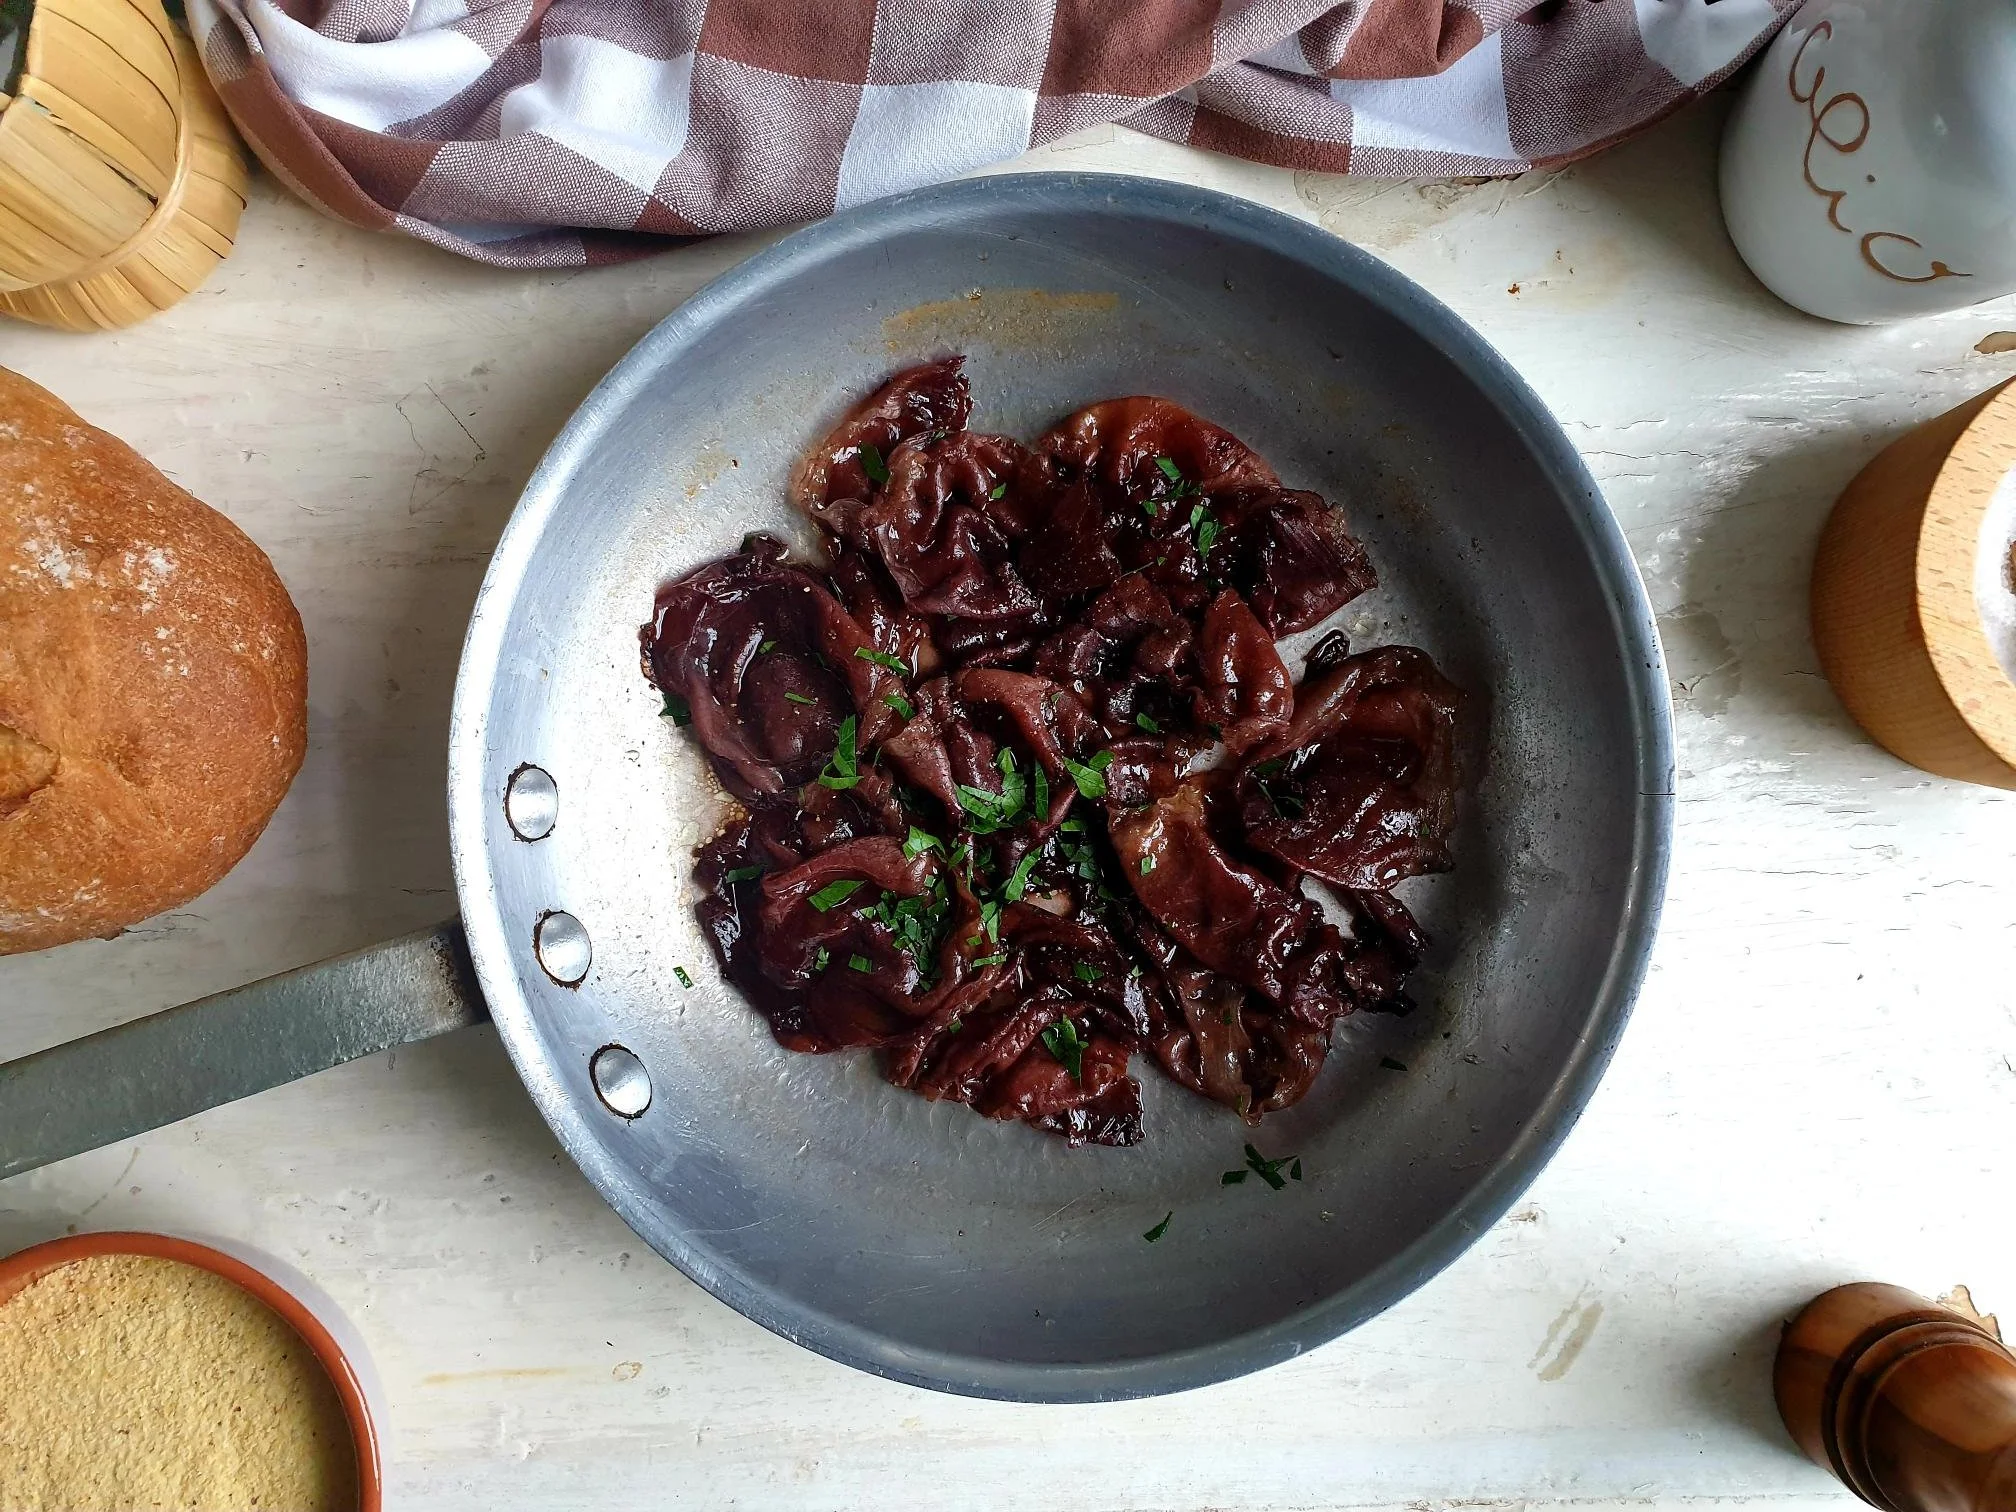
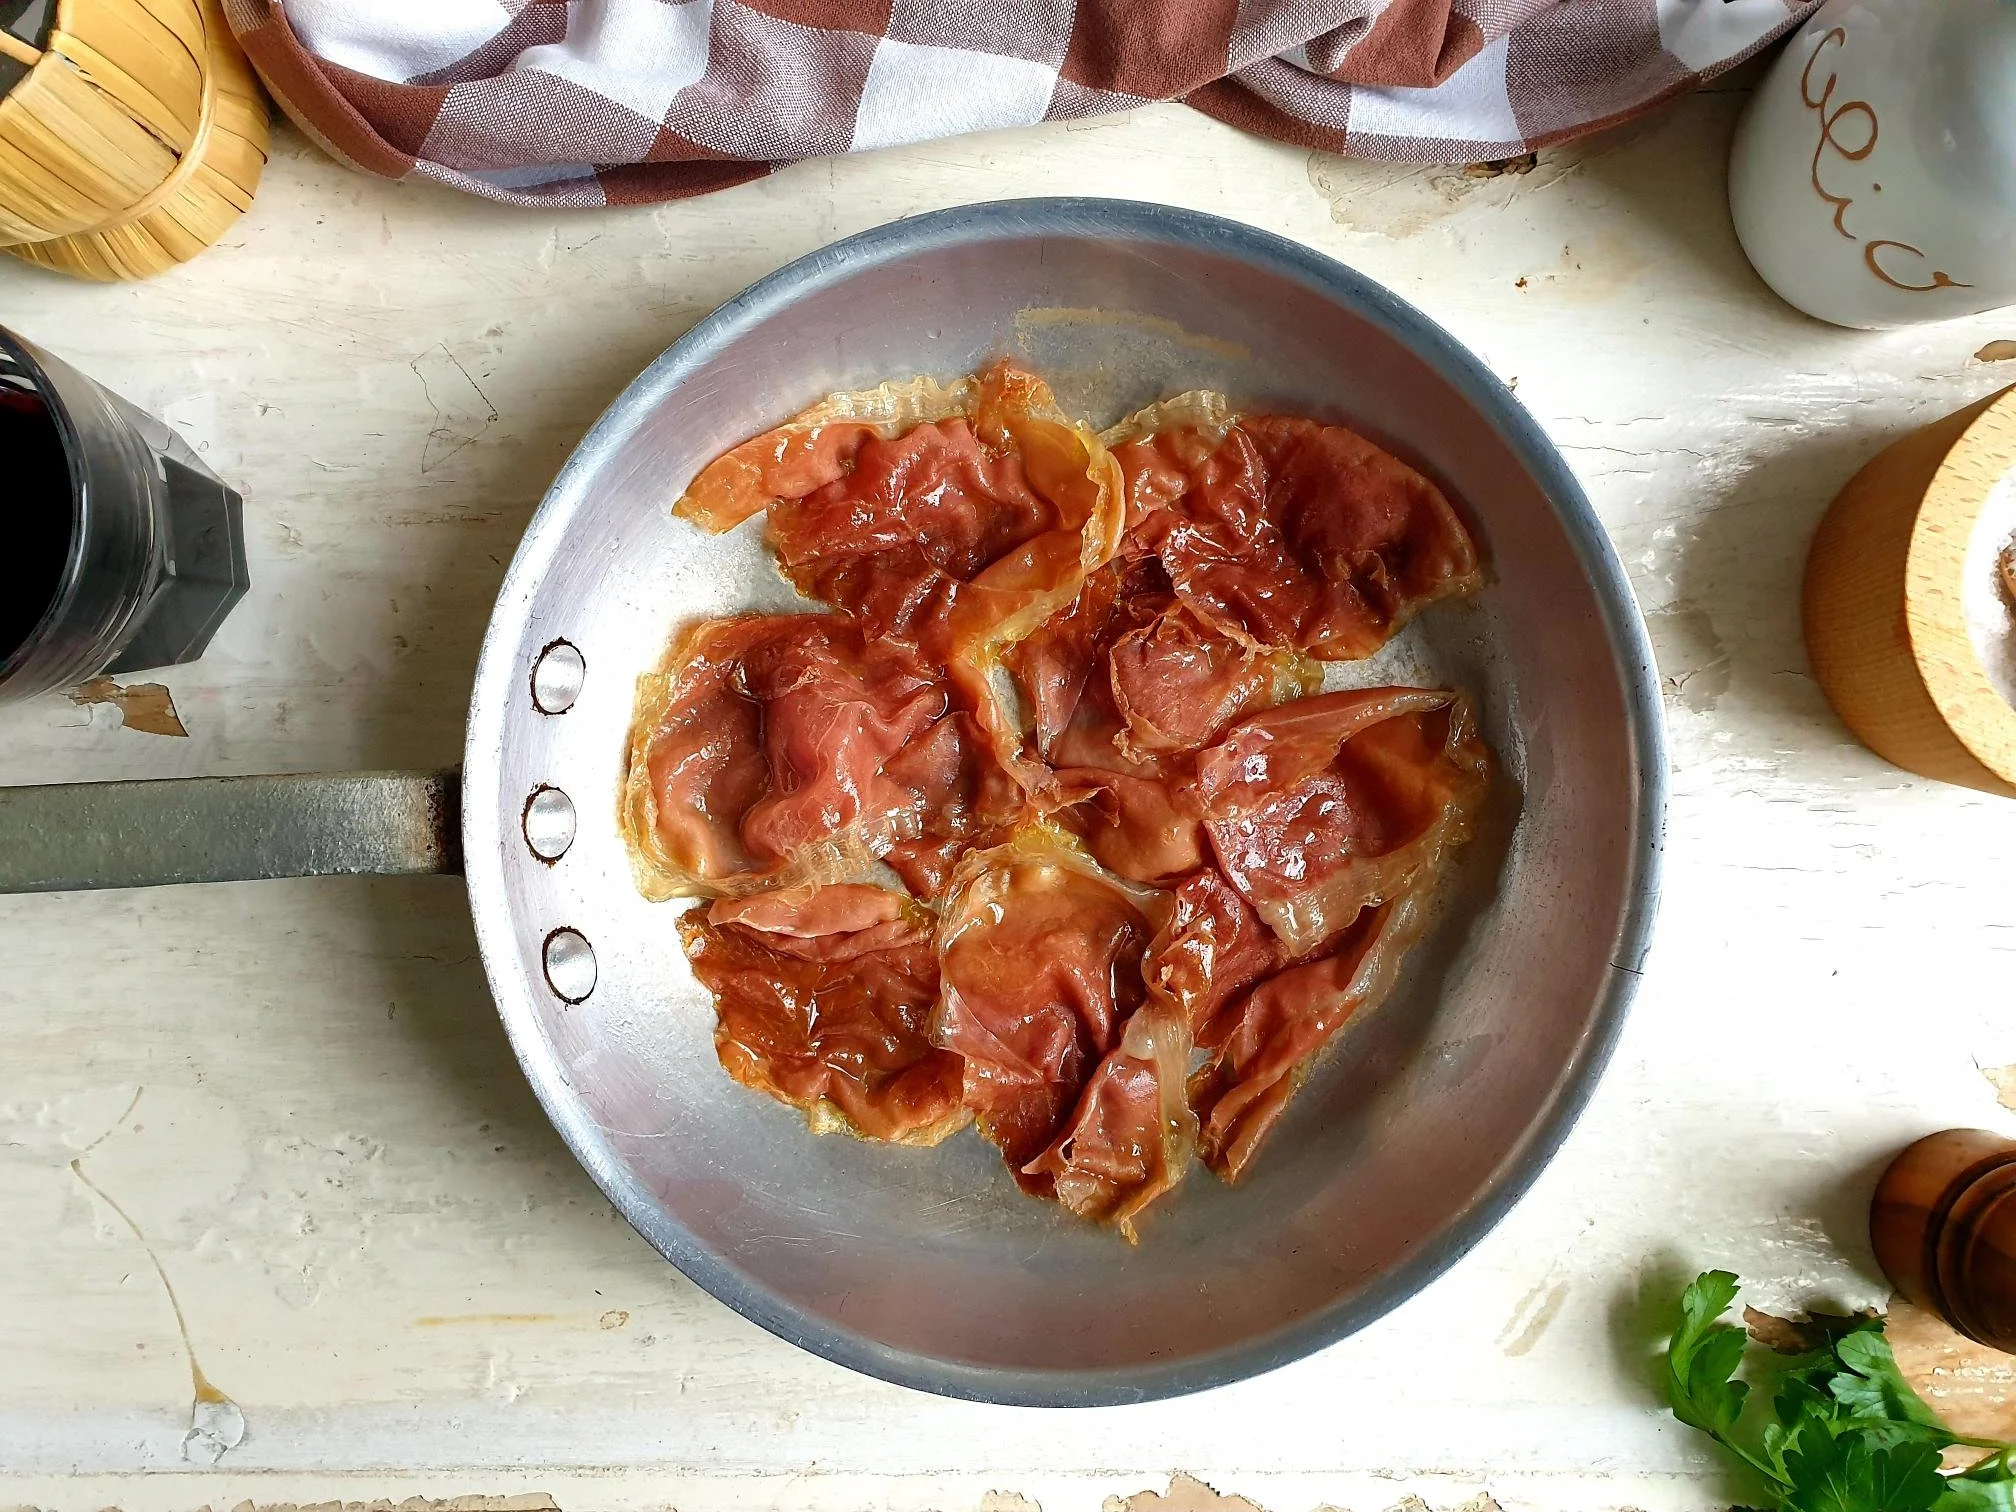
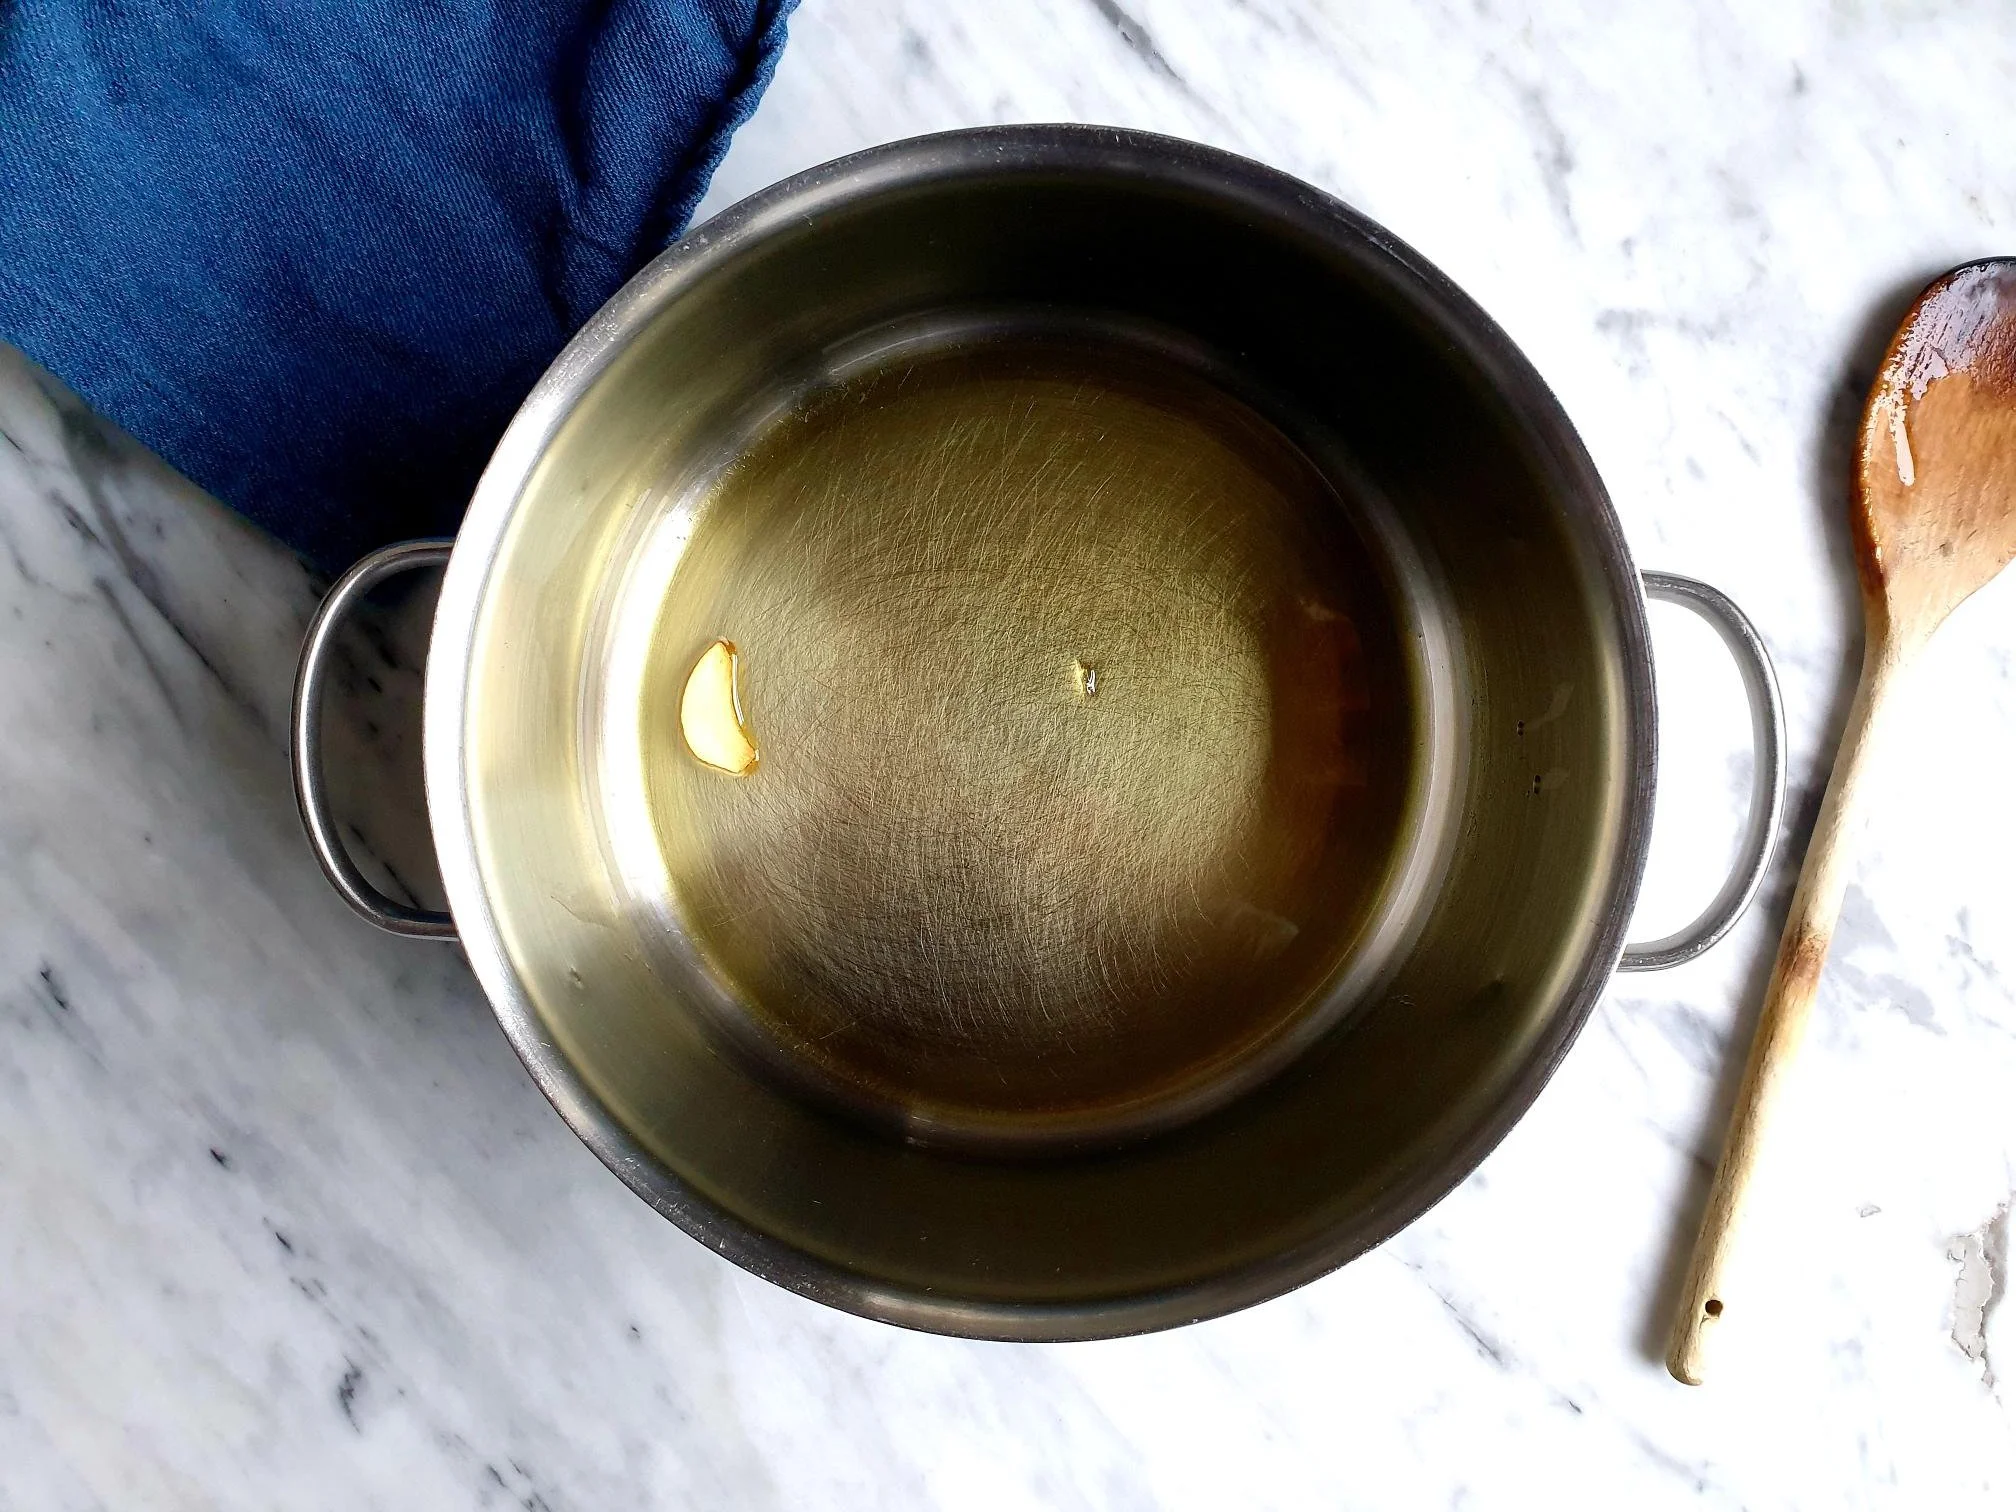
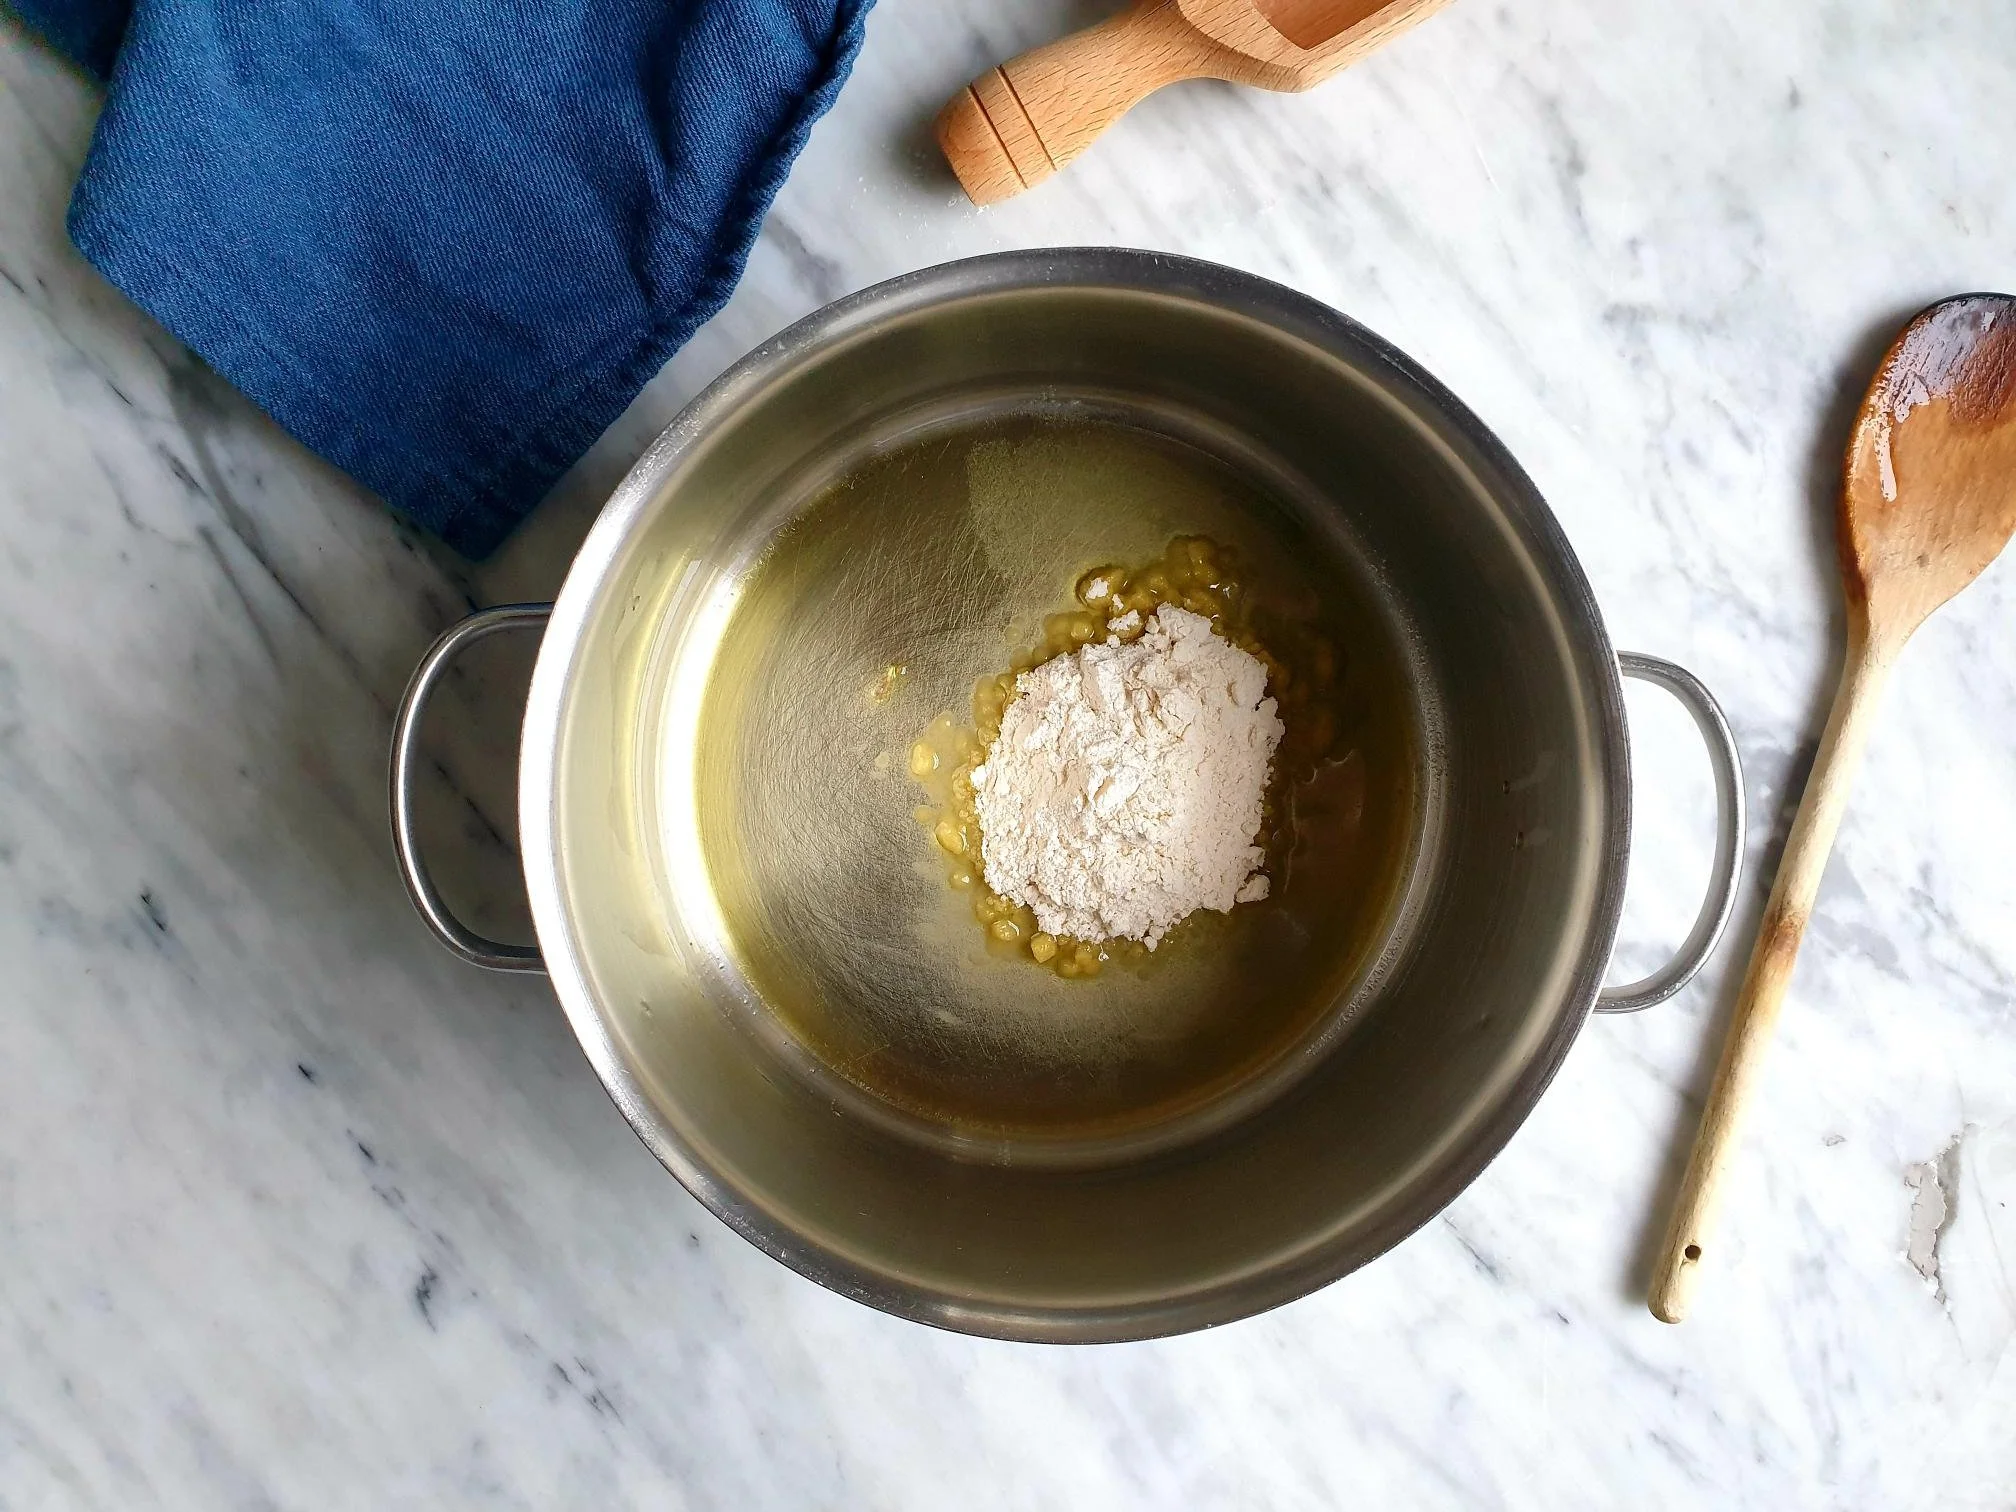
Place olive oil or butter in a saucepan and heat up a bit. Add the garlic and fry it on a gentle heat until it becomes golden in colour. The oil or the butter, depending on what are you using, will be nicely infused with garlic.

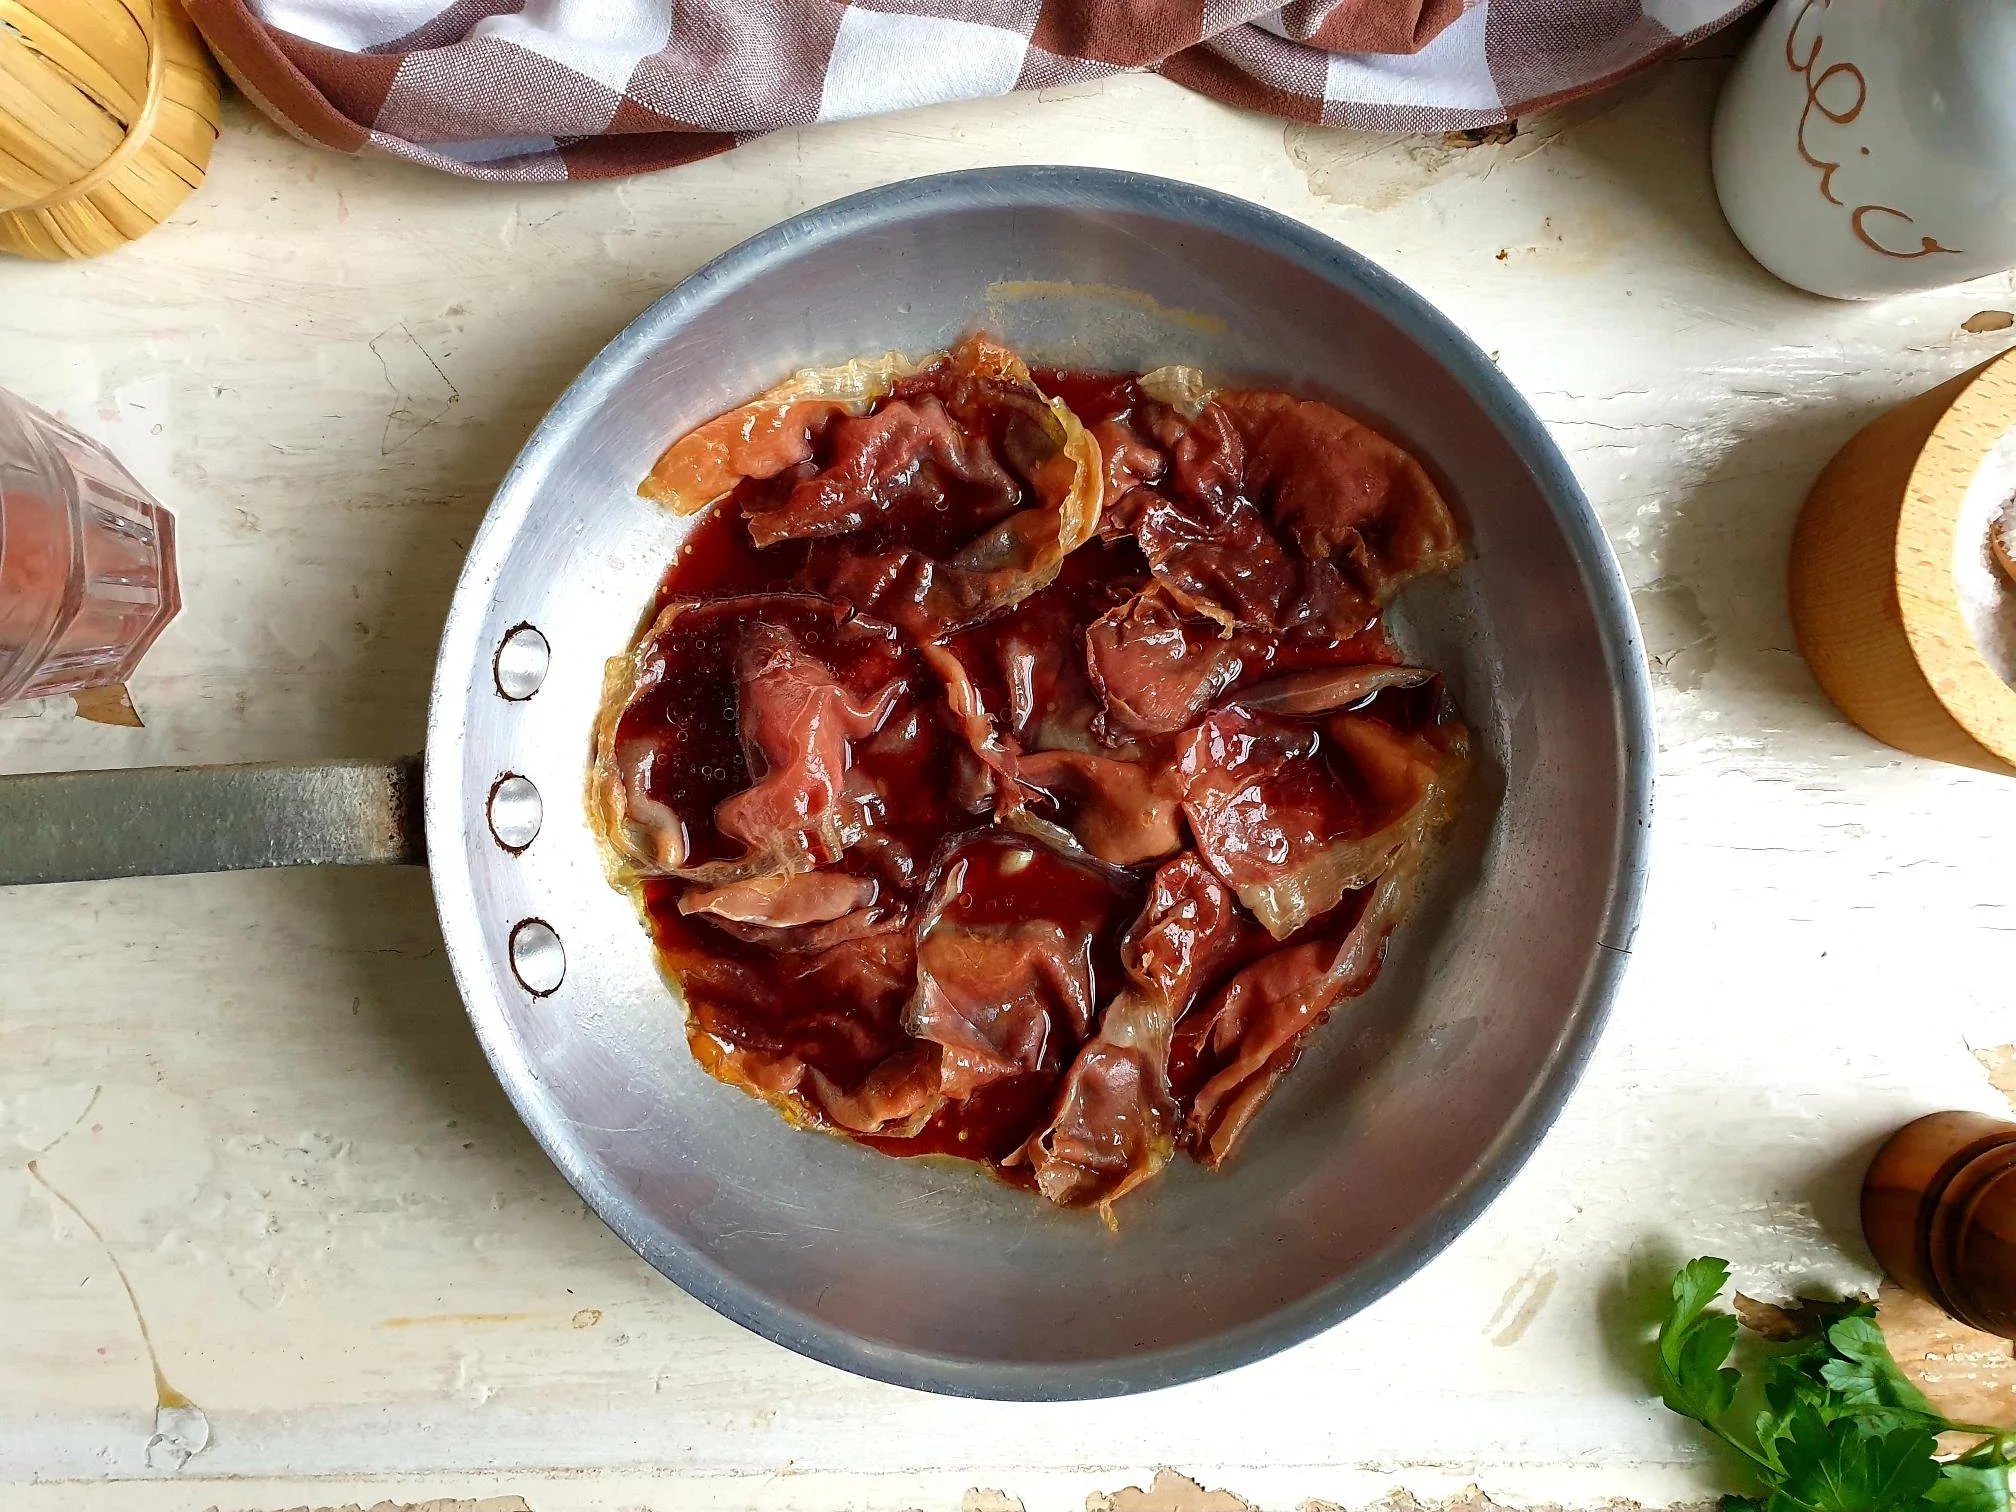
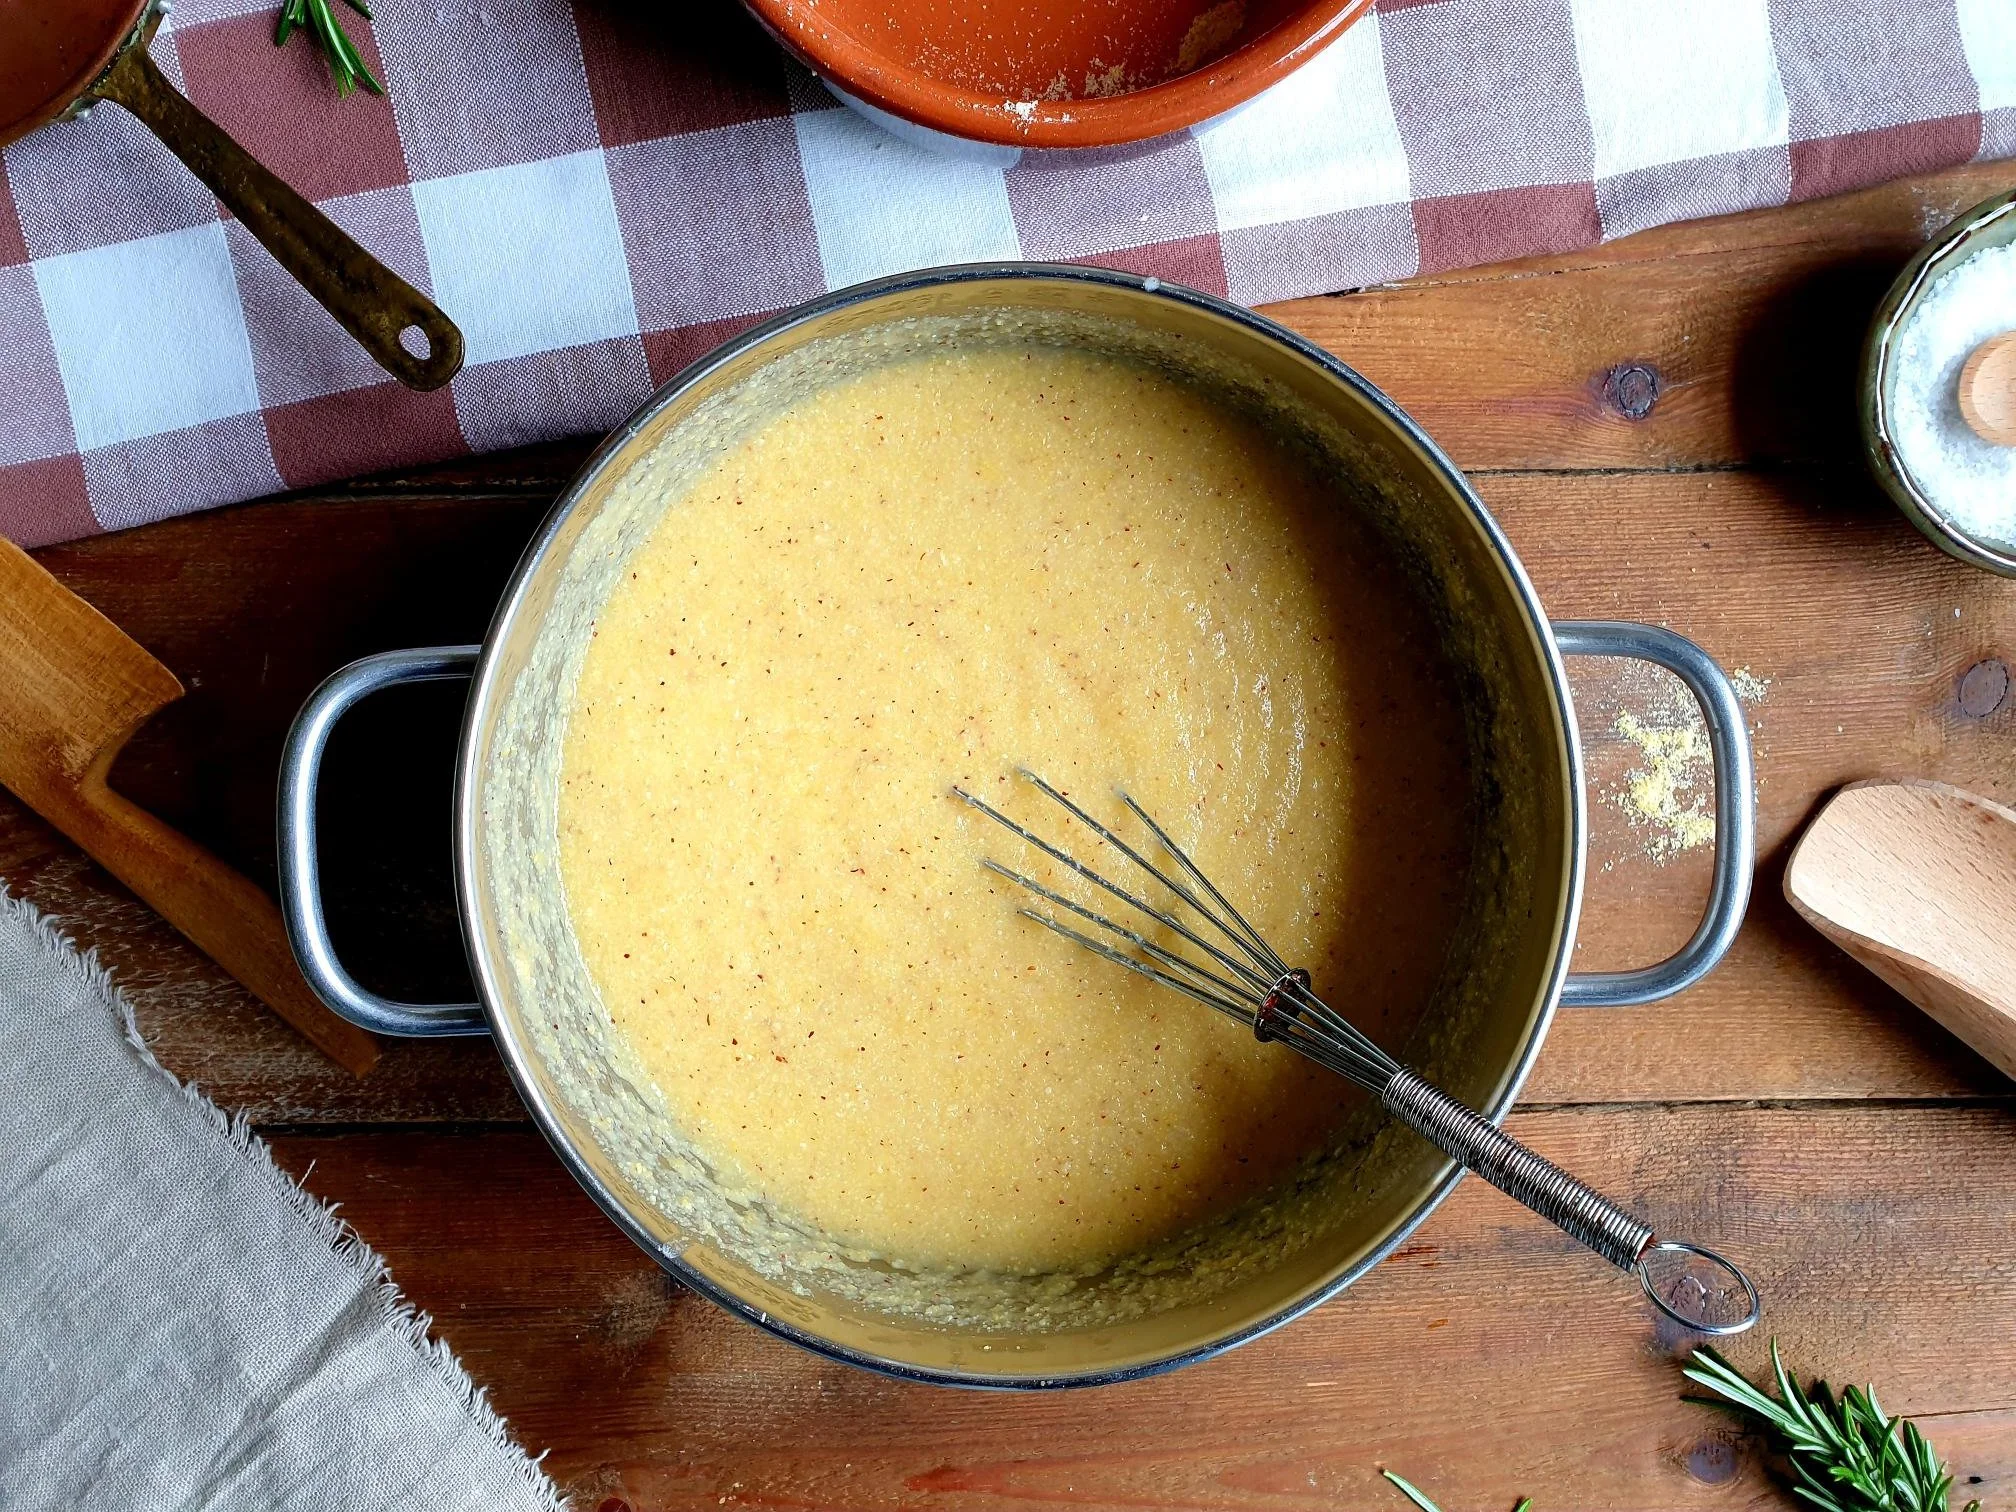
Start adding the flour and stir constantly with a small whisk.

View fullsize Prezganka-Traditional Slovenian Flour Based Soup 1.jpg
View fullsize Prezganka-Traditional Slovenian Flour Based Soup 2.jpg

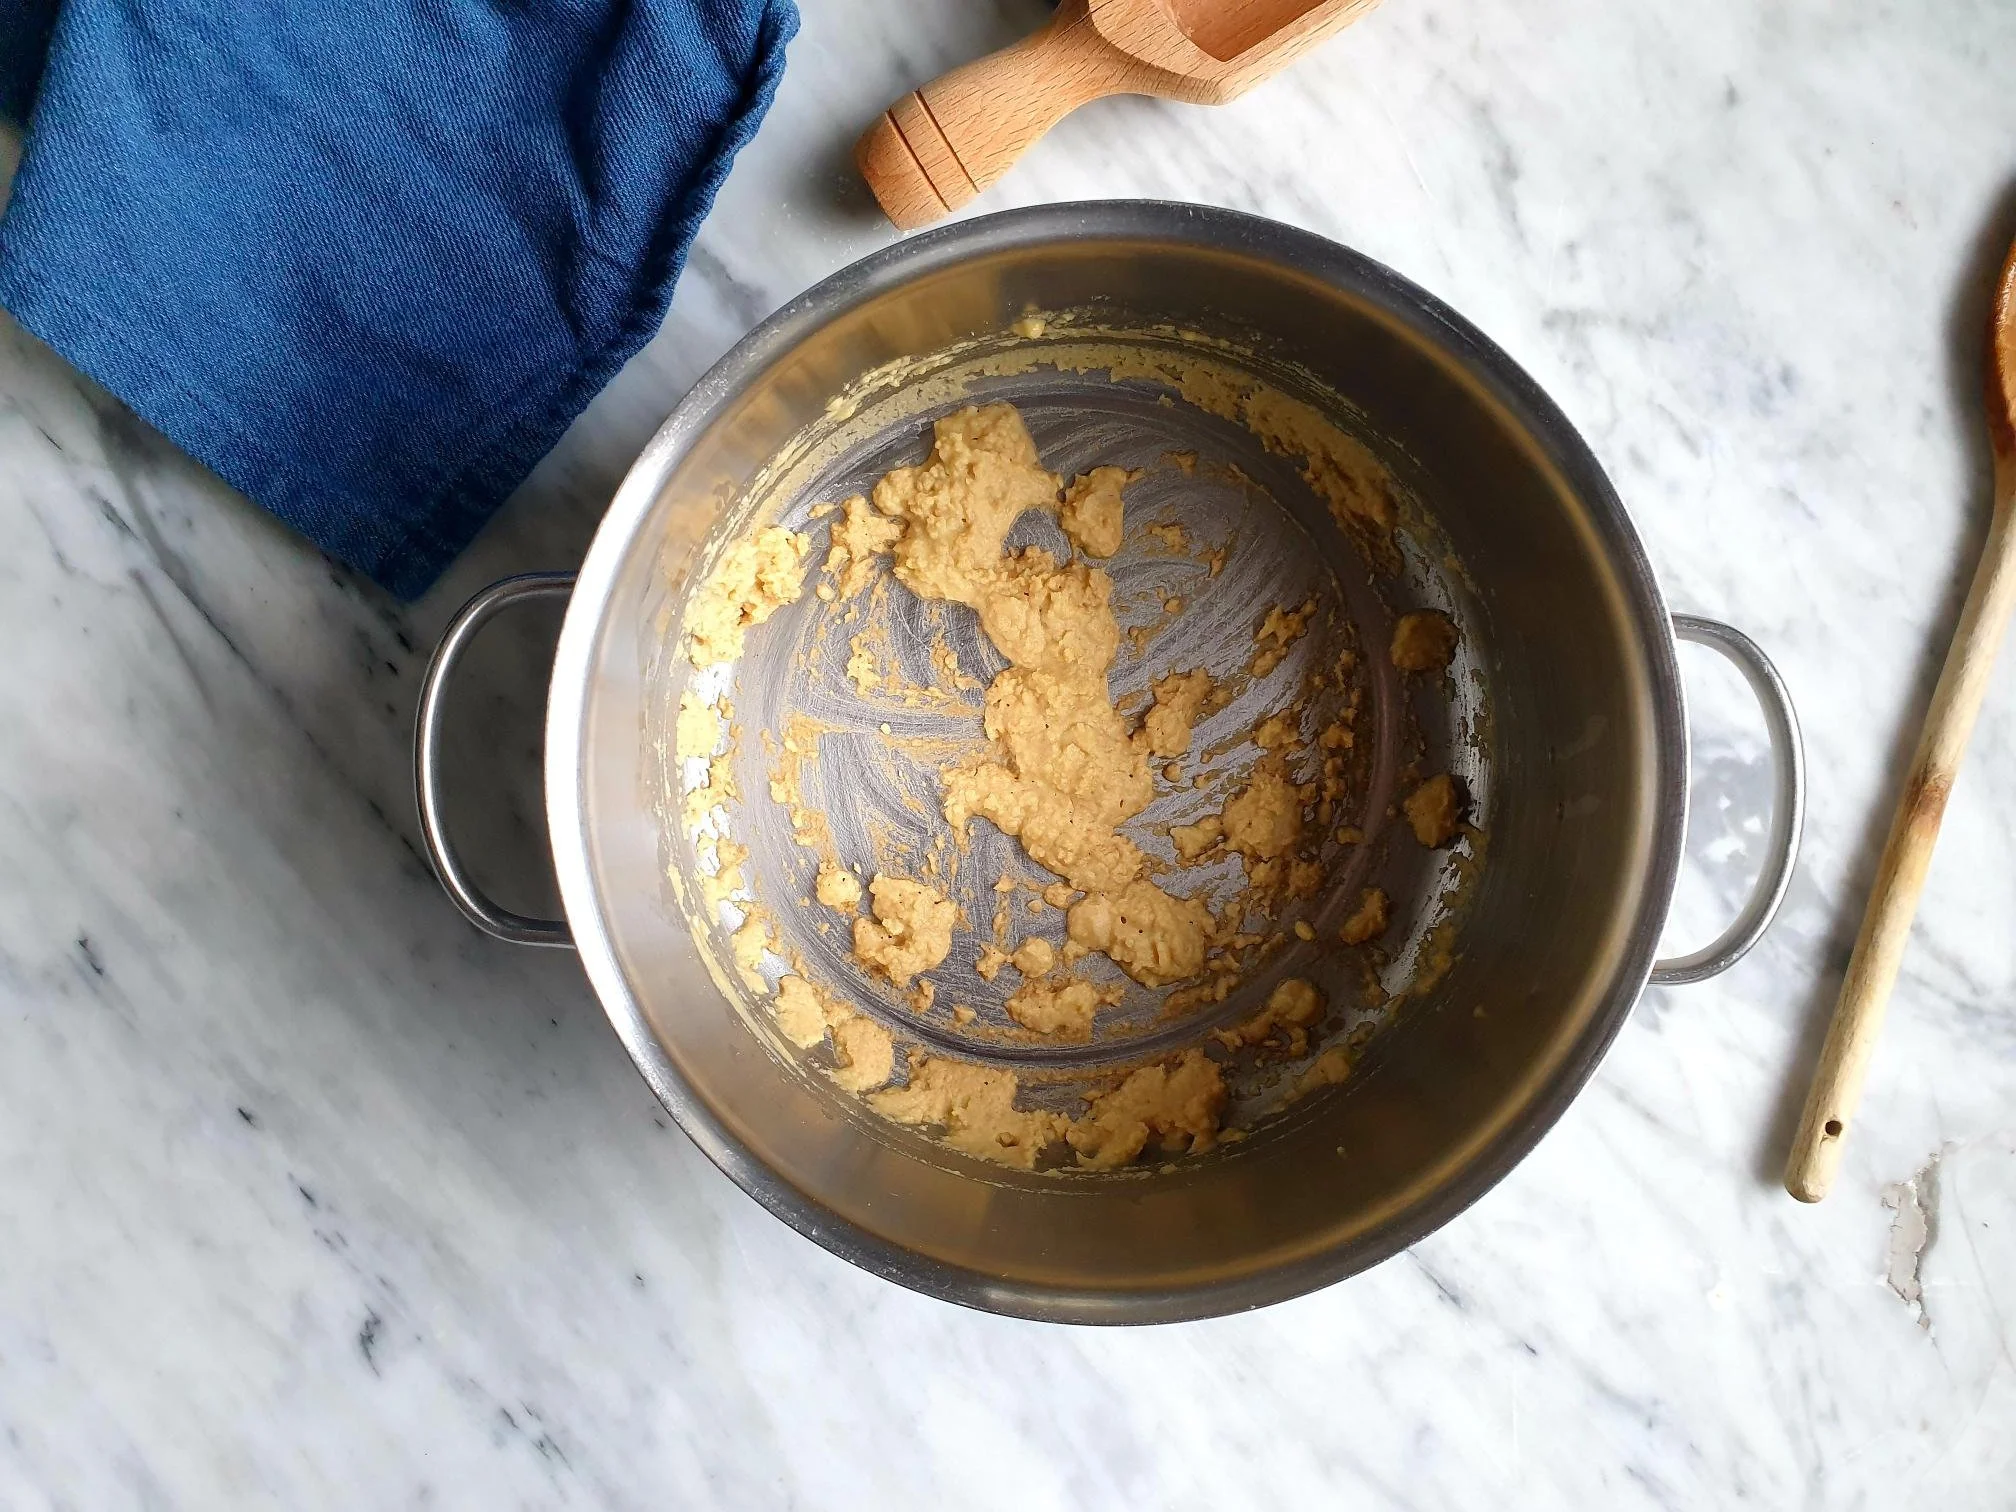
Cook for about 6 minutes, or until the flour roux becomes light to dark brown in colour. Be a bit mindful not to burn the flour!

View fullsize Prezganka-Traditional Slovenian Flour Based Soup 3.jpg
View fullsize Prezganka-Traditional Slovenian Flour Based Soup 4.jpg

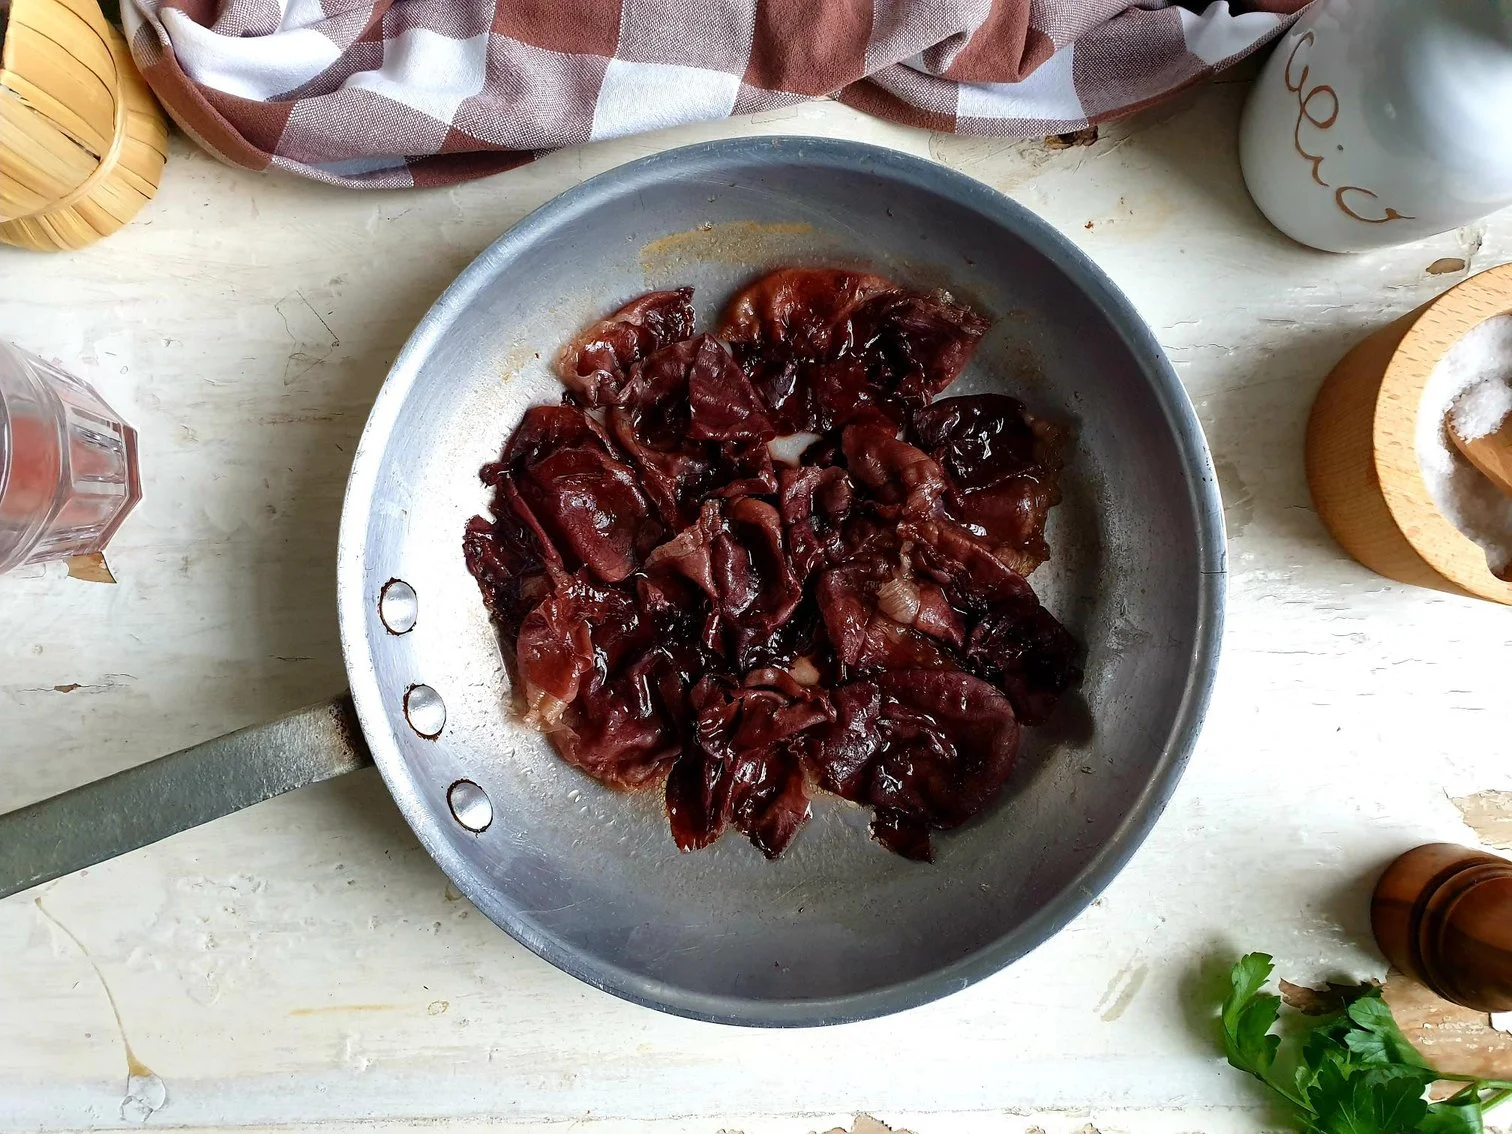
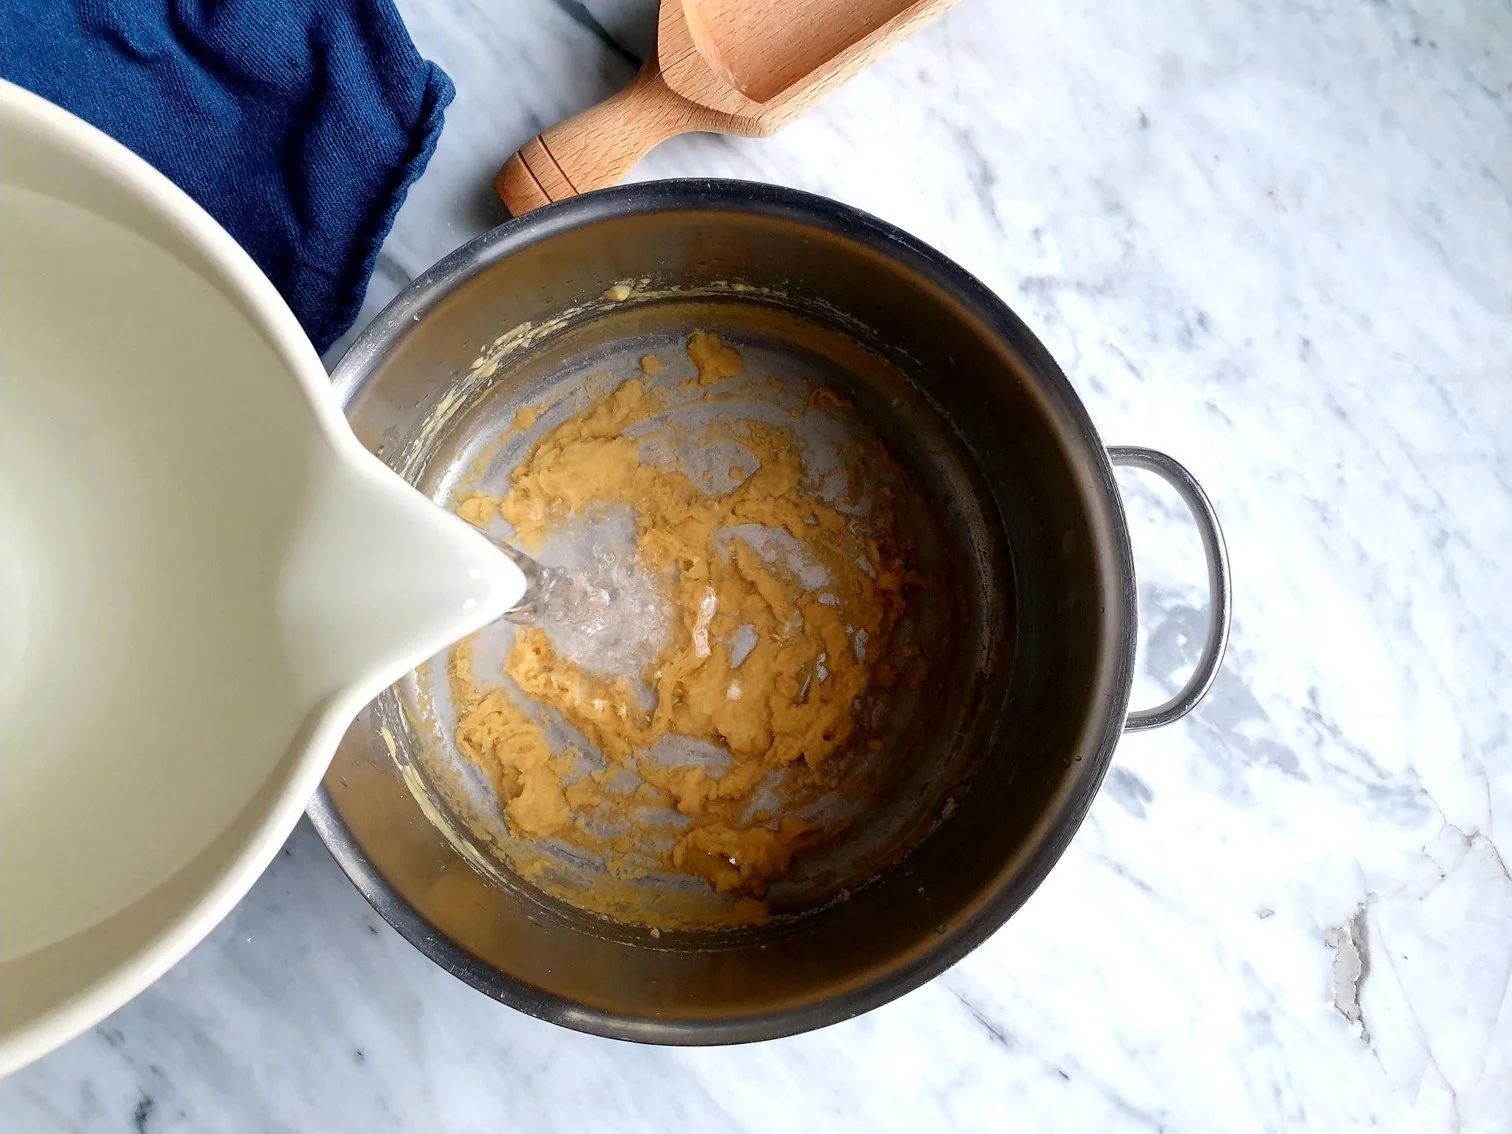
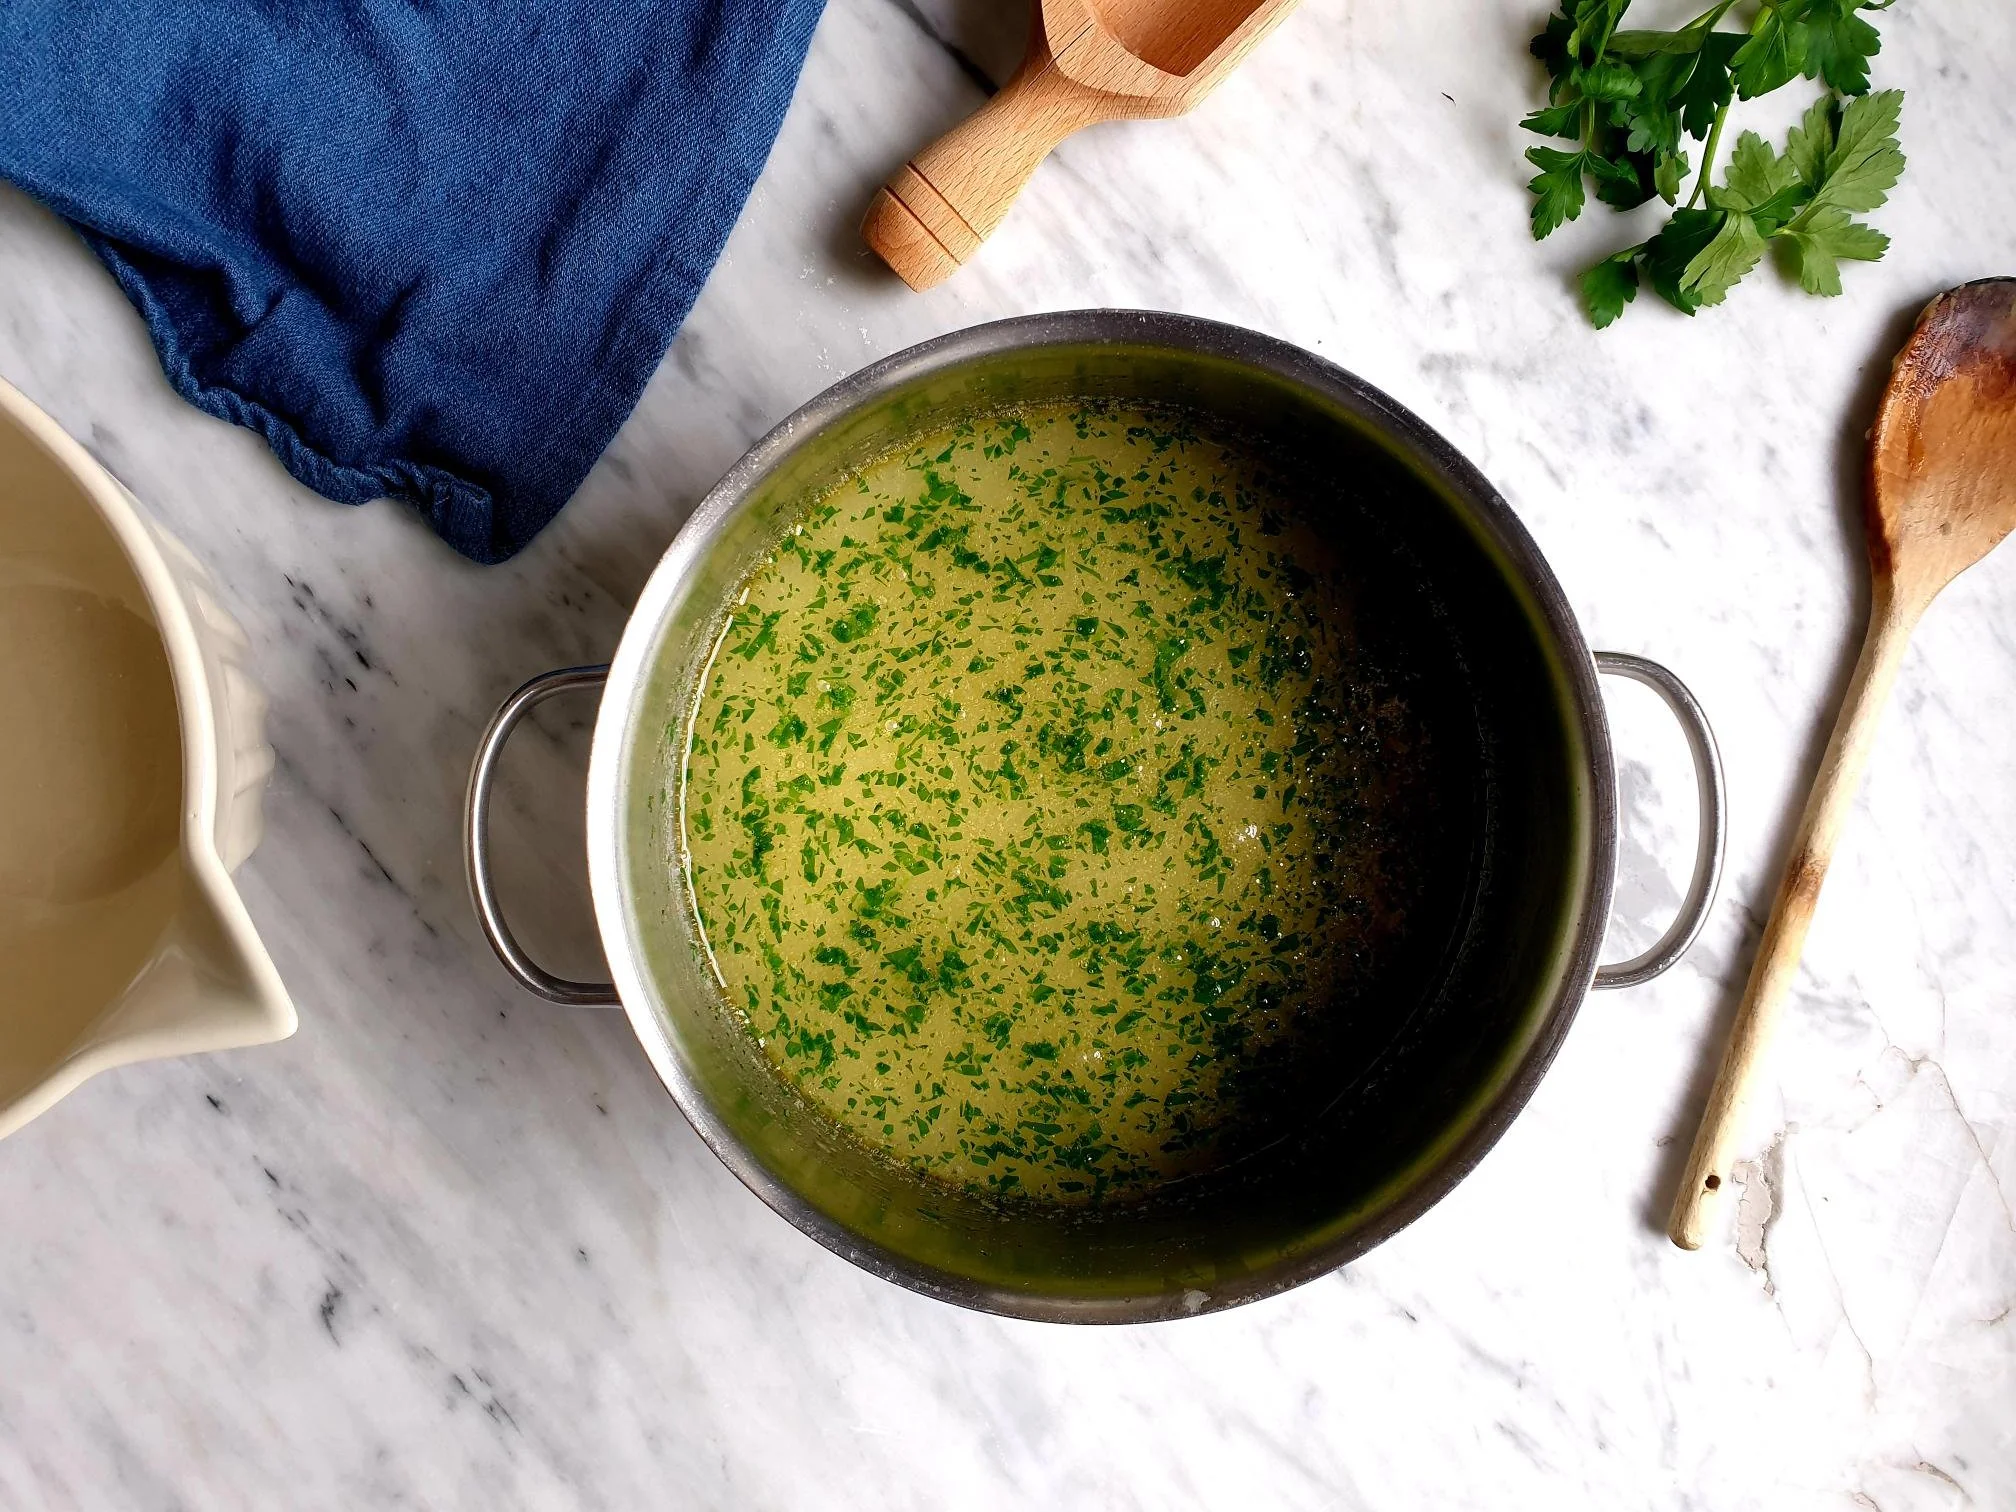
While stirring the roux, gradually add and pour the water. Cook and keep stirring constantly until the mixture becomes thick and smooth.

View fullsize Prezganka-Traditional Slovenian Flour Based Soup 5.jpg
View fullsize Prezganka-Traditional Slovenian Flour Based Soup 6.jpg

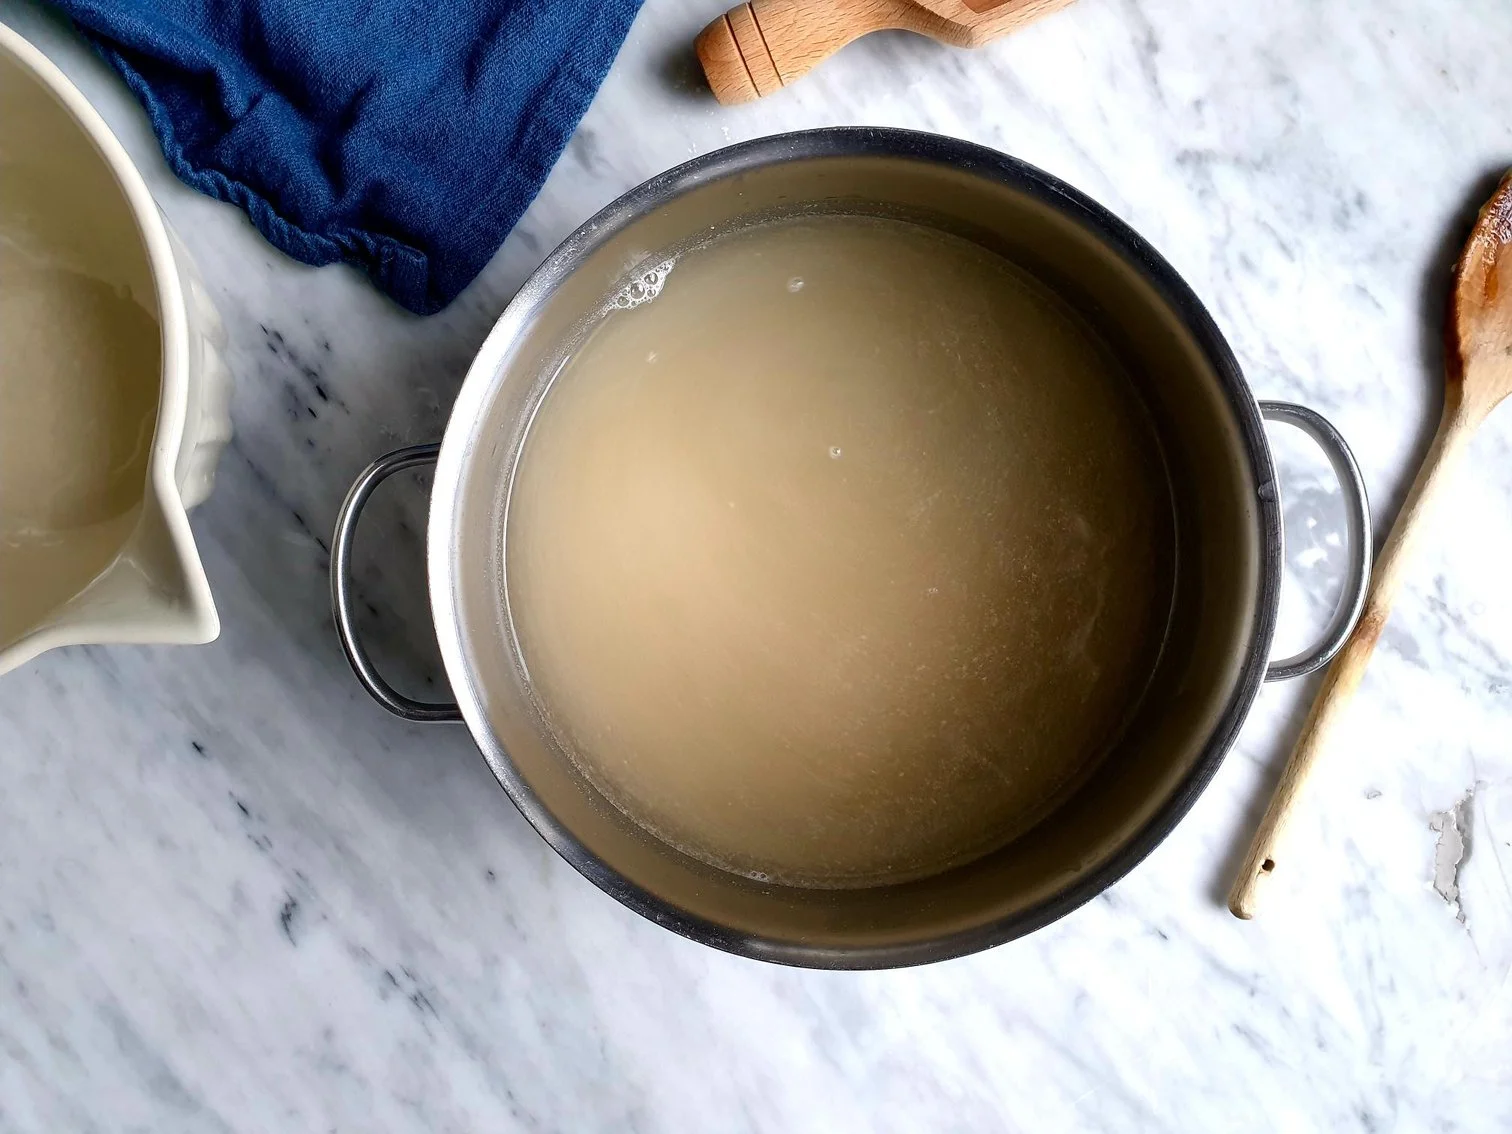
Stir well and add fresh finely chopped parsley. Bring to a boil, lower the heat, season with sea salt, and gently simmer for about 10 to 15 minutes.

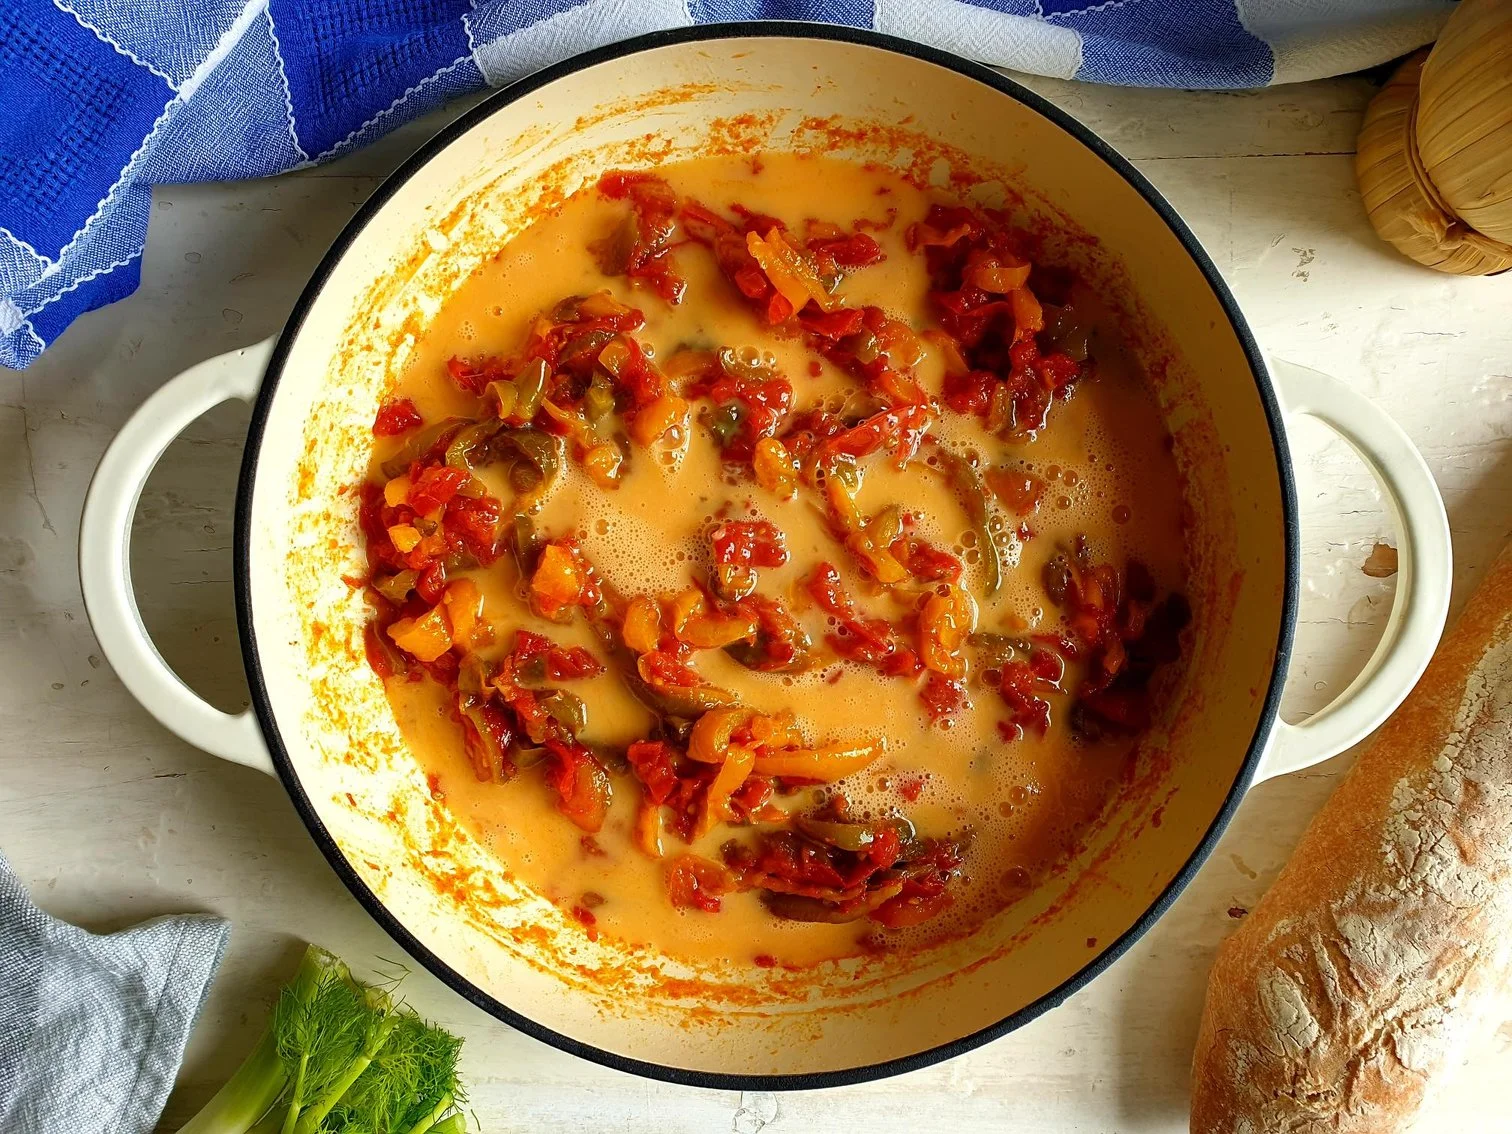
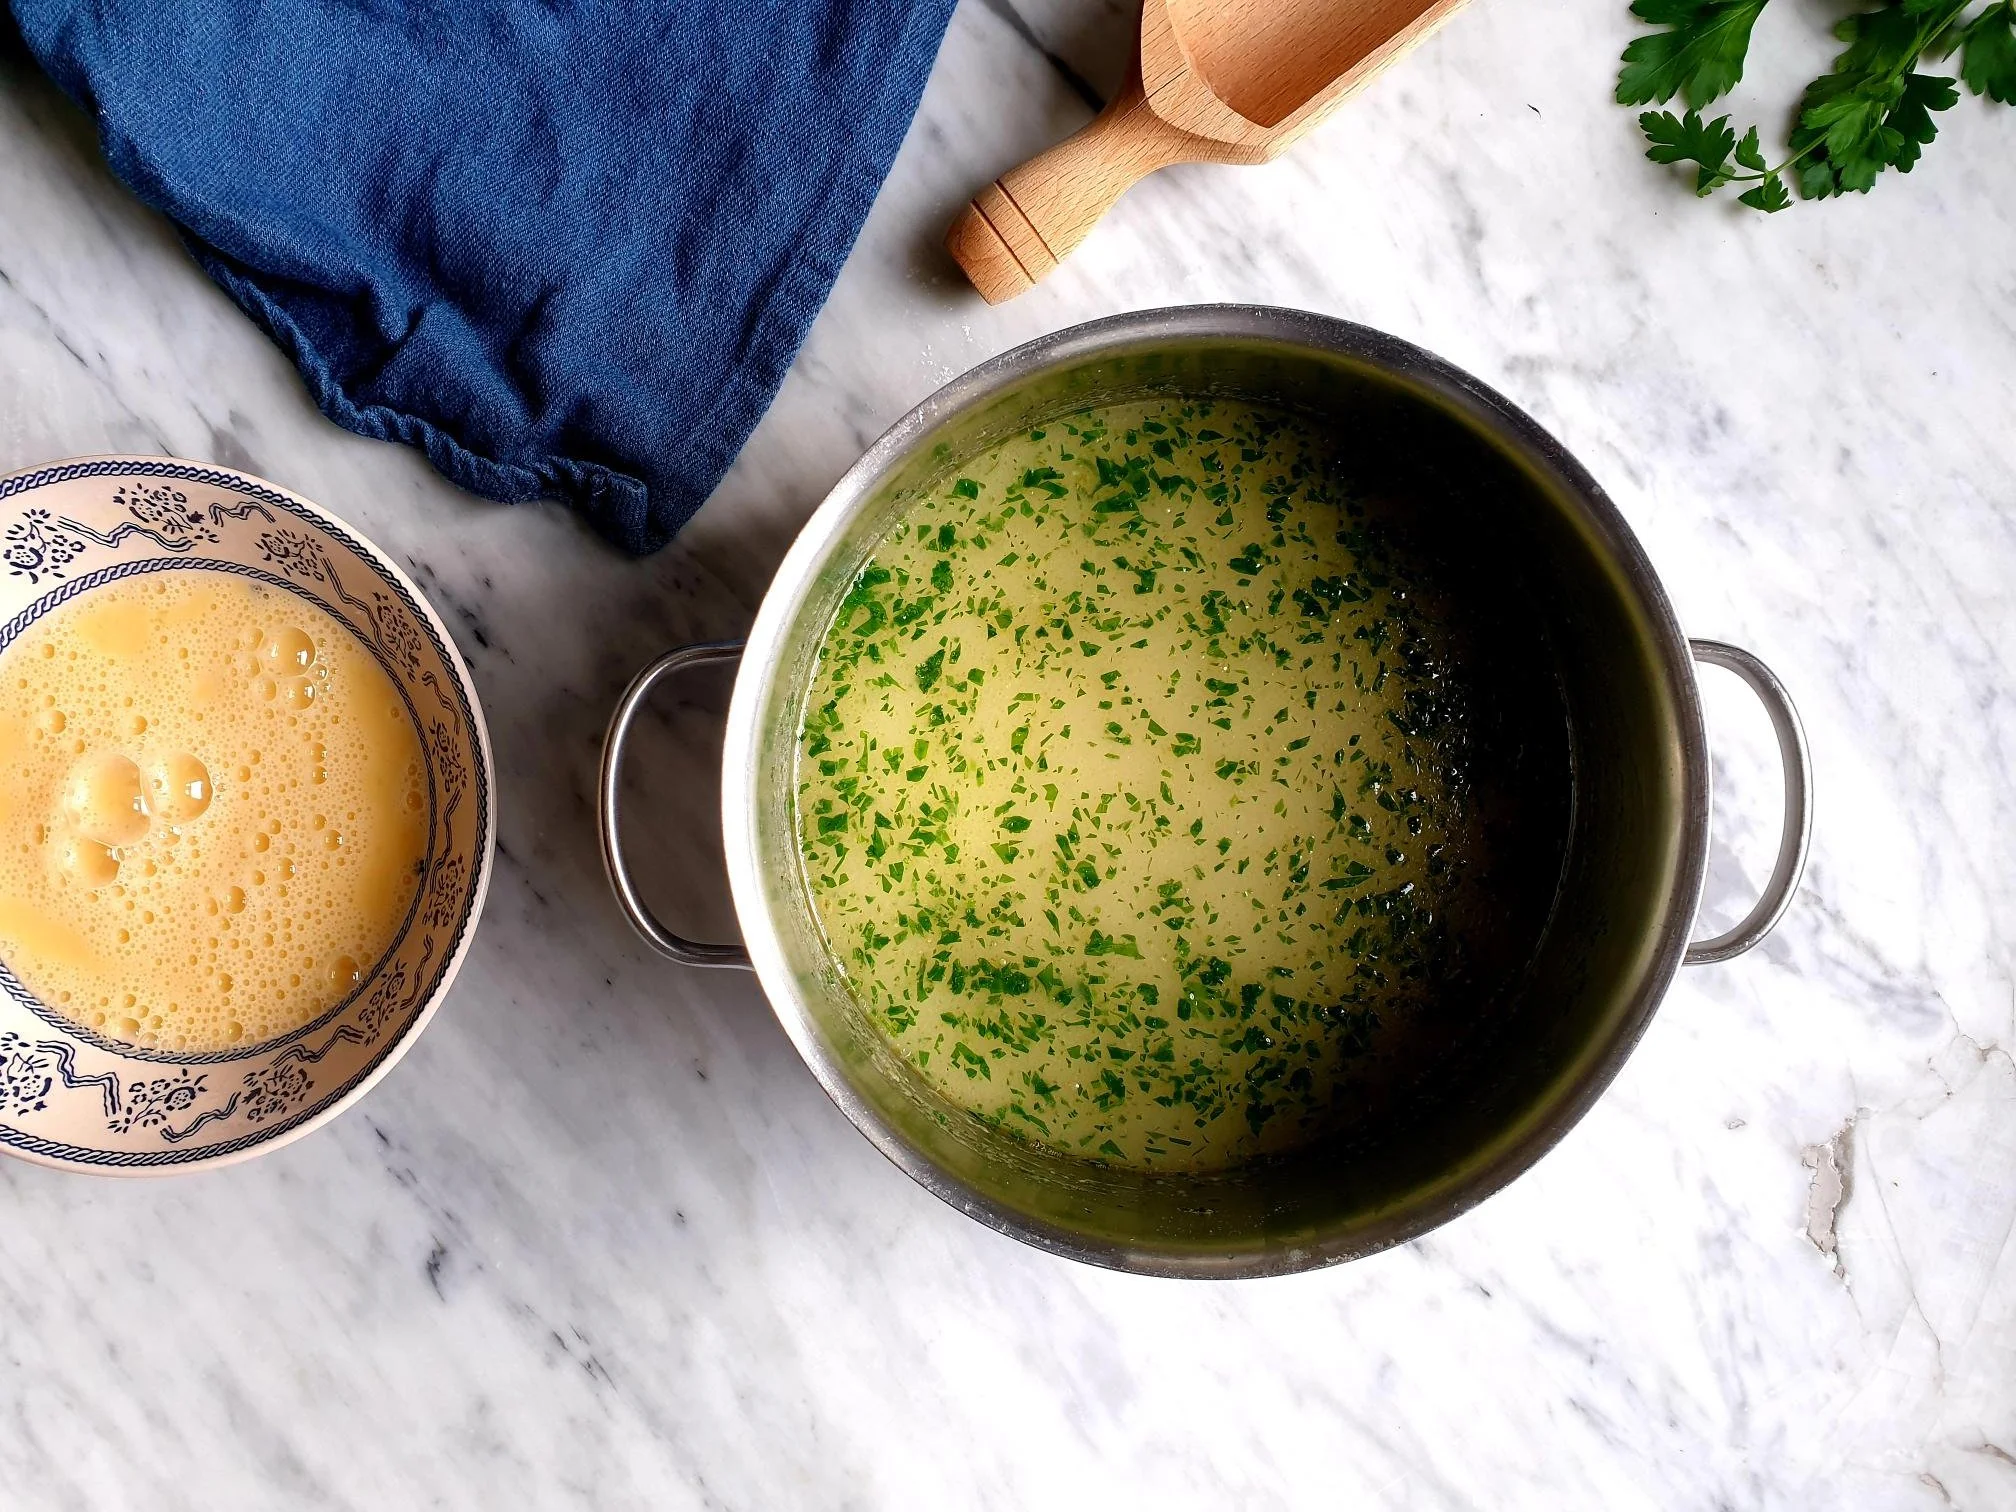
In meanwhile, crack the eggs in a small bowl, and gently beat with the fork.

View fullsize Prezganka-Traditional Slovenian Flour Based Soup 9.jpg
View fullsize Prezganka-Traditional Slovenian Flour Based Soup 10.jpg

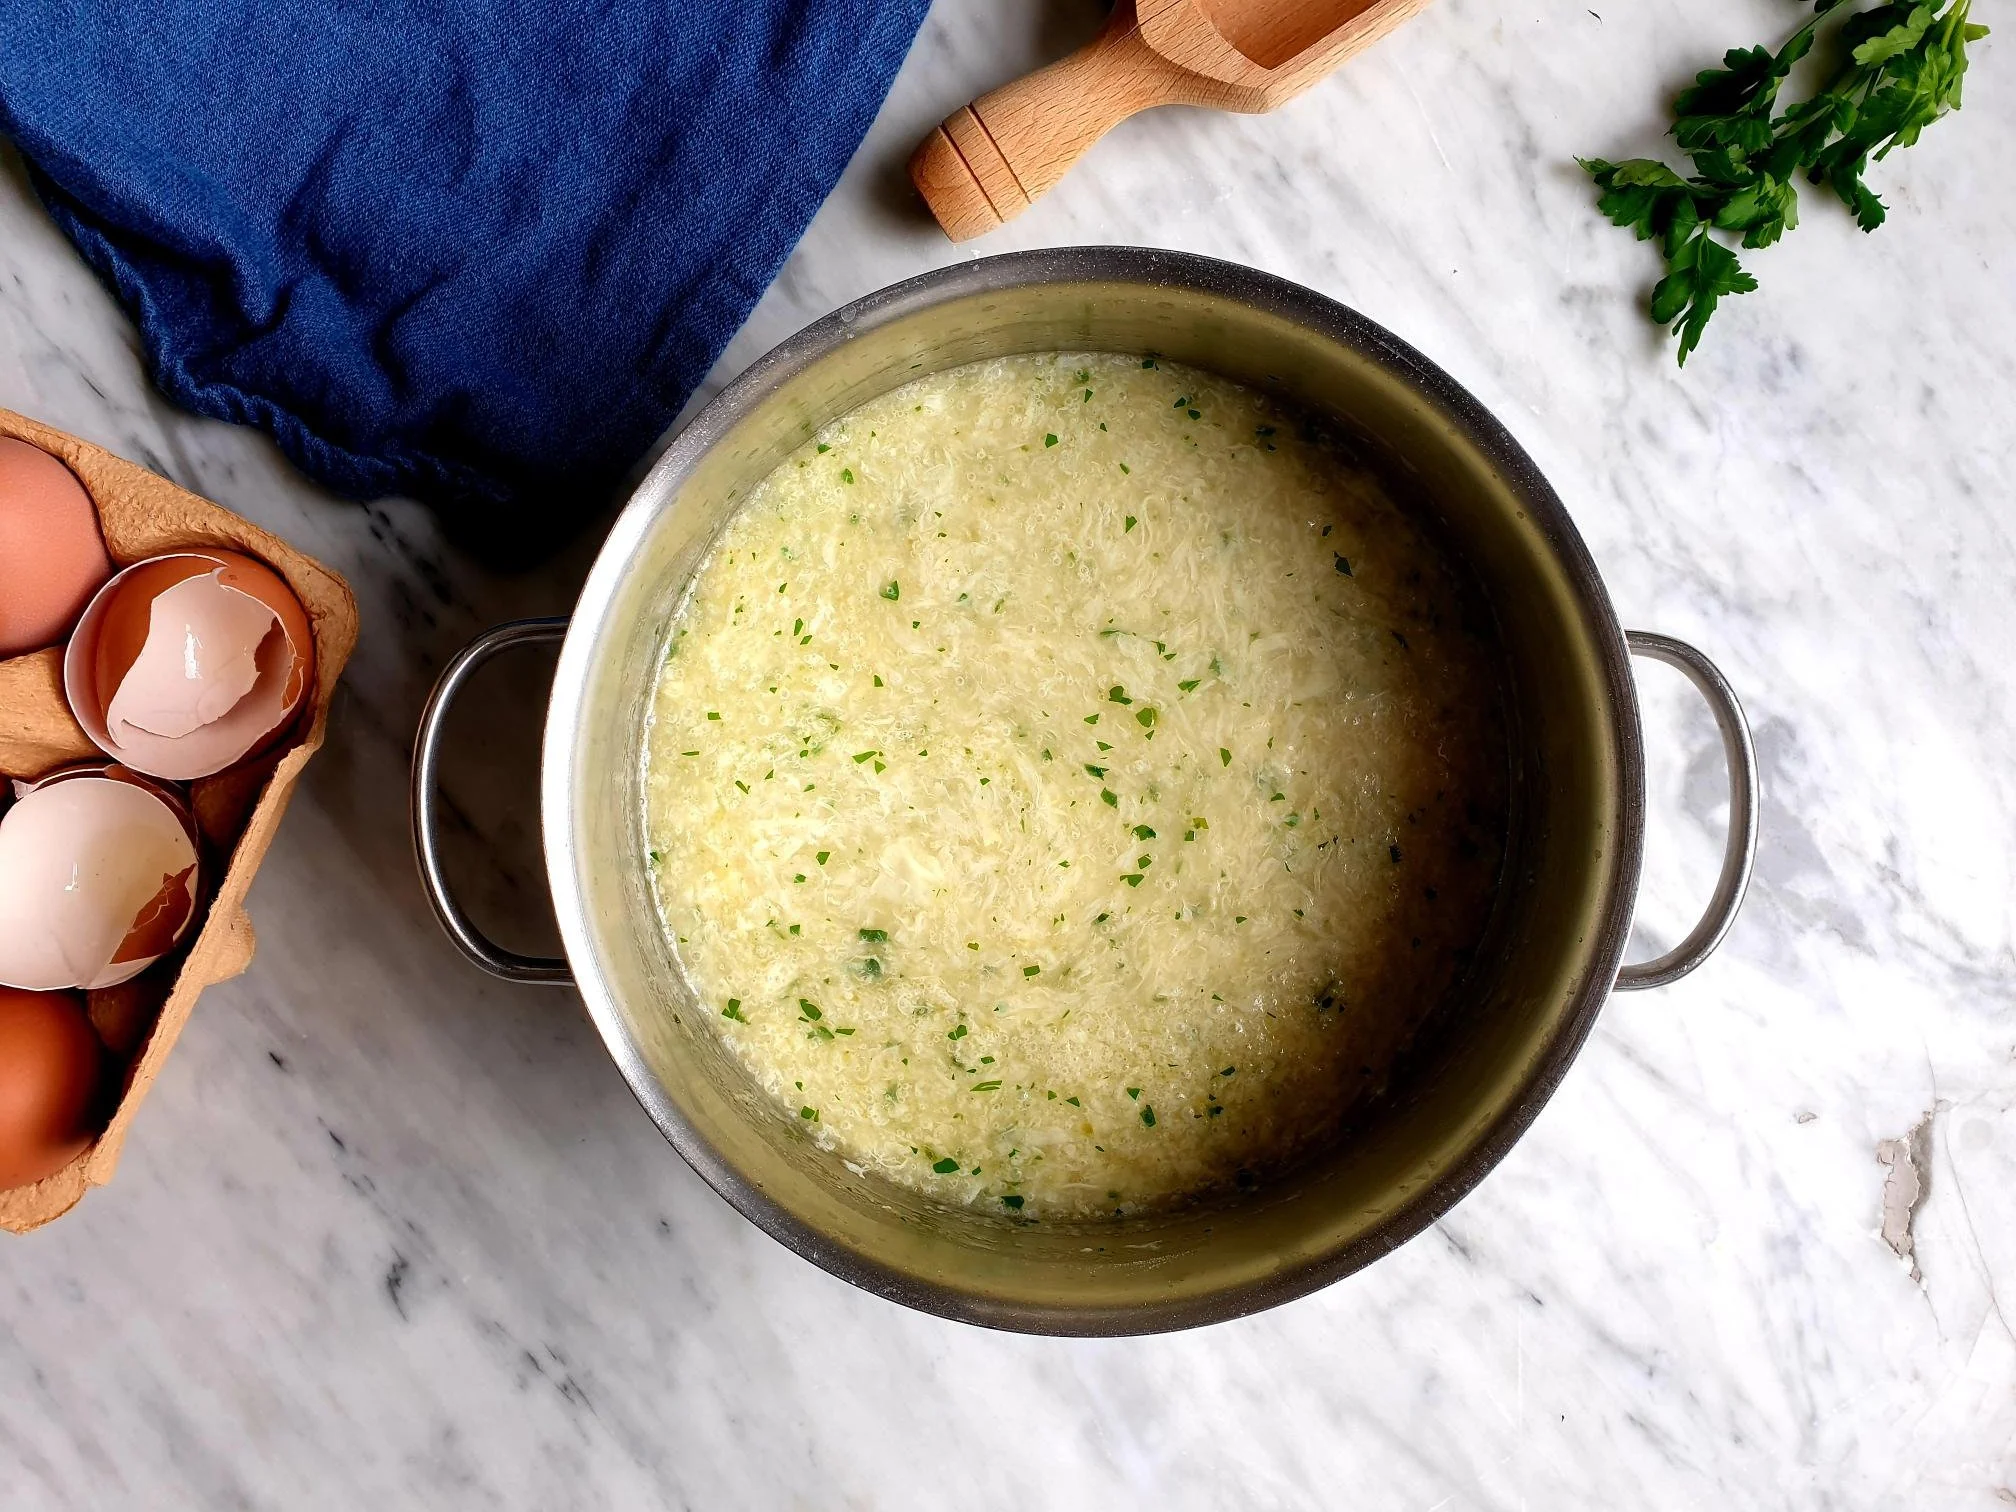
When the soup is cooked, slowly pour the beaten eggs in the soup in a thin stream, making sure you stir gently the soup constantly with the fork. Cook further for another 1to 2 minutes.

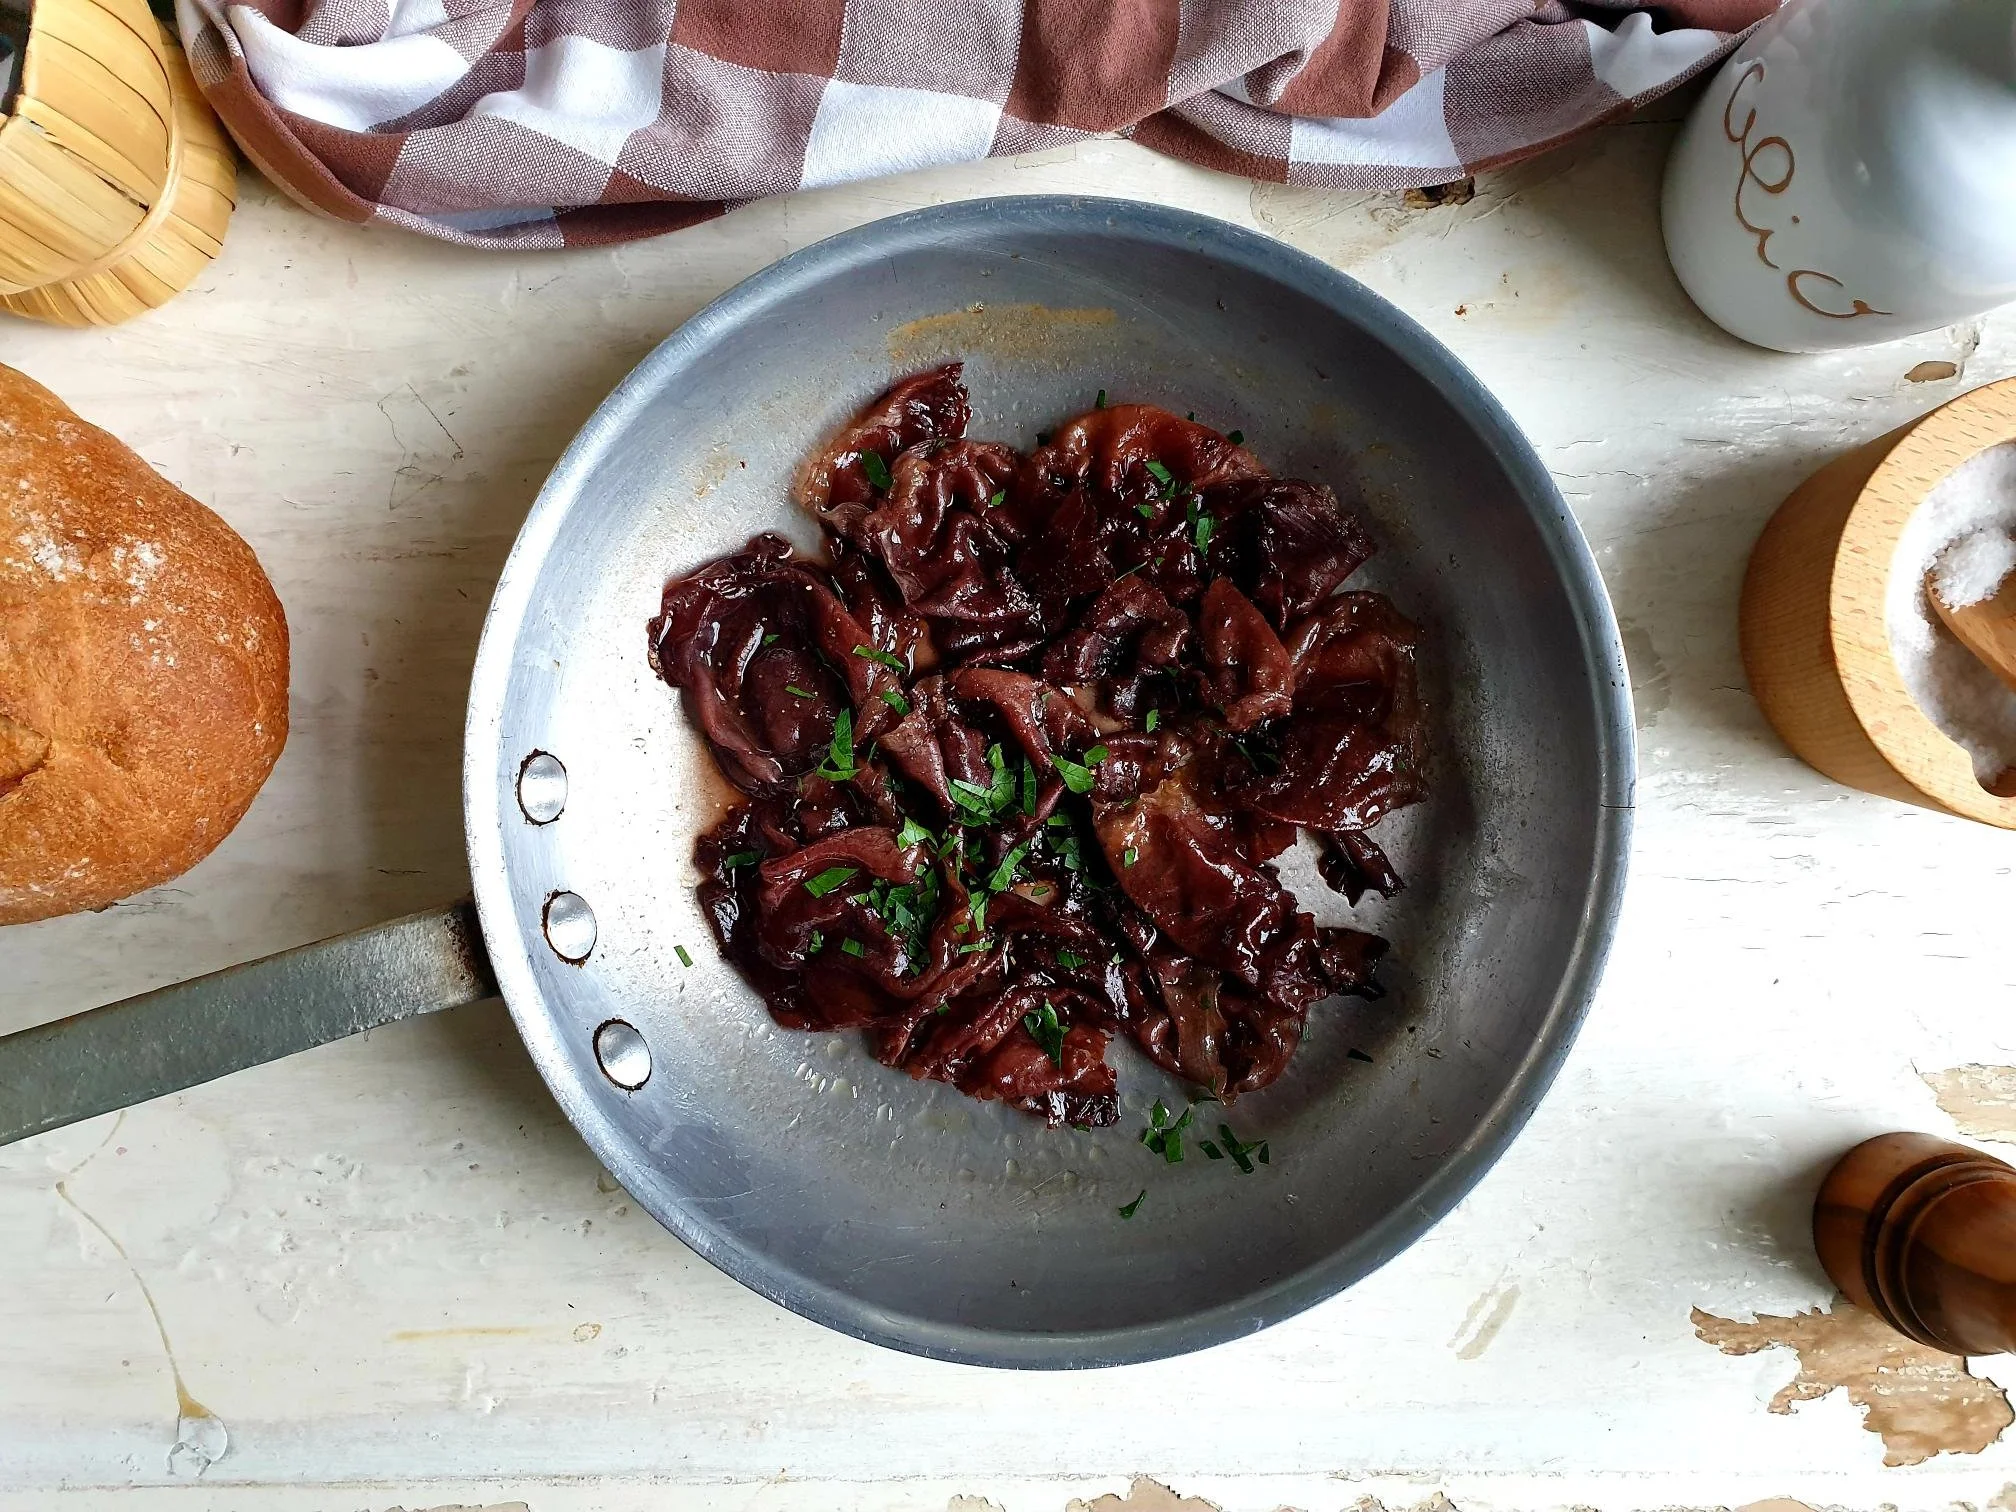
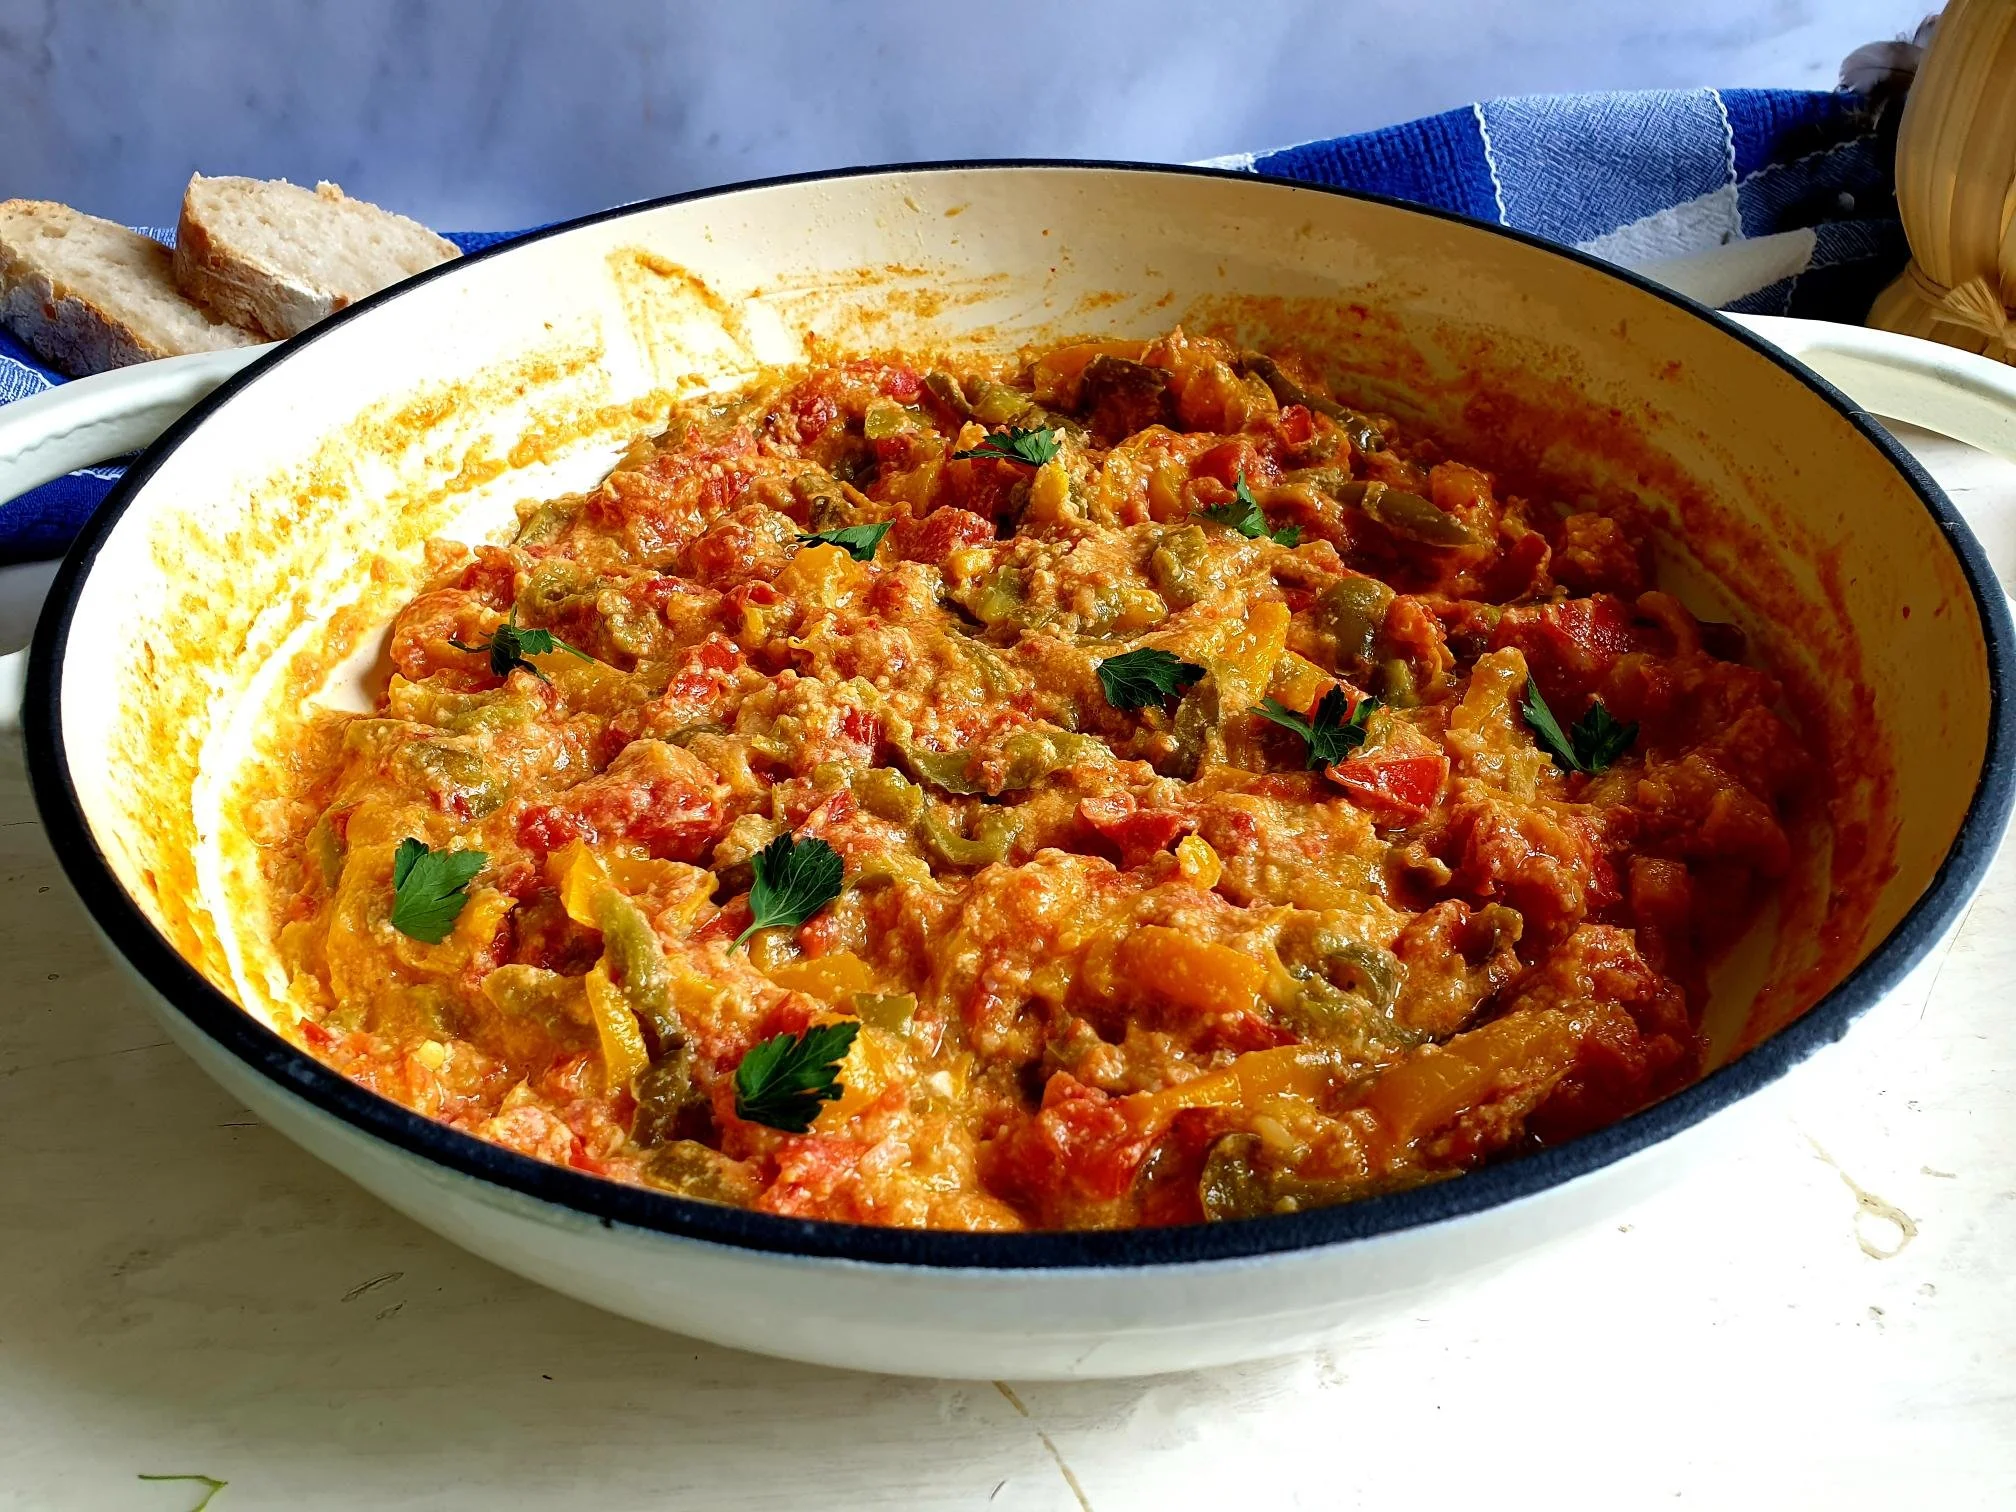
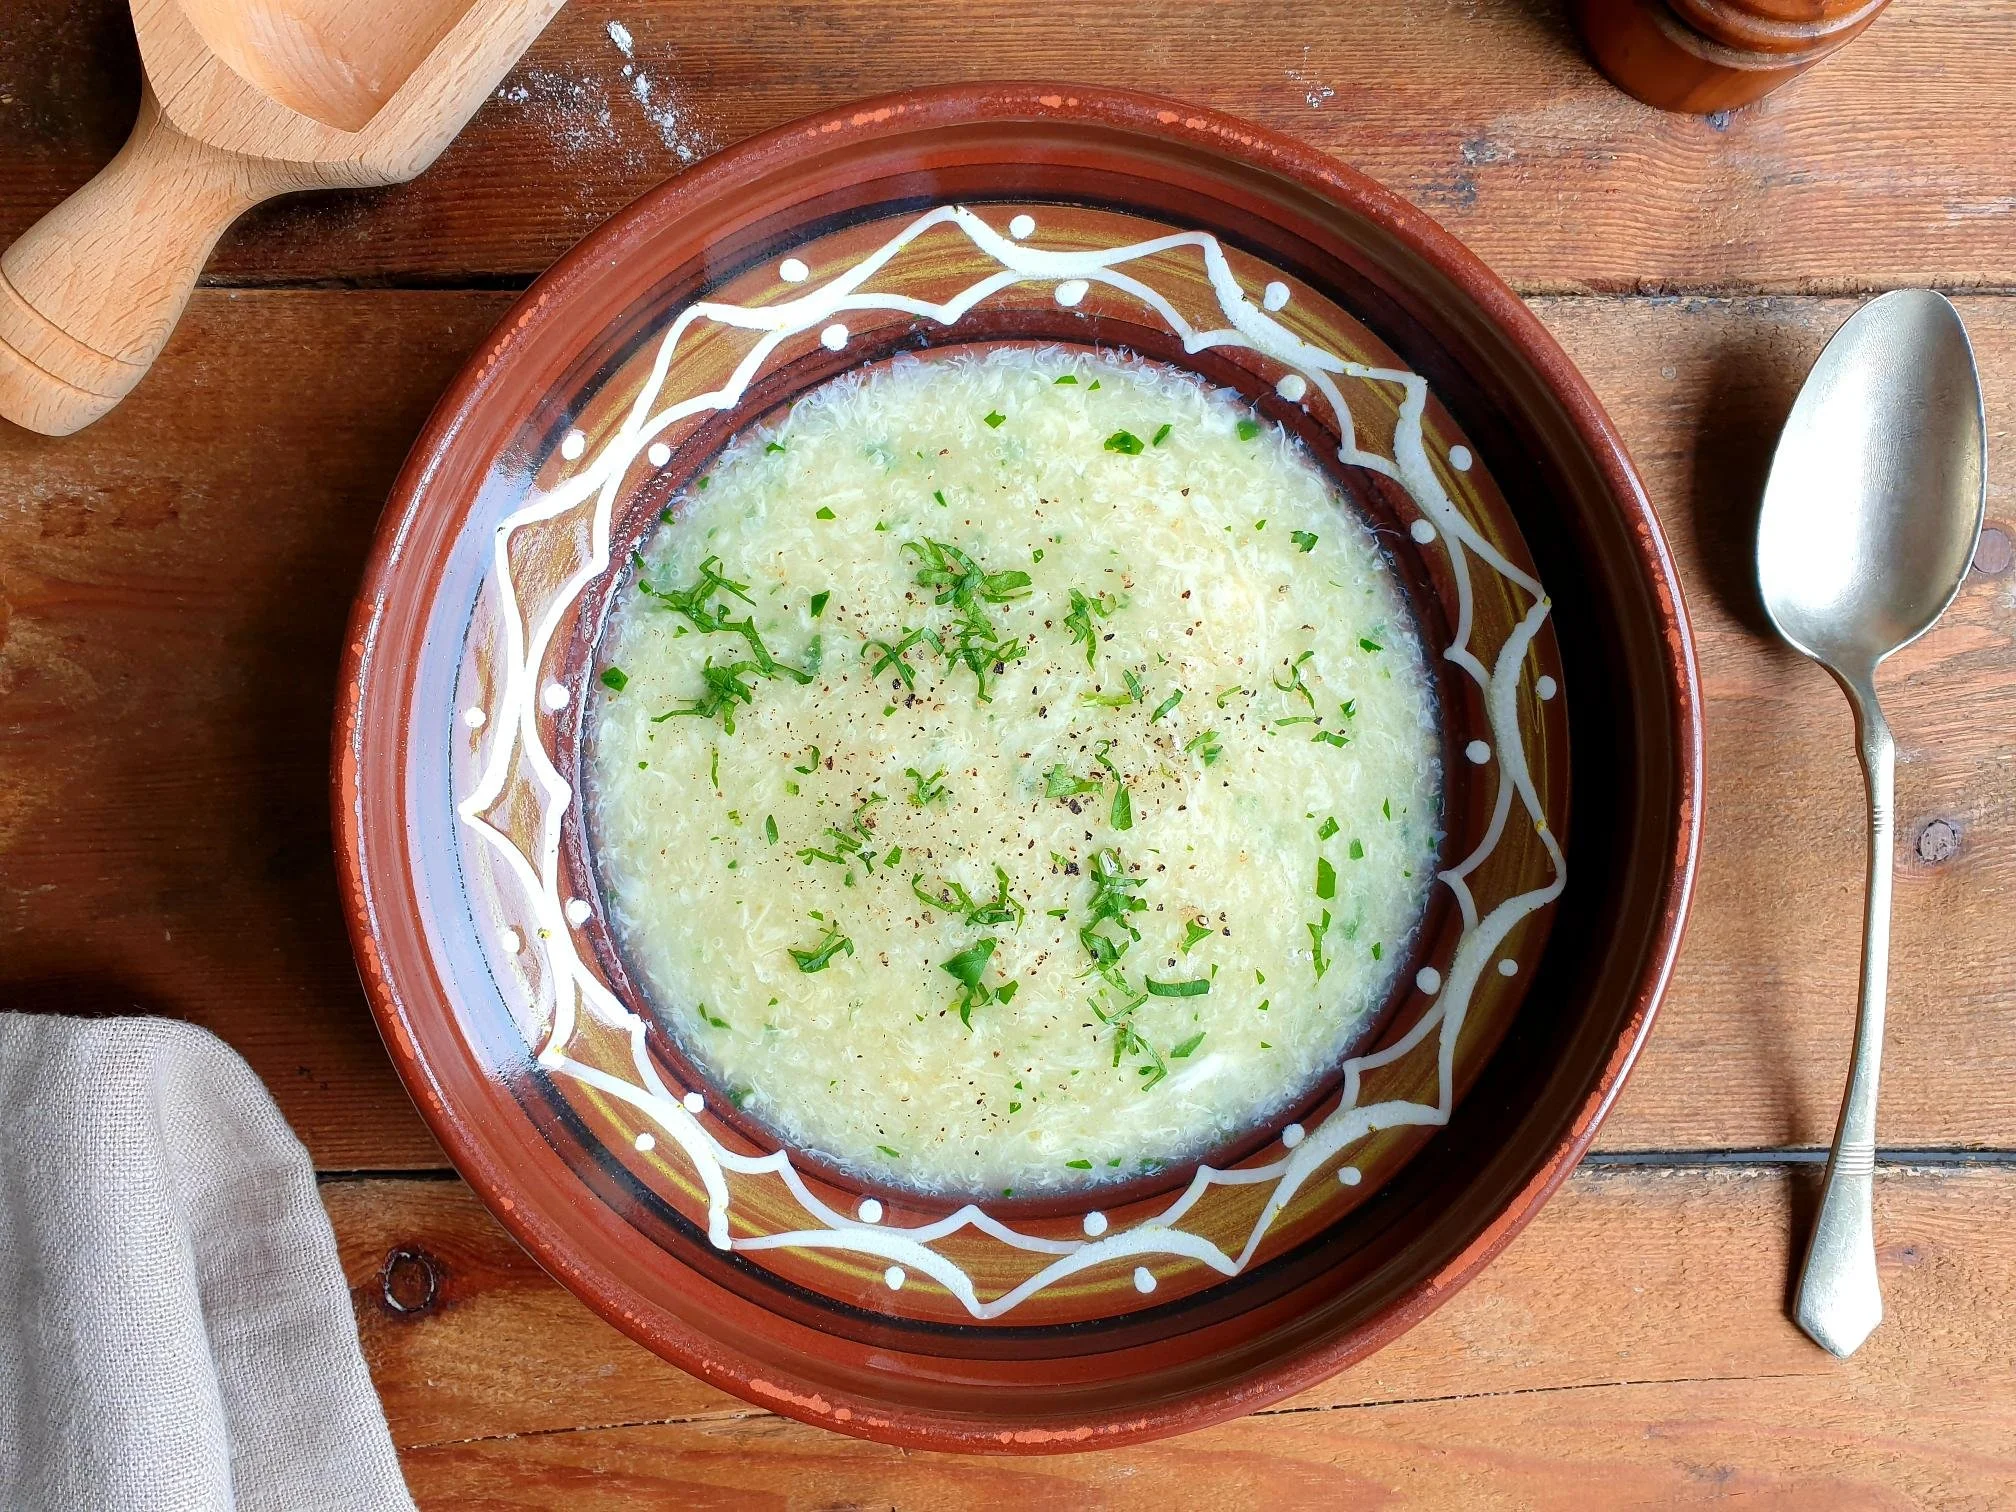
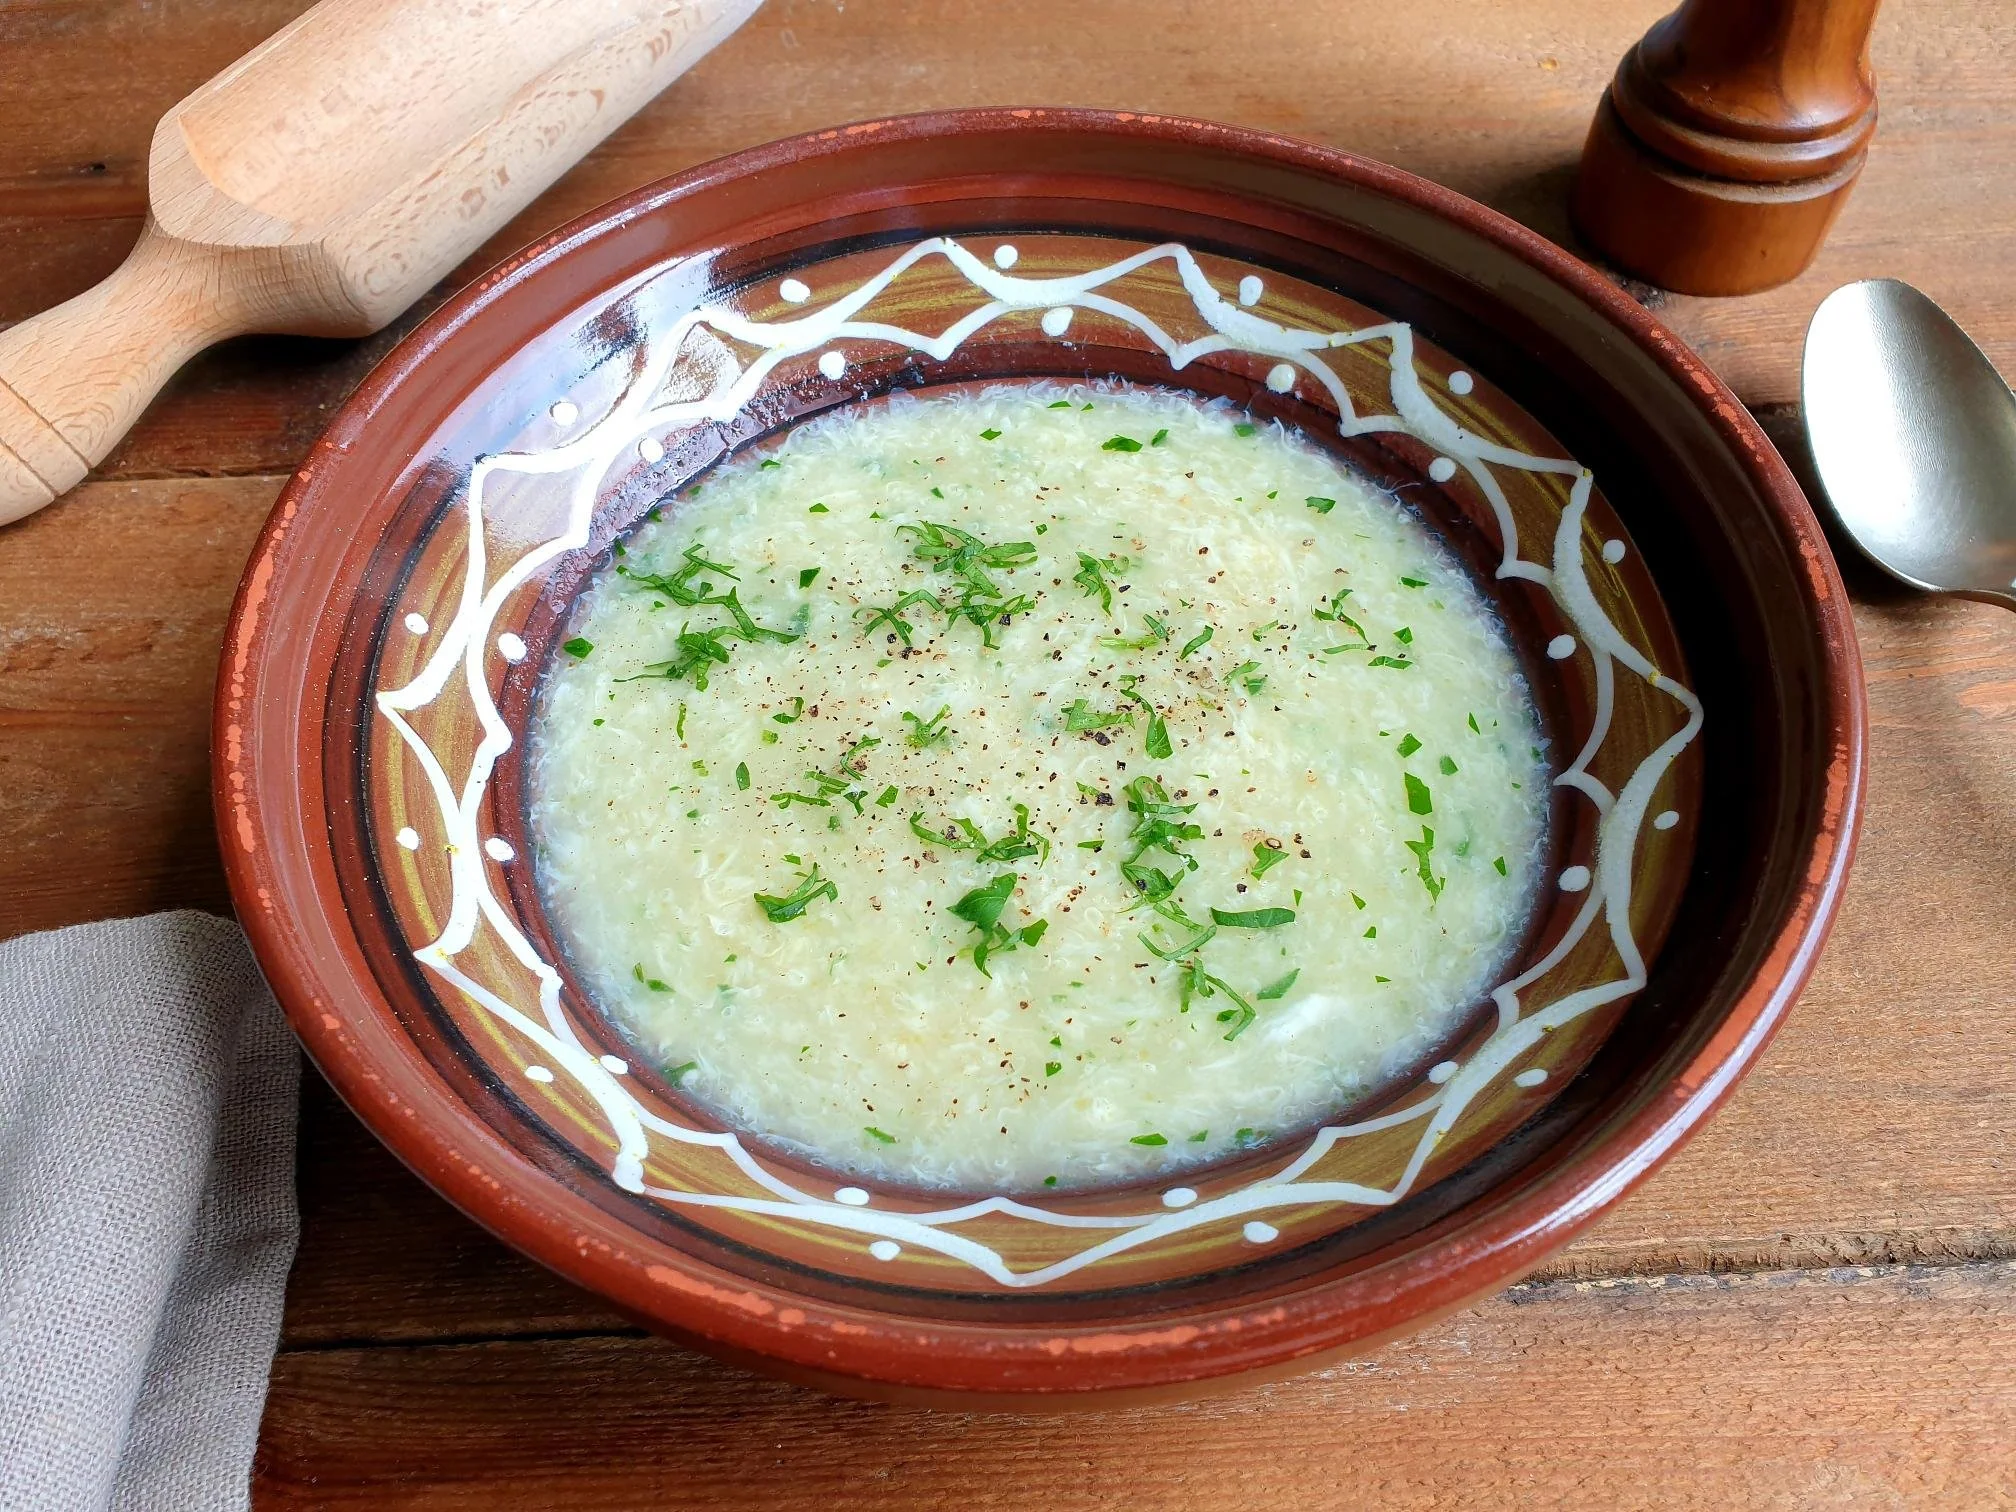
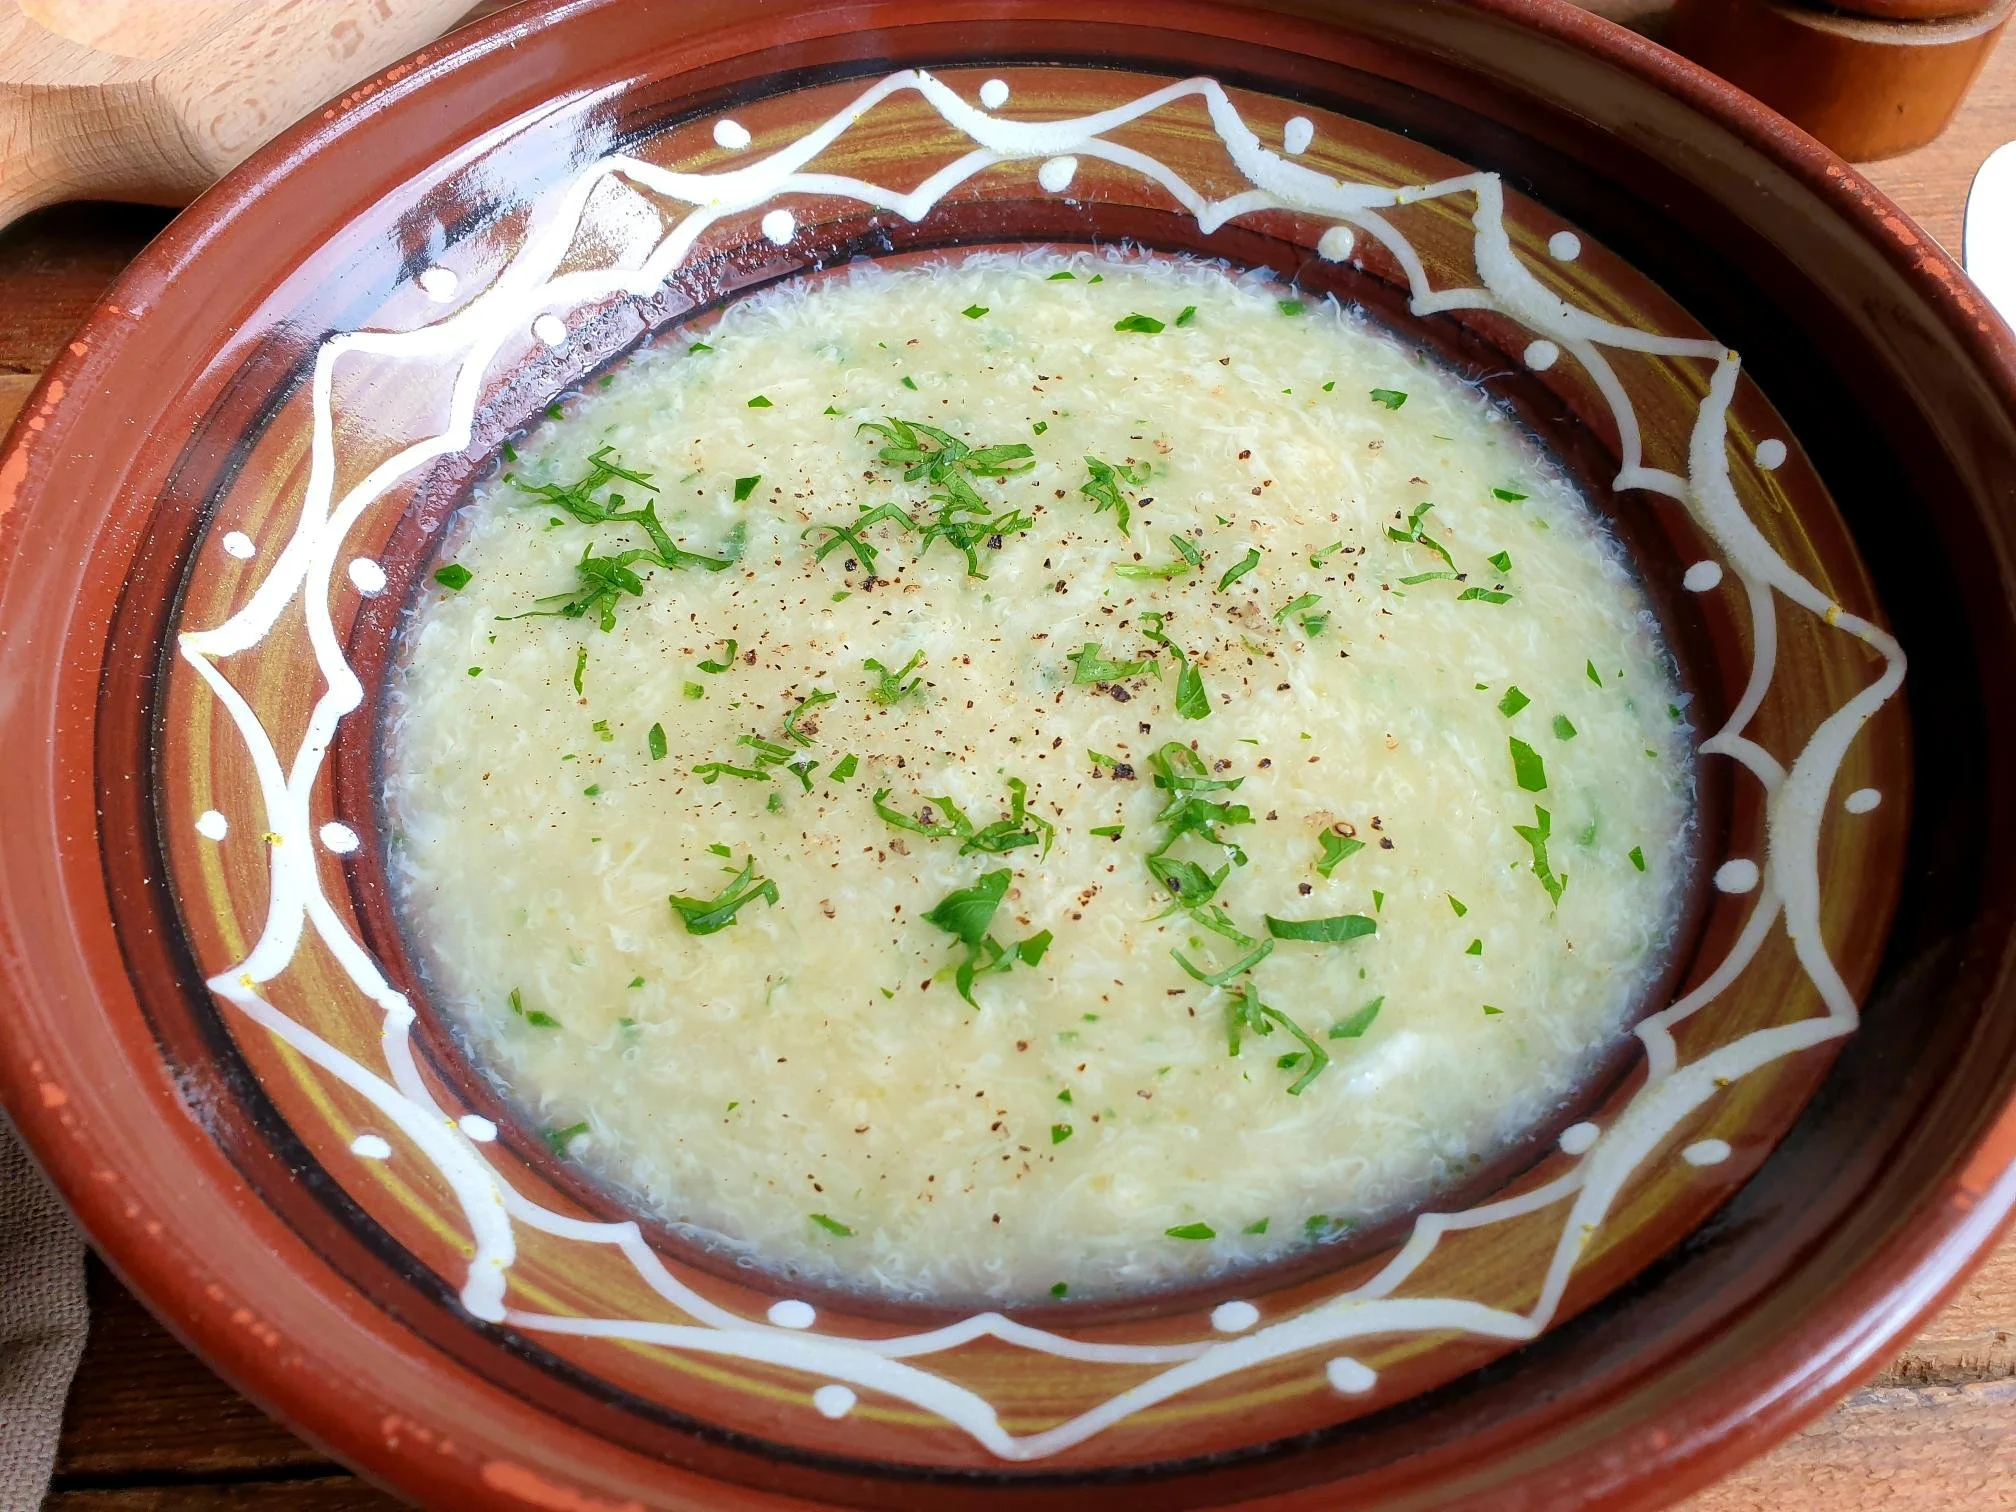
Ladle the soup into the plates or bowls, sprinkle with freshly chopped parsley and ground black pepper, optional, and serve hot immediately. You can top it with croutons and turn this soup into even more substantial meal.

February 26, 2025 /tina oblak
white flour, all purpose flour, eggs, Prežganka, Roman Egg drop soup, Stracciatella in brodo, Stracciatella alla Romana, Einbrennsuppe, humble soup, modest soup, roux based soup
Adriatic Recipe, All year round recipe, Appetizers, breakfast, Central European recipes, child friendly dish, child friendly meal, comfort, dinner, Easy recipe, entrée course, family friendly dish, family friendly meal, first course, first course dish, first course meal, Hearty soups, Istrian cuisine, Istrian dish, Istrian food, Istrian gastronomy, Mitteleuropean cuisine, Mitteleuropean dish, Mitteleuropean food, Mitteleuropean recipes, Rustic dish, simple recipe, Slovenian cuisine, Slovenian food, Slovenian gastronomy, Soups, Starters, Vegetarian
Comment
Share

Dry-Cured Ham in Red Wine Sauce Istrian Recipe

Beans and Sardines
December 17, 2024 by tina oblak in Adriatic Recipe, All year round recipe, Appetizers, breakfast, brunch, Canapés, Easy recipe, entrée course, Istrian cuisine, Istrian dish, Istrian food, main course, main dish, main meat course, Meat, Rustic dish, savory nibbles, simple recipe, Slovenian cuisine, Slovenian food, Slovenian gastronomy, Small bites, Snacks, Starters

This simple, uncomplicated and humble peasant dish must be one of the quickest and easiest recipes ever. You will only need three ingredients to make it, olive oil, red wine and some kind of dry-cured meat, and a couple of minutes to spare to cook it.The recipe originated in the Slovenian region of Karst, and it was prepared in the olden days by the housewives for their husbands upon their return home hungry after working all day in the fields and with the animals, and needed a quick and filling meal.

This dish was cooked using the ingredients that were exclusively homemade, types of dry cured meats changed according to what was available in the households.

It is a very much-loved simple dish that can be found in this region on the menus in local run family rustic restaurants referred to as Pršut z Refoškom, Pršut z vinom or Teranov toč (word vino meaning wine, and Refošk and Teran are the two typical full bodied red wines produced in the Karst region).

It is usually made with Kraški Pršut, a dry-cured non-smoked ham from the Kras (Karst) region in Slovenia, with a Protected Geographical Indication (PGI). This region is blessed with a continuous breeze and relatively low humidity, creating perfect conditions for drying meat, a strong tradition that has been kept alive among local people since the earliest settlements.

This is how a well renowned and famous Slovenian polymath John Weikhard Freiherr von Valvasor described in 1689 the Karst region and the traditions of its humble culinary customs.

This good people help

themselves as they can live

poorly: they are very happy if they

have a piece of pork fat (which they can digest due to their

ardours work), onion, and a

piece of plain, coarse, brown,

rolled bran bread.

I am sharing here a family recipe for this unique recipe that travel only a few kilometres from inland Karst region to the Slovenian Istrian coast, where it became part of local repertoire of recipes.

Recipe

Ingredients

Serves 4 as a starter

  • 1 Tbsp extra virgin olive oil or olive oil

  • 10 thinly sliced dry-cured ham (you can use dry-cured sausage like Italian salami or French Saucisson for example)

  • 100ml full-bodied red wine

  • knob of unsalted butter, optional

  • black pepper, optional

  • fresh flat leaf parsley, chopped, optional

Method

Put the olive oil in a fairly large frying pan and heat it up a bit.

Place the slices of dry-cured ham in a frying pan and cook them on a medium heat very briefly, just until they change the colour, it will literally take seconds.

View fullsize Dry-cured ham in red wine sauce Istrian Recipe 3.jpg
View fullsize Dry-cured ham in red wine sauce Istrian Recipe 4.jpg

Then pour the wine and cook for further a minute or two, or until the alcohol evaporates and the sauce thickens slightly. When it is cooked you can add a knob of butter if you wish to make the sauce creamier and richer.

View fullsize Dry-cured ham in red wine sauce Istrian Recipe 5.jpg
View fullsize Dry-cured ham in red wine sauce Istrian Recipe 6.jpg

Season with some black pepper if you wish, however, there is no need to season this dish with additional sea salt as dry-cured ham is already naturally quite salty.

Serve immediately hot or warm with slices of rustic bread or on a bed of soft, cooked polenta.

Just a thought

This dish is best eaten immediately after it has been prepared, and it is not suitable for freezing.

December 17, 2024 /tina oblak
dry cured ham, prosciutto crudo, Parma Ham, Pršut z Refoškom, Pršut z vinom, Teranov toč, Kraški Pršut, Kras, Karst region, full-bodied red wine, dry-cured non-smoked ham, Italian salami, French Saucisson
Adriatic Recipe, All year round recipe, Appetizers, breakfast, brunch, Canapés, Easy recipe, entrée course, Istrian cuisine, Istrian dish, Istrian food, main course, main dish, main meat course, Meat, Rustic dish, savory nibbles, simple recipe, Slovenian cuisine, Slovenian food, Slovenian gastronomy, Small bites, Snacks, Starters
Share

Oven Baked Ricotta (or curd cheese) Filled Crêpes Recipe

Beans and Sardines
March 01, 2024 by tina oblak in Adriatic Recipe, All year round recipe, Austrian inspired dishes, baked dish, baking, breakfast, brunch, Central European recipes, child friendly dish, child friendly meal, dessert, dinner, Eastern European dishes, Eastern European recipes, easy baking, Easy recipe, family friendly dish, festive dessert, festive sweet things, home baking, Hungarian inspired dishes, Istrian cuisine, Istrian dish, Istrian food, Istrian gastronomy, Mitteleuropean cuisine, Mitteleuropean dish, Mitteleuropean food, Mitteleuropean recipes, oven baked fish, Rustic dish, simple recipe, Slovenian cuisine, Slovenian food, Slovenian gastronomy

If you love your traditional pancakes but looking for a recipe that will elevate it a notch, look no further.

This recipe consists of frying thin pancakes (French style crêpe) and then filling them with sweetened ricotta, or curd cheese, flavoured with lemon and vanilla. The pancakes are then rolled up, placed in a greased baking tray, a custard-like mixture is then poured over them, and the whole dish gets baked in the oven for a bit.

The end result is truly divine, the steps to make this recipe are fairly simple and not at all complicated or lengthy, even though it may appear at first glance.

Usually these filled pancakes are served for breakfast or early dinner, or they make a great rustic style pudding, and can even be offered as a more formal type of dessert. Whichever way you decide to serve this sweet delight, they will most surely bring the smile to anyone having them.

This recipe, with slight variations, has been enjoyed around the world, and there is a very good reason – eating these pancakes hot or cold they are undeniably delicious.

This dish is sometimes refereed as Blintzes (or ricotta or curd cheese Blintzes). The recipe originated in Eastern Europe, and is part of Jewish cuisine, customarily eaten for the Jewish holiday of Shavuot.

The most common filling is curd or farmer's cheese but ricotta, mascarpone, cream cheese, cottage cheese or crème fraiche are also used. What you chose as a filling depends on your preference, but it will also depend on where you are in the world and types of ingredients available to you.

They are very popular and a much-loved dish in all the regions of Slovenia, as this land was ruled by the Austro-Hungarian Empire.

This sweet treat is prepared on a regular basis and is commonly offered in restaurants, and is called palačinke s skuto (word palačinka from German palatschinken).

This recipe is very special to me since it brings a lot of childhood memories that take me right back into my maternal grandmother's kitchen where she would make them quite often.

I am sharing here this much treasured family recipe where curd cheese is replaced by the use of ricotta cheese.

Recipe

Ingredients

Serves 6-8 people

For the crêpes (will make 10-12 crêpes if using 24cm, 9inch pan)

  • 250g white all purpose (plain) flour

  • 350 ml semi skimmed milk

  • 150 ml cold sparkling mineral water (can use regular cold water instead, sparkling water makes very light crêpes)

  • 2 medium eggs

  • sea salt, a pinch

For the filling

  • 500g ricotta cheese (or curd, farmer's cheese) If using curd cheese increase the amount of sugar to 100g or to your liking as more acidic in taste compared to ricotta.

  • 100g raisins or sultanas soaked in lukewarm water or dark rum

  • 1 medium egg

  • grated lemon zest of one unwaxed lemon

  • 1 Tsp vanilla bean extract

  • 80g sugar

For the custard sauce to pour over the pancakes

  • 250ml full fat milk or single cream (can use half milk and half cream)

  • 1 medium egg

  • 1 Tsp vanilla bean extract

  • 2 Tbsp sugar

Method

Before you start with the recipe, place the raisins or sultanas in a small bowl and cover completely with lukewarm water or dark rum and let them soak, absorb the water, and become plump for at least 20 minutes, or until needed (you can leave them to soak longer).

To make the crêpes

First make the crêpes by putting all the wet ingredients, eggs, milk and mineral sparkling water into a mixing bowl and whisk well until combined.

Start adding the flour, a bit at a time, a pinch of sea salt and whisk thoroughly until the batter is smooth and free of lumps. You can use an electric hand whisker, a food processor or a blender.

Set aside and leave it to rest for at least 15 minutes, ideally 30 minutes.

In a large non-stick frying pan or crêpe pan melt the butter over a medium heat (you can use a drizzle of oil instead).

Tilt the pan so the melted butter (or oil) covers and coats the whole surface of the pan.

Pour or ladle enough batter into the pan, swirling quickly, to thinly cover the base.

Cook for 1-2 minutes, or until golden brown, completely set on the upper part, or until it starts to come away from the sides of the pan.

Check that the pancakes are golden in colour underneath, then flip the pancake over and cook for 1 more minute or until cooked through.

Remove and place on a large plate and cook the rest.

Set aside to cool.

While the crêpes are cooling start making the filling.

To make the filling

Place ricotta or curd cheese in a bowl and stir.

Add the egg, grated lemon zest, sugar and vanilla bean extract and mix well all the ingredients.

Drain the raisins or sultanas, remove excess liquid and add to the mixture.

Set aside.

Preheat the oven to 180°C static or equivalent. Place about two tablespoons of ricotta filling in the centre of each crêpe and spoon evenly.

View fullsize 11.jpg
View fullsize 5.jpg

Fold in the side ends of the crêpe to prevent filling coming out during the rolling (if it does, it is not the end of the world).

View fullsize 6.jpg
View fullsize 12.jpg

Roll filled crêpe and place it in a greased oven proof dish seam side down in a single layer.

Repeat the process until you use all crêpes and all the filling.

View fullsize 13.jpg
View fullsize 15.jpg

To make custard sauce

Put the milk (or single cream if using), egg, sugar and vanilla bean extract in a jar and whisk well.

Pour the custard mixture over the filled crêpes until they are covered.Bake in the preheated oven for about 20 minutes.

View fullsize 17.jpg
View fullsize 18.jpg

Serve hot, warm or cold with a light dusting of sifted vanilla flavoured or regular icing sugar.

Just a thought

Ricotta filled crêpes can be assembled several hours in advance and baked just before serving.

March 01, 2024 /tina oblak
ricotta cheese, curd cheese, pancakes, French crêpe, Blintzes, ricotta cheese Blintzes, Curd cheese blintzes, mascarpone cheese, cream cheese, cottage cheese, crème fraiche, palačinke s skuto, palatschinken
Adriatic Recipe, All year round recipe, Austrian inspired dishes, baked dish, baking, breakfast, brunch, Central European recipes, child friendly dish, child friendly meal, dessert, dinner, Eastern European dishes, Eastern European recipes, easy baking, Easy recipe, family friendly dish, festive dessert, festive sweet things, home baking, Hungarian inspired dishes, Istrian cuisine, Istrian dish, Istrian food, Istrian gastronomy, Mitteleuropean cuisine, Mitteleuropean dish, Mitteleuropean food, Mitteleuropean recipes, oven baked fish, Rustic dish, simple recipe, Slovenian cuisine, Slovenian food, Slovenian gastronomy
1 Comment
Share

My Mother's Marble Chocolate and Vanilla Ring Cake Recipe

Beans and Sardines
July 06, 2023 by tina oblak in Adriatic Recipe, All year round recipe, baking, breakfast, brunch, Central Europe cakes, Central European recipes, dessert, Eastern Europe cakes, Eastern European recipes, easy baking, easy cakes, Easy recipe, home baking, Istrian cuisine, Istrian dish, Istrian food, Istrian gastronomy, Mitteleuropean cuisine, Mitteleuropean recipes, Mitteleuropean food, pudding, Rustic dish, simple recipe, Slovenian cuisine, Slovenian food, Slovenian gastronomy, Snacks, Sweet Things

Perhaps, you know the old adage, which actually goes back to Tudor times, ‘You can’t have your cake and eat it (too)?’ Well, with this recipe – you can! All your baking dilemmas, should I go for a chocolate cake this time, or for a vanilla one, are solved with this one recipe – you can have both in one cake!

This chocolate and vanilla sponge cake is a classic childhood sweet treat. It is moist with a soft and fluffy texture, it looks pretty, and is still elegant, since the light and dark batter is blended lightly together giving it a marble appearance, and so, hence its name, marble cake, or it is sometimes called a zebra cake, due to its zebra-striped pattern (skunks are also striped, but I supposed that isn’t a very appealing name for a cake). It is also known as a ring cake or a Bundt cake, especially in the United States.

So, this cake delivers on appearance and flavour every single time, and if you want to impress your family and friends, this is the cake to go for. It is very easy to make and you can whizz it up in no time.

It originated in Germany, where it is still very popular, from a Kugelhopf, a two-coloured sweet yeast bread.

This impressive cake has been frequently baked in Austrian households and other European countries, including in Slovenia (Šarkelj) where it represents one of the most frequently baked weekend sweet treats and it is enjoyed for breakfast as well, there is no wrong time to eat it!

This was a regular bake in my house when I was a small girl, all you need is a few simple ingredients and a few simple steps to follow, I promise you, you will think twice before reaching out for the store-bought version, and here it is, my mother's recipe.

Recipe

Ingredients

  • 4 medium eggs, room temperature

  • 250g caster sugar

  • 1 Tsp vanilla extract

  • 100ml milk, room temperature

  • 100ml sunflower oil, room temperature

  • 250g all purpose white flour (plain flour), sifted

  • 16g baking powder

  • 2 Tbsp cocoa powder, sifted

  • dusting sugar/vanilla powder sugar for dusting, optional

Method

Preheat the oven to 180°C static or equivalent.

Grease well with butter or oil a ring mould or a bundt cake tin. Make sure you cover every nook and cranny (alternatively you can use a 20cm cake tin or a 900g loaf tin, grease and line with baking parchment)

Dust with flour, shake off and tip out the excess.

View fullsize Marble Cake 2.jpg
View fullsize Marble Cake 4.jpg

Put in the mixing bowl the eggs and the sugar, and beat well until the mixture becomes golden pale in colour.

Add the milk, oil and vanilla extract, mix well.

View fullsize Marble Cake 5.jpg
View fullsize Marble Cake 6.jpg

Start adding, one spoonful at the time of sifted flour together with the baking powder.

View fullsize Marble Cake 7.jpg
View fullsize Marble Cake 8.jpg

Divide the batter, spoon half of the batter in a separate bowl.

Add in one half of the batter sifted cocoa and mix well.

View fullsize Marble Cake 10.jpg
View fullsize Marble Cake 11.jpg

Pour the white mixture into the base of the prepared ring mould first. Then pour the chocolate mixture on top.

View fullsize Marble Cake 12.jpg
View fullsize Marble Cake 13.jpg

Gently swirl a little with the knife.

Bake for about 35 minutes or until the cake has shrunk from the sides of the tin and is well risen, the top of the cake should ‘spring back’ when lightly pressed with your fingertips.

Leave to cool in the tin for a few minutes.

Turn out the cake and finish cooling on a wire rack.

Dust with icing sugar or vanilla icing sugar and serve.

July 06, 2023 /tina oblak
chocolate and vanilla ring cake, marble chocolate and vanilla cake, marble cake, zebra cake, Bundt cake, chocolate and vanilla Bundt cake, chocolate and vanilla zebra cake
Adriatic Recipe, All year round recipe, baking, breakfast, brunch, Central Europe cakes, Central European recipes, dessert, Eastern Europe cakes, Eastern European recipes, easy baking, easy cakes, Easy recipe, home baking, Istrian cuisine, Istrian dish, Istrian food, Istrian gastronomy, Mitteleuropean cuisine, Mitteleuropean recipes, Mitteleuropean food, pudding, Rustic dish, simple recipe, Slovenian cuisine, Slovenian food, Slovenian gastronomy, Snacks, Sweet Things
Comment
Share

Sweet Dough Yeasted Rings (Busolai) Recipe

Beans and Sardines
May 31, 2023 by tina oblak in All year round recipe, baked dish, baking, biscuits, breakfast, brunch, celebratory desserts, Celebratory dish, cookies, dessert, Easter, Easter recipes, easy baking, Easy recipe, Enriched dough, festive bakes, festive dessert, festive sweet things, home baking, Istrian cuisine, Istrian food, Istrian gastronomy, recipe from Northern Ital, simple recipe, Slovenian cuisine, Slovenian Easter Sweet Br, Slovenian food, Slovenian gastronomy, Snacks, Sweet bread, sweet course, sweet nibbles, Sweet Things

Busolai (also spelled Bussolai or Buzolai) are sweet treats that originate in the region of Veneto in north-east Italy. They are characteristic of Venice, and in particular on the fishermen island of Burano, hence these baked delights are also called Buranei (Burano buiscuits).

They are known as biscuits as they have the consistency of a biscuit, the dough does not contain the yeast, and it can be shaped into a ring or like the letter “S” (not a coincidence, since the S-shaped form of the biscuits makes it easier to dunk into milk or sweet wines).

They used to be only prepared and enjoyed during Easter festivities but nowadays almost every bakery on the island of Burano and in Venice sells them all year round.

Apparently, the letter from the Government of Venice, which still exists, has been found in the national archives of Italy, warning the nuns of the convent of St. Matthew on an island in the Venetian Lagoon that they should cut the number of Bussolai enjoyed during Easter festivities or otherwise they would encounter financial troubles.

The recipe for these biscuits, however, travelled further east, through the region of Friuli, and reached the city of Trieste (in Italy), and the land of Slovenian Istria across the “border”, where the recipe took a slightly different turn

The yeast was added to the dough making these baked goodies resemble more like soft doughnuts than the cookies, in fact, in the area they are described by the locals as sweet bread rings (obročki iz sladkega kruha).

As soon as they were freshly baked, it was a custom of some locals to spoon a bit of rum or grappa over them and sprinkle them with extra sugar.

Being like biscuits or doughnuts, they have one unmistakable characteristic in common, they have a hole in the centre, called “busa” in Venetian dialect”, hence their name, Busolai.

To make things more confusing in terms of naming this sweet treat, busolai are sometimes known as “kolach”, name originated from Old Slavonic word kolo meaning “wheel” or “circle”.

Once again, they were baked during festivities, especially during Easter since a great percentage of eggs are used in the recipe (egg representing the symbol of rebirth and resurrection).

These sweet baked rings were traditionally very popular during Confirmation (a rite in the Christian Church, at which baptized persons affirm their Christian belief, and are admitted as a full member of the Church).

Busolai were made into a garland with the use of a simple string and the godfather would gift these to his god child. This is described by a very well know and famous proverb in local dialect “Chi ga santoli ga buzzolai” (only the one who has a godfather will get busolai).

This tradition would be furthermore highlighted by another proverb in the local dialect “Bezi, basi e bussolai no i xe boni se no I xe assai,” which translates in standard Italian as (Soldi, baci e bussolai non sono buoni se non sono assai), and in English means that money, kisses and bussolai are no good if not given in abundance.

My husband’s uncle (known as zio Livio) with a garland of bussolai received on his Confirmation day by his godfather

This custom used to be very popular in Slovenian Istra, and almost each village would have a slightly different recipe for it. I am sharing with you my nona's recipe from the village of Marezige, a few kilometres from a coastal town of Koper where there used to be only one baker in town, at the time when my nona was a little girl, selling busolai, run by a family of Venetian origin.

Very sadly, there are no bakers selling busolai anymore, moreover, the custom of godfathers gifting the children with busolai has completely died out, and younger generations have never seen or heard of busolai.

Only a bunch of elderly people still alive today will tell you, with nostalgic voices and tearful eyes, with touching and emotional stories about their Confirmation Day, and they very much anticipated sugar coated busola, the only gift they received, if they were lucky enough.

Recipe

Ingredients

  • 500g regular plain flour

  • 1 cube of fresh (brewer's) yeast 42g or 14g of dry yeast

  • 100g unsalted butter, melted

  • 150g sugar

  • 2 medium eggs, lightly beaten

  • 2 egg yolks, lightly beaten

  • 100ml tepid lukewarm milk (semi skimmed or full fat)

  • 2 Tbsp dark rum or grappa (alcoholic, fragrant grape-based pomace brandy of Italian origin)

  • finely grated lemon zest of 1 unwaxed lemon

  • pinch of sea salt

  • 1 small egg, lightly beaten, for glazing (can use lightly beaten egg whites, the busolai will result lighter in colour after baking)

Method

In a small bowl place dry or fresh yeast (if using fresh yeast slightly brake it down into smaller pieces with your fingers).

Add 100ml of lukewarm milk and ¼ tsp of caster sugar.

Gently stir and leave for about 20 minutes or until gentle bubbles form on the surface.

In a separate mixing bowl put the eggs, egg yolks and beat them gently.

Add melted butter, sugar, rum or grappa, grated lemon zest and a pinch of sea salt, and with the fork mix well all the ingredients.

In a large mixing bowl put the flour, add egg mixture and the yeast mixture.

Combine well all the ingredients with the wooden spoon or spatula to start with. When all the ingredients are well combined transfer the mixture onto a clean, floured surface.

Work with your hands and knead the dough for about 10-15 minutes, stretching it and folding it, adding a little flour at the time if the dough is too sticky.

Knead the dough until it becomes smooth, soft, shiny and elastic (the dough should not stick to the surface or your hands).

Shape the dough in a ball, place it back into a previously oiled mixing bowl.

Cover tightly with cling film, leave to rest and prove in a draft free space at a room temperature for 3 hours.

After this time your dough should be at least double in size.

Line 2 large flat baking trays with baking parchment.

Take the dough out of the mixing bowl, place it on a working surface, knock the air out of the dough and shape it into a log.

View fullsize Busolai 3.jpg
View fullsize Busolai 4.jpg

Divide the dough into more or less equal parts (10-12 parts each weighting roughly 100g).

Shape each piece of the dough into a sausage and form a ring, pinching the ends together (make sure you are generous with the size of the ring, during the baking the busalai rise and stretch quite a bit, if the whole is too small, after the baking you will end up with busolai that have almost a non-existing hole, not that this is really a problem).

View fullsize Busolai 5.jpg
View fullsize Busolai 6.jpg

Place your ring-shaped sweet dough onto a tray.

Cover with clean tea towel and leave to prove for the second time for about 30 minutes.

Gently brush the sweet dough rings with lightly beaten egg or egg whites and sprinkle the top of the rings with sugar.

View fullsize Busolai 9.jpg
View fullsize Busolai 12.jpg

Preheat the oven to 180°C and bake for 20 to25 minutes or until well risen and deep golden brown (they will be slightly lighter in colour if you brush them with egg whites).

Remove from the oven and transfer the busolai to a wire rack to cool completely.

Busolai are best eaten within a few hours.

You can easily freeze them, just make sure you freeze them as soon as they are completely cool.

Wine suggestion

Vin Santo di Torgiano DOC 2010 - Lungarotti

May 31, 2023 /tina oblak
sweet dough yeasted rings, Busolai, Bussolai, Buzolai, Istrian Busolai, obročki iz sladkega kruha, Buranei, Buranei buiscuits, Venitian Buiscuits, sweet dough, sweet bread, Cinfirmation sweet treats
All year round recipe, baked dish, baking, biscuits, breakfast, brunch, celebratory desserts, Celebratory dish, cookies, dessert, Easter, Easter recipes, easy baking, Easy recipe, Enriched dough, festive bakes, festive dessert, festive sweet things, home baking, Istrian cuisine, Istrian food, Istrian gastronomy, recipe from Northern Ital, simple recipe, Slovenian cuisine, Slovenian Easter Sweet Br, Slovenian food, Slovenian gastronomy, Snacks, Sweet bread, sweet course, sweet nibbles, Sweet Things
Comment
Share

Grilled Polenta Recipe

Beans and Sardines
May 04, 2023 by tina oblak in Adriatic Recipe, All year round recipe, Appetizers, bite-sized nibbles, breakfast, brunch, Canapés, child friendly dish, child friendly meal, dinner, Easy recipe, family friendly dish, family friendly meal, Finger food, Healthy, healthy mael, hearty dish, Istrian cuisine, Istrian dish, Istrian food, Istrian gastronomy, light meal, Nutritious, Nutritious dish, recipe from Northern Ital, Rustic dish, savory nibbles, Side Dishes, simple recipe, Slovenian cuisine, Slovenian food, Slovenian gastronomy, Small bites, Snacks, supper, Vegan, Vegetarian, Venetian dish

Polenta, despite being offered and marketed as one of the fairly recent gastronomic fashions in high end restaurants around the world, has incredibly humble origins, it represents a staple peasant food that fed the poorest of the poor.

Grilled polenta slices taste great, they are crispy on the outside, soft on the inside, and will have a very light smoky flavour when barbecued, they are very easy to make and incredibly practical and convenient, as polenta mixture can be prepared ahead of time.

Polenta is incredibly versatile, in fact, there is nothing really that does not go with grilled polenta, it is one of the best side dishes you can pick to go with your grilled or barbecued meat, fish or vegetables.

Grilled polenta slices topped with vegetables (sautéed mushrooms, peppers, courgettes), different types of cheeses, cured meats and spreads make the most sophisticated appetizers and finger food to be served with drinks.

Polenta in Slovenin Istra is traditionally enjoyed with different meat, fish or bean stews, and Venetian style liver. What is wonderful is polenta with creamed salted cod, and even a simple fried egg can accompany humble polenta.

Polenta used to be also eaten for breakfast, however, this gastronomic ritual from the past has nowadays almost disappeared. Only a handful of elderly people would still have it as the first meal of the day, perhaps as a nostalgic reminder of their youth.

My nona told me that cooled and set polenta would be cut into smaller pieces, put into a bowl, then some milk would be added, and a pinch of sea salt to counterpart the natural sweetness of the milk. This provided a very nourishing morning meal. I guess it was like an old-fashioned concept of bowl of cereal with milk.

Polenta is also incredibly popular in the neighbouring region of Friuli, in Italy, where maize flour cooked in milk, speciality from the region called Suf, used to be eaten either for breakfast or as an evening meal, this dish provided a nutritious and easily digested plate of food.

Nowadays, polenta, being soft cooked, hard cooked or grilled, it is still very much loved and is a recurrently cooked dish in almost every household for unpretentious mid-week meals, or during festivities. Its popularity has never decreased and reflects a true identity of the local people and is deeply rooted in the gastronomic traditions of the area.

I am sharing here the recipe for this polenta dish where hot cooked runny polenta would be traditionally poured on round wooden boards, and not into loaf tins like I do for practical reasons. When polenta was completely cooled and set so it becomes firm it would then be cut into strips or random shaped chunks, and then quickly pan fried (only left over polenta used to be grilled).

Recipe

Ingredients

  • 250g yellow or white polenta (instant polenta) maize flour

  • 1 litre of water

  • sea salt

Method

Before you start cooking the polenta prepare the loaf tin. With a brush (or just with your hands and fingers) slightly oil the loaf tin, this will prevent polenta from sticking.

Pour the water into a pan and bring to boil (to speed up the process you can use hot boiling water directly from the kettle).

View fullsize Grilled polenta 2.jpg
View fullsize Grilled polenta 4.jpg

Lower the heat and gradually start slowly pouring the polenta into a hot water, whisk constantly.

Cook and whisk until the mixture begins to thicken and becomes smooth in consistency with no lumps. Follow the instruction how long to cook the polenta (timing may vary a bit, mine took about 10 minutes).

During the cooking process polenta mixture will create air bubbles that will pop (a bit like tiny volcanos erupting, be careful not to burn yourself).

Taste and adjust the seasoning with sea salt.

View fullsize Grilled polenta 6.jpg
View fullsize Grilled polenta 9.jpg

Pour cooked polenta into a loaf tin, smooth the top with the back of the spatula or a wooden spoon. (you can pour the cooked polenta into a baking tray, previously lined with backing parchment, spread it and flatten it, when the polenta is completely cooled, cut it in whatever shape you like, strips, triangles, rounds or use cookie cutters of your choice).

Allow the polenta to set and cool completely at a room temperature or put it in the fridge to speed up the process.

View fullsize Grilled polenta 10.jpg
View fullsize Grilled polenta 11.jpg

Tip the polenta onto a chopping board (it should be completely moulded into the shape of your loaf tin).

Cut the polenta loaf into 1-1.5cm (about ½ inch) slices.

View fullsize Grilled polenta 12.jpg
View fullsize Grilled polenta 13.jpg

Preheat a non-stick griddled pan (indoor grill pan) or a regular non-stick frying pan over a medium high heat for a few minutes.Place polenta slices in the griddled pan and charcoal grill on a fairly high heat for a few minutes. Do not move the polenta around., let the polenta slices sizzle in the pan undisturbed (do not overcrowd the pan and work in batches).

Turn the slices the other side and grill for another few minutes. Be patient with this process, only turn and flip the slices after you have tested the edges, flip the slices when the polenta easily lifts off the grill pan.

Polenta slices should have grill marks when fully grilled and have crispy outside layer.

Serve hot immediately.

View fullsize Grilled polenta 14.jpg
View fullsize Grilled polenta 18.jpg

Just a thought

This is a very convenient dish, you can make polenta mixture about up to two days before you actually need to grill it.

Although not done traditionally, you can cook the polenta with a stock of your choice for extra flavour and you can also add some grated cheese of your choice to a hot polenta mixture.

May 04, 2023 /tina oblak
polenta grigliata, polenta, pan fried polenta, barbecued polenta, maize flour, white polenta, instant polenta, cucina povera
Adriatic Recipe, All year round recipe, Appetizers, bite-sized nibbles, breakfast, brunch, Canapés, child friendly dish, child friendly meal, dinner, Easy recipe, family friendly dish, family friendly meal, Finger food, Healthy, healthy mael, hearty dish, Istrian cuisine, Istrian dish, Istrian food, Istrian gastronomy, light meal, Nutritious, Nutritious dish, recipe from Northern Ital, Rustic dish, savory nibbles, Side Dishes, simple recipe, Slovenian cuisine, Slovenian food, Slovenian gastronomy, Small bites, Snacks, supper, Vegan, Vegetarian, Venetian dish
Comment
Share

Easter Sweet Plaited Bread (Tičice) Istrian Recipe

Beans and Sardines
April 07, 2023 by tina oblak in Adriatic Recipe, baking, breakfast, brunch, celebratory desserts, Celebratory dish, child friendly dish, dessert, Easter, Easter recipes, Easter treats, easy baking, Easy recipe, Enriched dough, festive bakes, festive dessert, festive sweet things, home baking, Istrian cuisine, Istrian food, Istrian gastronomy, Rustic dish, Slovenian cuisine, Slovenian Easter Sweet Br, Slovenian food, Slovenian gastronomy, Spring recipe, Sweet bread, sweet course, sweet finger food, sweet nibbles, Sweet Things

This celebratory sweet bread is similar to Jewish Challah, and is very flavoursome, soft and fluffy. It is made with yeasted enriched dough, and is shaped into a plait (or braid), and decorated with hard boiled eggs. It is very popular and traditionally baked during Easter festivities in Slovenian and Croatian Istra, Dalmatia (in Croatia) and in neighbouring Trieste in Italy and its surrounding areas.

It is best eaten fresh straight away, on its own with tea, coffee, or sweet wine, or paired with, as is traditionally the case, with cooked ham, and a selection of cheeses or cold dry cured meats. It is equally very delicious toasted the following day with some butter or jam.

This traditional recipe for sweet bread can be distinguished from other recipes for sweet bread across Europe by the addition of dark rum or grappa in the dough for extra flavour, and by the quantity of eggs used. This makes the bread have a heavier and slightly denser texture and richer taste, but this also means that it also requires a longer proofing time.

The eggs in the bread have symbolic significance in Christianity. Eggs represent new birth, new life, and are a reminder of the Passion and Resurrection of Christ. Traditionally, new converts to Christianity were baptised on Easter Sunday, representing their new birth in the faith, and new life in the Church. During the Middle Ages eggs were also a real treat to eat on Easter Sunday since they were forbidden during Lent, the 40 days of fasting before Easter.

Most of the time every household back home would bake two kinds of bread: the dough would be divided in half, and one kind is pinca bread, and is shaped like a regular round type of bread, but with cross-shaped incision on the top (representing Christ’s Crucifixion), and the other kind of bread, using the other half of the dough, is tičice, the braided variation with a hard boiled egg.

I am sharing here the recipe for this very traditional Easter sweet bread that has been made in my family for generations, it will make your holiday even more special!

Recipe

Method

This recipe will make 2 braided breads.

To make sweet bread plait, follow the recipe for basic sweet bread (pinca).

After the dough has risen and doubled in volume, remove it from the bowl.

Tip it onto a lightly floured surface and divide the dough in half.

Divide one half of the dough into 3 equal parts (cover the other half of the dough with the tea towel to prevent it from drying).

Roll each piece of the dough into 3 logs.

View fullsize Ticice 1.jpg
View fullsize Ticice 2.jpg

Join and pinch the ends of all 3 logs together to start shaping them into a braid.

View fullsize Ticice 3.jpg
View fullsize Ticice 4.jpg

Pinch the opposite end of the braided dough together.

View fullsize Ticice 5.jpg
View fullsize Ticice 6.jpg

Place it on a baking tray previously lined with baking parchment.

Repeat the process with the other half of the dough.

Decorate the plait with hard boiled eggs (you can use the eggs previously decorated and dyed, see my recipe how to decorate and dye the eggs, Easter Eggs Dyed with Onion Skins Recipe). Place hard boiled eggs at the end part of the braid, pressing down a bit, almost creating a little nest where the egg can sit.

Brush both plaits with the egg whites.

Allow braided loaf to rise in warm, draft free, room for about 1 hour.

View fullsize Ticice 7.jpg
View fullsize Ticice 8.jpg

Bake in the preheated oven at 180C for about 30 minutes, tent it with the aluminium foil halfway through if the top starts browning too much.

Once baked, take from the oven.

Transfer on a cooling rack and let it cool a bit.

Best served fresh still a bit warm.

Just a thought

Best eaten freshly baked on the same day.

Store leftover sweet bread in an airtight container for up to three-four days.

You can toast the slices and enjoy them with butter, jam, peanut or almond butter or use it to make French toast or bread and butter pudding, delicious!

Wine suggestion

Fior d'arancio Colli Euganei Spumante Dolce DOCG 2021 - Alla Costiera

April 07, 2023 /tina oblak
Braided sweet bread, plaited sweet bread, Easter sweet bread, Easter sweet braided bread, Easter sweet plaited bread, Tičice, celebratory sweet bread, yeasted dough, enriched dough
Adriatic Recipe, baking, breakfast, brunch, celebratory desserts, Celebratory dish, child friendly dish, dessert, Easter, Easter recipes, Easter treats, easy baking, Easy recipe, Enriched dough, festive bakes, festive dessert, festive sweet things, home baking, Istrian cuisine, Istrian food, Istrian gastronomy, Rustic dish, Slovenian cuisine, Slovenian Easter Sweet Br, Slovenian food, Slovenian gastronomy, Spring recipe, Sweet bread, sweet course, sweet finger food, sweet nibbles, Sweet Things
Comment
Share

Easter Eggs Dyed with Onion Skins Recipe

Beans and Sardines
March 29, 2023 by tina oblak in Adriatic Recipe, breakfast, brunch, Canapés, Celebratory dish, Easter, Easter recipes, Easter treats, Easy recipe, foraging, Fresh herbs, Istrian cuisine, Istrian gastronomy, Rustic dish, savory nibbles, simple recipe, Slovenian cuisine, Slovenian food, Slovenian gastronomy, Small bites, Snacks, Spring recipe, Starters

The tradition and the roots of dyeing the eggs over the Easter Period of celebrations now might be linked by many to modern and commercial aspect of Easter, but as a matter of fact, it takes us back to the history of the celebration of these events. It is believed that the custom of dying or colouring Easter Eggs started with the early Christians in Mesopotamia.

The eggs were dyed in various colours to represent and symbolise different aspects of the Easter story, yellow represents the resurrection, blue represents love and red represents the blood of Jesus Christ that was shed on the Cross for the sins of the world.

This tradition would spread over time through Catholic and Protestant churches in Europe, even though in pagan cultures eggs were a symbol of rebirth and fertility, and the arrival of Spring. It is another example of the early Church adapting, transforming existing pagan rites, and rituals to the Christian story and its message for the world.

In Slovenian Istra, where I come from, and all the regions of Slovenia, dying eggs during the Easter festivities is a deeply rooted tradition and has passed, luckily, the tests of modern times; Christians and non-Christians can get involved with this fun and family friendly activity. One of the most popular and inexpensive way to colour the eggs is using onion skins.

I am sharing here how the eggs have been decorated with fresh herbs leaves and flowers and dyed with onion skins in my family for generations.

The beautifully decorated and dyed eggs would be put in a wicker basket together with cooked ham, sweet Easter Bread (Pinca) and taken to Mass on Holy Saturday or early on Easter Sunday to be blessed, and only after being blessed, the food was taken from the basket, shared and enjoyed.

Recipe

In this recipe I am using different types of leaves from fresh herbs to decorate the eggs before dying them. If you are short of time however, or not feeling up to the task, you can easily skip the step of decorating the eggs and just colour them, and they will be equally beautiful.

Ingredients

  • 12 eggs at room temperature (white or brown shell eggs or a mixture of both). You can easily change the quantity of the eggs used according to your needs.

  • big mixing bowl full of dry onion skins (from yellow or red onions or a mixture of both), roughly 3-4 handfuls

  • 2 Tbsp white vinegar

  • 1 egg white

  • a selection of fresh herbs and flowers (from the garden or a meadow)

You will also need

  • some old ladies’ nylon tights (quite thin,15 Denier or less)

  • scissors

  • cotton thread or thin string

  • paint brush

  • a big pot

  • vegetable oil

Method

Cut the tights into 10-15cm wide strips (this size of the “pocket” should accommodate nicely the egg)

Lightly brush the inside of the herb leaf or flower with a paint brush dipped in egg white.

Gently place it on the egg, press it lightly to help it stick.

Brush the edges of the herb leaf or flower with the egg white so it adheres better to the egg (preventing the herb or flower moving around). Leave to dry just for a few minutes.

View fullsize Easter Eggs Dyed with Onion Skins Recipe 7.jpg
View fullsize Easter Eggs Dyed with Onion Skins Recipe 8.jpg

Carry on with the process until you decorate all the eggs with herb leaves or flowers.

Place the decorated egg inside the tights strip, wrap it tightly around the egg, this will allow the decoration to stay in place and not move around (you will need to stretch it a bit and adjust the strip of tights).

Tie the end with a thread or a thin string, or stretch the tights pocket a bit and make a knot.

View fullsize Easter Eggs Dyed with Onion Skins Recipe 13.jpg
View fullsize Easter Eggs Dyed with Onion Skins Recipe 14.jpg

Put half of the onion skins in the pot.

Place decorated and prepared eggs into a pot on top of the onion skins.

View fullsize Easter Eggs Dyed with Onion Skins Recipe 16.jpg
View fullsize Easter Eggs Dyed with Onion Skins Recipe 17.jpg

Cover the eggs with the remaining onion skins.

Add cold water so the eggs are completely covered and submerged in water.

Pour two tablespoons of white vinegar.

Bring to boil.

Turn the heat down and gently simmer for about 30 minutes.

View fullsize Easter Eggs Dyed with Onion Skins Recipe 18.jpg
View fullsize Easter Eggs Dyed with Onion Skins Recipe 19.jpg

Turn the heat off and leave the eggs to cool completely.

Allow the eggs to soak (check the eggs for desired colour).

You can leave the eggs to colour for about 4-6 hours, you can leave them to colour for longer or overnight (I leave mine overnight for practical reasons). The longer you leave them to soak, the darker they will get. You can also remove half of the eggs after a few hours and the rest of the eggs the following day (in this case you will end up with some eggs being lighter in colour compared to the ones that were left to soak for longer).

Remove the eggs form the pot.

Cut off the tights with the scissors, remove decorative herbs with the help of some kitchen paper.

View fullsize Easter Eggs Dyed with Onion Skins Recipe 21.jpg
View fullsize Easter Eggs Dyed with Onion Skins Recipe 22.jpg

Dry the eggs with kitchen paper.

If desired, wipe gently the eggs with a bit of vegetable oil. This will give them a beautiful shine.

Display the eggs in the basket.

March 29, 2023 /tina oblak
onion skins, onion peel, natural egg dyes, dyed Easter eggs, fresh eggs, white shell eggs, brown shell eggs, dry onion skins, make ahead, make in advance, family activity, chiled friendly cooking, child friendly cooking, fresh meadow herbs, fresh garden herbs, Easter eggs, Decorating easter eggs, colouring easter eggs, Easter festivity, Easter celebration, Easter traditions
Adriatic Recipe, breakfast, brunch, Canapés, Celebratory dish, Easter, Easter recipes, Easter treats, Easy recipe, foraging, Fresh herbs, Istrian cuisine, Istrian gastronomy, Rustic dish, savory nibbles, simple recipe, Slovenian cuisine, Slovenian food, Slovenian gastronomy, Small bites, Snacks, Spring recipe, Starters
Comment
Share

Austrian Style Sweet Pull Apart Yeast Buns Recipe

Beans and Sardines
March 09, 2023 by tina oblak in Adriatic Recipe, All year round recipe, Austrian inspired dishes, Autumnal dish, Autumnal recipe, baked dish, baking, breakfast, brunch, Central European recipes, child friendly dish, child friendly meal, dessert, Eastern European recipes, easy baking, Easy recipe, Enriched dough, family friendly dish, home baking, Istrian cuisine, Istrian dish, Istrian food, Istrian gastronomy, Mitteleuropean cuisine, Mitteleuropean dish, Mitteleuropean food, Mitteleuropean recipes, pudding, Rustic dish, simple recipe, Slovenian cuisine, Slovenian food, Slovenian gastronomy, Snacks, Sweet bread, sweet course, sweet finger food, sweet nibbles, Sweet Things

These soft, fluffy and airy sweet yeast buns are filled with apricot jam and are simply irresistible. This baked treat is similar to a crown loaf, it breaks into 12 individual rolls which makes it perfect for sharing, and they transport very well to take on a picnic.

As soon as they are baked the outside is lightly golden and slightly crispy but the crust becomes soft when the buns cool down.

They can be enjoyed as a dessert and are perfect for breakfast, great with tea or coffee, and kids love them as a snack, any time of the day, with a glass of milk or hot chocolate.

They are Austrian in origin (Buchteln plural form and Buchtel singular) where they are very commonly served with the vanilla sauce. These sweet buns are unknown to many people, and because they are slightly off the beaten track, this makes them a bit of an undiscovered treasure. However, they are very popular in Slovenia which borders Austria, and was once part of Austro-Hungarian Empire.

I remember that these buns were baked in school for our mid morning snack, accompanied by a hot drink. The aroma of freshly baked buhteljni (this is what they are called in Slovenian) would travel through the corridors into the classrooms – disrupting at times our concentration! Indeed, just before the break we children would get so excited the teachers found it almost impossible to contain us.

Here I am sharing the recipe of my maternal grandmother, stara mama Iva, she baked them often on a regular basis, they went down as a real treat every single time, and she never seemed to bake enough of them...

Recipe

Ingredients

This recipe makes 12 buns

  • 400g all purpose (plain) flour

  • 40g butter, melted and slightly cooled

  • pinch of sea salt

  • finely grated lemon zest of one unwaxed lemon

  • ½ Tsp vanilla extract

  • 2 medium eggs, at room temperature

  • 140ml semi-skimmed or full fat milk, lukewarm

  • 60g caster sugar

  • 5g (1 ½ Tsp) dry fast-action yeast

  • apricot jam or a jam of your preference for the filling

For the glaze

  • 40g melted unsalted butter for the brushing

For serving

  • icing sugar or vanilla icing sugar for dusting

Method

Put the sifted flour in a large mixing bowl and add the sea salt to one side of the bowl.

Make a well, pour in lukewarm milk and add the yeast.

View fullsize Buhteln 1.jpg
View fullsize Buhteln 2.jpg

In a separate smaller bowl, add the eggs and whisk them lightly. Add the sugar, melted and slightly cooled butter, and vanilla extract.

Pour the egg mixture to a big mixing bowl and add finely grated lemon zest.

View fullsize Buhteln 3.jpg
View fullsize Buhteln 4.jpg

Stir the mixture with the fork first so all the ingredients come together, incorporate, and combine well to make a fairly sticky dough.

Tip the dough into a lightly floured working surface and knead by hand for about 10-15 minutes, adding a little extra flour if needed.

The dough should be very soft, shiny and elastic.

View fullsize Buhteln 5.jpg
View fullsize Buhteln 6.jpg

Transfer the dough to a large lightly oiled container or bowl. Cover tightly with cling film and leave to rise in a warm place for about at least 1 hour, or until the dough has doubled in size.

Form into a sausage and divide into 12 equal pieces.

Flatten them to the thickness of about 1cm to obtain mini pizza shaped discs. You can do this by using floured rolling pin or stretch the dough with your hands.

Put one teaspoon of apricot jam in the centre, on top of each circle, and close the ends well. Do not try to be overgenerous with the jam, if the filling gets on the edges of the disc, it is almost impossible to seal them because the dough will stop sticking. Wrap the dough around the filling, pinching and sealing it tightly You should end up with 12 parcels.

View fullsize Buhteln 8.jpg
View fullsize Buhteln 9.jpg

Lightly grease a 23cm round, deep springform cake tin. You can use other shapes of baking trays, just make sure they are greased to prevent the buns from sticking.

Place the parcels, one next to each other, so they are snug and touching with the seam side down in a non stick baking tray. Melt the butter and brush the top and all the sides.

View fullsize Buhteln 10.jpg
View fullsize Buhteln 11.jpg

Leave to proof for a second time, for about 30min, by covering them with a clean kitchen cloth in a warm room with no draft until they are nicely risen and puffed up.

Bake at 180º static in the preheated oven, on the middle shelf, for about 30minutes or until a skewer inserted into the centre comes out clean.

The buns should be lightly golden on top and well risen.

Leave in the tin for about 5 minutes, then release the sides of the tin.

View fullsize Buhteln 13.jpg
View fullsize Buhteln 14.jpg

Remove and place the sweet buns to a wire rack to cool.

Dust the buns with regular or vanilla icing sugar and enjoy.

March 09, 2023 /tina oblak
sweet buns, pull apart sweet buns, jam filled buns, sweet crown bread, Buchteln, Buchtel, buhteljni, yeast buns, sweet dough, make ahead, pick me up treat, picnic food
Adriatic Recipe, All year round recipe, Austrian inspired dishes, Autumnal dish, Autumnal recipe, baked dish, baking, breakfast, brunch, Central European recipes, child friendly dish, child friendly meal, dessert, Eastern European recipes, easy baking, Easy recipe, Enriched dough, family friendly dish, home baking, Istrian cuisine, Istrian dish, Istrian food, Istrian gastronomy, Mitteleuropean cuisine, Mitteleuropean dish, Mitteleuropean food, Mitteleuropean recipes, pudding, Rustic dish, simple recipe, Slovenian cuisine, Slovenian food, Slovenian gastronomy, Snacks, Sweet bread, sweet course, sweet finger food, sweet nibbles, Sweet Things
Comment
Share

Carnival Sweet Crackers Istrian Recipe

Beans and Sardines
February 15, 2023 by tina oblak in Adriatic Recipe, baking, bite-sized nibbles, breakfast, celebratory desserts, Celebratory dish, dessert, Easy recipe, Enriched dough, festive bakes, festive dessert, festive dish, festive sweet things, Finger food, Istrian gastronomy, Pastry, pudding, Rustic dish, simple recipe, Slovenian cuisine, Slovenian gastronomy, Small bites, Snacks, sweet finger food, sweet nibbles, Sweet Things

These delicate, fragile, irresistible and crispy pastries are traditionally associated with Carnival (Pust in Slovenian), and they are super tasty, so light and flaky that they just simply melt in your mouth.

They have a deep connection with Christian, especially Catholic, liturgical festivities like the Carnival season, the time of the year in which eating in excess, and gastronomic indulgence was allowed by the Church before the start of fasting and austerity during Lent, culminating with the Easter celebrations.

To make this crumbly sweet dessert is very easy, sweet dough is rolled out very thinly, it then gets very quickly fried, and it is during the frying process that this wafer thin rectangles of pastry contort into the strangest shapes. When they cool down completely they get covered in a generous dusting of icing sugar to delight children and grown-ups alike.

Together with fritole and jam filled doughnuts they are a very common sight in the pastry shop windows offering to by-passers a very cheerful Carnival atmosphere.

There are many different names for these sweet wafer-like treats throughout Italy, bugie in Piedmont, frappe or sfrappole in Emilia, cenci and donzelle in Tuscany, chiacchiere and lattughe in Lombardy to name just a few.

It is believed that they originated in the region of Veneto, where they are known as Galani or Crostoli, although their origin is being disputed and other Italian regions have claimed the credit for them.

On the coastal part of Slovenian Istra, once being part of what was called, “The most Serene Republic of Venice,” these sinfully delicious and and fragrant little delights are almost a symbol of the Carnival season, and are called, and known by the locals as hroštole, hroštule or krhki flancati in standard Slovenian.

Traditionally, they are made in quite large quantities as they are meant to last for the whole period of Lent, you will find them in rectangular shapes, but the strips of dough can be cut in different shapes like diamonds or squares, you can cut thinner strips and make knots (bows) or create rafioi (or rafioji) folded like ravioli biscuits that use jam or preserve as a filling.

These sweet Carnival temptations have been part of my life. My nona used to make them every year in huge quantities, and I am sharing here her recipe, and her little secret, she adds a bit of single cream to the dough mixture...

Recipe

Ingredients

  • 250g all purpose flour (white plain flour)

  • 3 egg yolks (room temperature), lightly beaten

  • 2 Tbsp milk

  • 3 Tbsp dark rum or grappa (can use Marsala, brandy or similar)

  • finely grated lemon zest of 1 unwaxed lemon

  • 2Tbsp lemon juice

  • 50g sugar (caster or granulated)

  • pinch of sea salt

  • vanilla icing sugar or plain icing sugar, for dusting, to serve

  • oil for frying

Method

Sift the flour in a fairly large mixing bowl and add lightly beaten egg yolks, milk, rum or grappa, finely grated lemon zest, lemon juice, sugar and a pinch of sea salt.

View fullsize Crostoli 1.jpg
View fullsize Crostoli 2.jpg

Mix well with the fork to incorporate all the ingredients, then gather with your hands to form a fairly firm dough.

Adjust the wetness of the dough by either adding a little flour at the time if the dough is too wet, and on the contrary, gradually adding a bit of milk if the dough is too dry.

View fullsize Crostoli 3.jpg
View fullsize Crostoli 4.jpg

Transfer the dough onto a working surface and work the pastry mix quite intensely for about 10-15 minutes. You should end up with a smooth and elastic dough that does not stick to your hands or the surface, it should be firm, bur fairly soft to the touch.

Shape it into a ball and wrap in cling film and leave it to rest at room temperature for at least 30 minutes, ideally about 1 hour.

Divide the dough into smaller portions (about 150g).

If you have a pasta machine, this is the time to use it, alternatively a rolling pin will do the job just fine.

With the palm of your hand flatten slightly the first portion of the dough.

Sprinkle with a little bit of flour and roll it out with the pasta machine to the widest thickness.

View fullsize Crostoli 6.jpg
View fullsize Crostoli 7.jpg

Fold the short sides of the sheet of dough towards the centre.

View fullsize Crostoli 9.jpg
View fullsize Crostoli 10.jpg

Continue to roll the sheet of dough using an increasingly thinner setting on the pasta machine each time.

Stop rolling when you reach the last and the thinnest setting, and the dough sheet reaches the thickness of about 2mm.

Repeat the process with the remaining portions of the dough.

If you are using rolling pin, roll each portion of the dough to the thickness of a coin, roughly 2mm.

Using a knife or a pastry (cutting) wheel, cut the rolled sheets of dough into rectangles (about 5 x 10 or 2-inch x 4-inch).

Make a couple of incisions in the middle of each strip (parallel to the long side on each one).

This will help the sweet crackers to expand during frying.

View fullsize Crostoli 12.jpg
View fullsize Crostoli 13.jpg

Strips of dough can be cut in different shapes, you can cut thinner strips and make knots (bows).

View fullsize Crostoli 18.jpg
View fullsize Crostoli 19.jpg

You can also create rafioi (or rafioji) folded like ravioli biscuits (to make these, you do not want your pastry to be rolled out too thin). Cut out circles (size of your preference). Place a dab of jam or preserve of your choice in the centre of each circle, fold in half. Pinch well to close and fry.

View fullsize Crostoli 14.jpg
View fullsize Crostoli 15.jpg
View fullsize Crostoli 16.jpg
View fullsize Crostoli 17.jpg

Heat the oil in a frying pan, bring it to the temperature of 170° C.

When the oil reaches the right temperature, place 2-3 (this will depend on the size of your frying pan) rectangles of the dough into the oil.

Fry them turning them on both sides until they are golden brown.

View fullsize Crostoli 24.jpg
View fullsize Crostoli 25.jpg

With the help of slotted spoon or a skimmer remove the crackers.

Place them on a tray or a big plate previously lined with kitchen paper allowing to drain.

View fullsize Crostoli 27.jpg
View fullsize Crostoli 28.jpg

Allow to cool completely, sprinkle with plenty of icing sugar.

Pile them in criss-cross layers on a plate and serve.

They are very fragile so be careful not to break them.

And be mindful of the fact that when you eat them you will be, almost inevitably, covered slightly in a bit of crumbs and icing sugar, is all part of the experience, it is Carnival after all!

Just a thought

These sweet Carnival crackers are best enjoyed as soon as they are made.

They can be stored for about 2-3 days in an airtight containers.

February 15, 2023 /tina oblak
Carnival sweet crackers, Pust, Carnevale, Carnival, Carnival sweet treats, fried sweet pastry, bugie, frappe, sfrappole, cenci, donzelle, chiacchiere, lattughe, hroštoli, hroštule, krhki flancati, rafioi, rafioji, Carnival season sweets
Adriatic Recipe, baking, bite-sized nibbles, breakfast, celebratory desserts, Celebratory dish, dessert, Easy recipe, Enriched dough, festive bakes, festive dessert, festive dish, festive sweet things, Finger food, Istrian gastronomy, Pastry, pudding, Rustic dish, simple recipe, Slovenian cuisine, Slovenian gastronomy, Small bites, Snacks, sweet finger food, sweet nibbles, Sweet Things
Comment
Share

Ricotta or Curd Cheese Strudel Recipe

Beans and Sardines
January 25, 2023 by tina oblak in Adriatic Recipe, breakfast, Central European recipes, dessert, Eastern European recipes, easy baking, Easy recipe, Istrian cuisine, Istrian food, Istrian gastronomy, Mitteleuropean cuisine, Mitteleuropean food, Mitteleuropean recipes, pudding, Slovenian cuisine, Slovenian food, Slovenian gastronomy, Snacks, sweet course, sweet finger food, sweet nibbles, Sweet Things

Ricotta cheese strudel is a variation of a traditional, well known and quintessentially Viennese Apple Strudel, it is a very scrumptious dessert, made with very thin, elastic pastry, and the filling contains ricotta or curd cheese, sugar, vanilla bean extract, eggs yolks, grated lemon zest and raisins soaked in dark rum, grappa or just lukewarm water.

Apple strudel was first mentioned in 1696, and later conquered all the countries that were once ruled by the Austro-Hungarian Empire, and curd cheese strudel is as popular and traditional in Austria as the famous Apple strudel.

All three types of strudels (apple, curd cheese and cherry) are very much loved in the North Adriatic, in Slovenian Istra, where I come from, and in the neighbouring city of Trieste, in Italy, and part of its province.

Ricotta strudel is regularly and traditionally baked with curd cheese (called skuta in Slovenian) in local households, and sometimes, if you are lucky enough, you might find it in more informal family run restaurants (skutin štrudelj or skutin zavitek).

This very delicious sweet treat really takes me back to my childhood, not only my mother frequently baked it, we also had it for school dinner as a pudding, and it did go down a treat.

I am sharing here my mother's recipe for ricotta strudel, this slightly off the beaten track recipe, made with home made pastry, but if you are too daunted by the idea of making your own dough, or simply do not have time to make it, you can still indulge yourself, and cut corners a bit by using store bought ready made pastry.

Recipe

Ingredients

Will make two separate strudels.

You can use store bought ready made puff pastry, shortcrust or filo pastry.

Ingredients for home-made strudel dough

  • 250g all purpose flour

  • 1 egg, lightly beaten

  • 3 Tbsp neutral tasting vegetable oil (I used sunflower oil)

  • 2 Tbsp white wine vinegar or lemon juice

  • sea salt, a pinch

  • 60ml lukewarm water, or as needed

Ingredients for ricotta or curd cheese filling

  • 500g ricotta or curd cheese

  • 100g raisins

  • 2 egg yolks

  • 80g caster sugar (I recommend 100g of sugar if using curd cheese as more acidic compared to ricotta)

  • 1 ½ vanilla bean extract

  • 1 unwaxed lemon, finely grated zest

  • 3 Tbsp dark rum, grappa or lukewarm water (for soaking the raisins)

  • generous knob of butter, melted (for brushing the strudels before baking them)

Method

Before starting with the recipe, place the raisins in a small bowl, pour dark rum, grappa or lukewarm water over them, and let them soak and plump up for about 30 minutes (you can leave them to soak for longer or overnight).

To make the dough

Sift the flour in a big mixing bowl and make a well.

In a separate, smaller bowl, mix slightly beaten egg, oil, vinegar or lemon juice, (the acidity will help to relax gluten in the flour making the dough more stretchy) a pinch of sea salt, and lukewarm water. Pour the mixture into a flour well.

With the fork, stir the mixture with the flour until well combined. Only if the mixture is very wet and sticky, add a little bit of flour at a time, until the dough comes nicely together, then work the dough with your hands.

Transfer the dough on a lightly floured working surface and knead the dough for about 10 minutes or until nice and smooth.

After this time, the dough should be moist and elastic and not sticky. Add a little more flour if the dough is too sticky to knead.

In order to further encourage the development of the gluten, resulting in a very elastic dough, slam the dough onto the working surface a few times.

Shape the dough into a smooth ball and place it in a clean bowl, previously brushed with oil.

Cover the bowl with cling film and let the dough rest for about 30-60 minutes at room temperature (strudel dough has no yeast, so do not expect the dough to rise or double in size, it needs to rest for gluten to relax).

View fullsize Apple Strudel 4.jpg
View fullsize Apple Strudel 5.jpg

To make the filling

Place ricotta or curd cheese in a fairly large bowl and stir.

Add caster sugar, vanilla bean extract, egg yolks, grated lemon zest and mix well all the ingredients.

View fullsize Ricotta strudel 1.jpg
View fullsize Ricotta strudel 2.jpg

Drain the raisins, remove excess liquid, add to the mixture.

Set aside for later use.

Preheat the oven to 190C static or equivalent.

View fullsize Ricotta strudel 3.jpg
View fullsize Ricotta strudel 4.jpg

Divide the dough in half to make two separate strudels (easier to work with).

Place half of the dough on a clean and lightly floured table cloth. Flour the rolling pin and start rolling out the dough. While rolling, to prevent sticking, flour the dough and the surface every now and then.

When the dough reaches about 20 cm in diameter pick it up and keep stretching it. The best way to do so is to use the back of your hands, and in particular the knuckles, but make sure you remove any sharp jewellery first.

When the dough becomes difficult to handle as it becomes bigger and thinner, place it on a lightly floured tablecloth.

With your hands (tip of the fingers) keep stretching gently the dough on the tablecloth to paper thin consistency, from the inside to the outside working your way round the sheet of dough.Keep stretching until the sheet of dough starts to look almost translucent and you will be able to see a pattern of your tablecloth through it.You should end up with a thin sheet of dough stretched more or less into a rectangular shape with a diameter of approximately 40 cm which will fit into a standard 40 cm baking tray.

If you notice that the edges are still a bit thick, stretch them further very gently, or cut them off. If you leave the edges thick, when rolling the strudel, they will form quite a thick layer at the very centre of the strudel risking to remain slightly underbaked.

View fullsize Ricotta strudel 5.jpg
View fullsize Ricotta strudel 6.jpg

Place and spoon evenly half of the ricotta mixture (you will use the other half of the mixture to make a second strudel) over ¾ of the dough sheet leaving about 2-3cm to the edge.

View fullsize Ricotta strudel 8.jpg
View fullsize Ricotta strudel 9.jpg

Fold in the side ends of the sheet to prevent filling coming out during rolling.

Fold in the side ends of the sheet to prevent filling coming out during rolling.

Using the tablecloth to help you, roll the dough all the way and roll it directly onto a sheet of baking parchment, seam side down.Transfer very gently the baking parchment with the rolled strudel on a baking tray.

Repeat the process with the other half of the dough to make a second strudel.

View fullsize Ricotta strudel 10.jpg
View fullsize Ricotta strudel 11.jpg

Brush both strudels with a bit of melted butter.

View fullsize Ricotta strudel 12.jpg
View fullsize Ricotta strudel 13.jpg

Bake in the preheated oven on the middle shelf for about 40-45 minutes, or until the strudel crust turns nice golden in colour.

Take it out of the oven and let it cool a bit.

Serve it slightly warm or at room temperature.

Dust with regular icing sugar or vanilla icing sugar, cut into slices and serve it on its own or with custard.

Just a thought

You can make the strudel dough ahead and keep it refrigerated in an airtight container for up to two days. Before using the dough take it out of the fridge allowing it to come to a room temperature.

Ricotta strudel is best eaten the day is made. You can keep it in an airtight container in the fridge for 3-4 days or overnight on the counter.

You can make a less traditional version of this strudel and replace raisins for chocolate chips in the ricotta filling.

Wine suggestion

Colli Orientali del Friuli Verduzzo Sottozona Cialla DOC “Verduzzo di Cialla” 2017 - Ronchi di Cialla

January 25, 2023 /tina oblak
strudel pastry, home made strudel pastry, filo pastry, shortcrust pastry, ready made puff pastry, ricotta, ricotta cheese, curd cheese, raisins
Adriatic Recipe, breakfast, Central European recipes, dessert, Eastern European recipes, easy baking, Easy recipe, Istrian cuisine, Istrian food, Istrian gastronomy, Mitteleuropean cuisine, Mitteleuropean food, Mitteleuropean recipes, pudding, Slovenian cuisine, Slovenian food, Slovenian gastronomy, Snacks, sweet course, sweet finger food, sweet nibbles, Sweet Things
Comment
Share

Dried Fig and Walnut Bread Istrian Recipe

Beans and Srdines
December 21, 2022 by tina oblak in Adriatic Recipe, All year round recipe, Appetizers, baking, breakfast, brunch, Canapés, child friendly dish, child friendly meal, Christmas bakes, dessert, easy baking, Enriched dough, festive bakes, Istrian cuisine, Istrian dish, Istrian food, Istrian gastronomy, Rustic dish, simple recipe, Slovenian cuisine, Slovenian food, Slovenian gastronomy, Small bites, Snacks, Starters, sweet finger food, sweet nibbles, Sweet Things

This rustic, rich and dense loaf filled with dried figs and walnuts, will be a fantastic addition to your cheese platter, it is delicious toasted and buttered for breakfast, makes a nice foodie gift, and it is a great snack. Dried figs give a light sweetness to the bread while the walnuts add a very pleasant crunchy texture. If you are intimidated by bread making, I can assure you, this a foolproof recipe, there is nothing complicated about it!

My 96 year old nona told me that in Slovenian Istra, when she was small, the children were given a slice of this bread as a snack for a special treat. The locals call it in the dialect Pan de Fighi, and it was bought in bakeries, and not usually baked in the household, as one might think. Ripe fresh figs, when in full season at the end of the summer were sold in the Farmer's market which provided an extra income for the family.

Nowadays in Slovenian Istra, this bread is not commonly found in bakeries and supermarkets.

I am sharing here my nona's recipe for this super delicious, enriched, special bread.

Recipe

Ingredients

  • 500g white all purpose (plain) flour, plus extra for dusting and coating

  • 30g caster sugar

  • 10g (2Tsp) instant dried yeast

  • 260ml lukewarm milk or water (or half and half)

  • 60g unsalted butter, melted and slightly cooled

  • 1 Tsp sea salt

  • 150g dried figs, roughly chopped

  • 100g walnut kernels, roughly chopped

Method

With the knife roughly chop the walnuts.

Remove the hard stem from the figs, if there are any, and chop into smaller pieces.

Place the flour, sugar, yeast, milk (water or half and half) and butter in a large bowl. Stir with a fork or a wooden spoon to combine the ingredients then bring together with your hands.

Tip onto a lightly floured work surface, add sea salt and knead for about 10 minutes, pulling and stretching the dough, until it becomes smooth, elastic, and no longer sticks to your fingers or the surface.

View fullsize Dried Fig and Walnut Bread 3.jpg
View fullsize Dried Fig and Walnut Bread 4.jpg

Roll the dough, or press out to flatten slightly into a roughly rectangular or oval shape.

Top with chopped figs and walnuts.

View fullsize Dried Fig and Walnut Bread 6.jpg
View fullsize Dried Fig and Walnut Bread 7.jpg

Knead back into the dough.

Place the dough in a slightly oiled big bowl, cover with cling film (I use plastic shower cap) and leave it to rest in a warm, draught-free room for about 1 hour, or until the dough doubles in size.

View fullsize Dried Fig and Walnut Bread 9.jpg
View fullsize Dried Fig and Walnut Bread 14.jpg

Place the dough onto a lightly floured surface, knock the air out and shape it into a loaf, oval shape.

View fullsize Dried Fig and Walnut Bread 16.jpg
View fullsize Dried Fig and Walnut Bread 17.jpg

Put the loaf onto a baking tray, previously lined with baking parchment, cover with clean tea towel and leave to rest and prove for further 30 minutes, or until risen slightly.

Preheat the oven to 180C static or equivalent.

Sprinkle the top with a little extra flour.

Using a very sharp knife, make a shallow cut along the length of the loaf.

View fullsize Dried Fig and Walnut Bread 18.jpg
View fullsize Dried Fig and Walnut Bread 19.jpg

Bake for about 45 minutes, or until golden brown in colour.

If it browning too much tent the loaf with some aluminium foil.

When baked, the loaf should sound hollow when tapped on the base.

December 21, 2022 /tina oblak
bread, sweet bread, enriched bread, dried figs, walnut kernels, rustic bread, cheese board, make ahead
Adriatic Recipe, All year round recipe, Appetizers, baking, breakfast, brunch, Canapés, child friendly dish, child friendly meal, Christmas bakes, dessert, easy baking, Enriched dough, festive bakes, Istrian cuisine, Istrian dish, Istrian food, Istrian gastronomy, Rustic dish, simple recipe, Slovenian cuisine, Slovenian food, Slovenian gastronomy, Small bites, Snacks, Starters, sweet finger food, sweet nibbles, Sweet Things
Comment
Share

Apple Fritter Rings Istrian Recipe

Beans and Sardines
November 29, 2022 by tina oblak in Adriatic Recipe, All year round recipe, Appetizers, Austrian inspired dishes, Autumnal dish, Autumnal recipe, bite-sized nibbles, breakfast, brunch, Canapés, Central European recipes, child friendly dish, child friendly meal, dessert, Eastern European dishes, Eastern European recipes, Easy recipe, Finger food, Istrian cuisine, Istrian dish, Istrian food, Istrian gastronomy, Mitteleuropean cuisine, Mitteleuropean dish, Mitteleuropean food, Mitteleuropean recipes, pudding, Rustic dish, simple recipe, Slovenian cuisine, Slovenian food, Slovenian gastronomy, Small bites, Snacks, sweet finger food, sweet nibbles, Sweet Things

This is a simple and rustic sweet treat, yet very much loved apple dessert, and it is as popular with adults as it is with children, who seem never to get enough of it!

Apple fritter rings are incredibly easy and simple to make, apple slices are dipped into a type of pancake batter and then shallow fried to golden brown.

Apple fritters for me are a reminder of my childhood, and I am quite nostalgic about them, they take me right down the proverbial memory lane, and represent a quintessentially autumn dessert. My maternal grandmother would make these fritters on a regular basis, made from the apples grown in the family orchard.

Battered apple ring fritters have been very popular in Slovenian Istra where I come from, which was once part of the Habsburg Monarchy with Maria Theresa being its supreme ruler, and this is her recipe for apple fritters.

Take two eggs and a little wine. Make a batter. Cut the apples in cubes. Put in the batter. Let lard heat in a pan. In it pour your apples. Fry and turn them. Lift out and serve strewn with sugar.

(Maria Theresia Voigtin, 1724)

Rosl Philpot, Viennese Cookery, Hodder and Stoughton Ltd., London, 1965.

Whether you are using my family recipe or Maria Theresa's one, make this delicious apple based sweet treat, it is just a pure perfection in its simplicity.

Recipe

Ingredients

  • 500-600g roughly apples (any apples you like, but they need to be firm and be able to hold the shape when cut into rings)

  • 1 egg

  • 100ml milk

  • 2 Tsp sugar (10g)

  • 100g plain white flour

  • pinch of sea salt

  • ground cinnamon, to taste optional (added to the batter)

  • icing sugar or vanilla icing sugar for dusting

  • vegetable oil for frying

Method

In a medium bowl, whisk the egg, add a pinch of sea salt and sugar.

Pour in the milk and whisk together.

View fullsize Apple fritters 2.jpg
View fullsize Apple fritters 3.jpg

Slowly start adding the flour, bit by bit, and whisk well until you obtain a smooth batter with no lumps. Add ground cinnamon, if using, and whisk well.

Leave the mixture to rest for about 30 minutes, it will thicken a bit.

View fullsize Apple fritters 4.jpg
View fullsize Apple fritters 6.jpg

While the batter is resting, prepare the apples.

Wash, peel, core and slice the apples into rounds. (if you do not have the apple corer, you can remove the centre from the apple ring with a small round cookie cutter or just use the knife to cut out the centre core).

Add roughly 1cm of frying oil in a pan.

Heat the oil to 170C (use food thermometer if you have one).

Dip each slice in the batter and shake off any excess, then carefully lower the slices into the oil and fry on both sides until golden brown in colour.

View fullsize Apple fritters 10.jpg
View fullsize Apple fritters 11.jpg

Transfer onto a large plate or a dish previously lined with the kitchen paper to allow excess oil to absorb.

Dust with icing sugar.

Enjoy hot or at room temperature.

Wine suggestion

Alto Adige Moscato Giallo DOC 2021 - Kaltern

November 29, 2022 /tina oblak
apple fritter rings, apple fritters, battered apple rings, battered apple fritters, pancake battered apple rings
Adriatic Recipe, All year round recipe, Appetizers, Austrian inspired dishes, Autumnal dish, Autumnal recipe, bite-sized nibbles, breakfast, brunch, Canapés, Central European recipes, child friendly dish, child friendly meal, dessert, Eastern European dishes, Eastern European recipes, Easy recipe, Finger food, Istrian cuisine, Istrian dish, Istrian food, Istrian gastronomy, Mitteleuropean cuisine, Mitteleuropean dish, Mitteleuropean food, Mitteleuropean recipes, pudding, Rustic dish, simple recipe, Slovenian cuisine, Slovenian food, Slovenian gastronomy, Small bites, Snacks, sweet finger food, sweet nibbles, Sweet Things
Comment
Share

Rustic Apple Pie Squares Istrian Recipe 

Beans and Sardines
November 02, 2022 by tina oblak in Adriatic Recipe, Autumnal dish, Autumnal recipe, baked dish, baking, bite-sized nibbles, breakfast, Canapés, child friendly dish, dessert, easy baking, Easy recipe, Finger food, Istrian cuisine, Istrian dish, Istrian food, Istrian gastronomy, pudding, Rustic dish, simple recipe, Slovenian cuisine, Slovenian food, Slovenian gastronomy, Small bites, Snacks, sweet course, sweet finger food, sweet nibbles, Sweet Things

This quintessentially autumnal and rustic apple sweet treat is made with mouth-watering crumbly butter dough and apple pure filling,  it is baked in rectangular baking trays, and when completely cooled it is cut into squares. 

It is easy to prepare, inexpensive and becomes a delicious dessert when served warm with some cream or vanilla ice cream, goes very well with tea or coffee and makes an excellent snack. Apple bars, when placed in biscuit tin, can also make a lovely present or a pick-me-up gift for someone special. 

When apples are in season, apple pie squares are baked on a regular basis,  and it is one of the most commonly baked sweet treats in Autumn, not only along the Slovenian coast, where I come from, but in every corner of the country, and also very popular in neighbouring Croatia. 

This good old-fashioned bake from childhood is given to the children as an afternoon snack after school, and in Slovenian it is referred to as  Jabolčna pita. It is commonly baked in households, and is sometimes even offered in more informal family run restaurants, and comes with a few variations. 

For extra texture and taste you can add to the apple filling mixture some pine nuts, roughly chopped walnuts or some raisins and a bit of ground cinnamon and /or ground cloves, and adding an extra layer of curd cheese or ricotta is quite common too. 

My maternal grandmother would bake this pie almost on a weekly basis as my grandfather had an orchard with apple tress, like a lot of households have in the countryside, with abundant varieties of apples, which were often shared in the village or community. 

I am sharing here my mother's recipe for this slightly different, off the beaten track recipe, for Apple Pie Squares. No matter if you picked your own apples, or are given some, or you buy them in the food store, bake this delicious pie and you will come back to it, time and time again. You will see, smell, and taste why there is a reason this pie has been baked and loved for generations! 

Ingredients 

Dough 

  • 400g plain flour 

  • 150g butter 

  • 1 Tsp baking powder 

  • 100g caster sugar 

  • 1 egg, slightly beaten 

  • 1-2 Tbsp milk 

  • lemon zest of 1 unwaxed lemon, finely grated 

  • pinch of sea salt 

Filling 

  • 1.5kg apples 

  • 2 Tbsp caster sugar (quantity of the sugar depends on the sweetness of the apples) 

  • lemon juice of 1 small lemon

  • 1 Tsp of ground cinnamon or cloves (optional) 

  • icing sugar, for dusting 

Method 

Very lightly grease a 30 x 23 cm (12 x 9 in) traybake or roasting tin. 

To make the pastry, measure the flour into a large bowl and add diced butter. 

Using your fingertips, rub the butter until the mixture resembles breadcrumbs.

View fullsize Apple pie bars 3.jpg
View fullsize Apple pie bars 4.jpg

Make a well in the centre of the flour, then add baking powder, sea salt, caster sugar, beaten egg, finely grated lemon zest and the milk. First gently mix with the fork to combine all the ingredients, and for the mixture to come together. 

View fullsize Apple pie bars 5.jpg
View fullsize Apple pie bars 6.jpg

Gently gather the dough with your hands and transfer it onto a lightly floured surface. 

View fullsize Apple pie bars 7.jpg
View fullsize Apple pie bars 8.jpg

Gently press the dough, without kneading it, until it comes together to form a firm ball. 

If too wet add a bit of flour, if too dry wet your hand with cold water and gently knead. 

Press the dough into a roughly rectangular shape (this will help later to roll out the pastry).Wrap in cling film and leave to rest in the fridge for about 30 minutes.

View fullsize Apple pie bars 10.jpg
View fullsize Apple pie bars 11.jpg

Preheat the oven to 180C static or equivalent and prepare the apple filling. 

To make the apple filling peel and coarsely grate the apples, place them in a bowl and add lemon juice.

Add caster sugar and spices, if using, and mix well. 

Transfer the apple mixture into a large frying pan and cook the apples on a gentle heat, stirring occasionally, until they become completely soft, mushy and have a consistency of apple puree.

Turn the heat off and set aside. Taste and adjust sweetness of the filling to your liking by adding more sugar. 

View fullsize Apple pie bars 13.jpg
View fullsize Apple pie bars 14.jpg

 Take the dough out of the fridge and divide it in half. 

On a slightly floured surface, with the rolling pin, roll out each half into roughly the size and shape of four baking tray.

View fullsize Apple pie bars 15.jpg
View fullsize Apple pie bars 16.jpg

Press one rectangle into the bottom of a baking dish. 

If the dough comes up the sides a bit, do not worry, just tuck it in a bit and press down. 

View fullsize Apple pie bars 17.jpg
View fullsize Apple pie bars 19.jpg

Spoon the apple filling.

View fullsize Apple pie bars 20.jpg
View fullsize Apple pie bars 21.jpg

Cover with the other half of the dough, tuck it in a bit, and prick the pie crust with a fork. 

View fullsize Apple pie bars 22.jpg
View fullsize Apple pie bars 23.jpg

Put it in the oven and bake for about 45 minutes or until the top layer is pale golden in colour. 

Cool completely, dust with icing sugar and cut into squares. 

You can enjoy it warm with cream or vanilla ice cream but you will not be able to cut them into bars, as the apple pie, when still warm, is quite soft and crumbly. 

November 02, 2022 /tina oblak
Rustic Apple Pie, Apple pie squares, Apple pie bars, apple pie with apple pure, Jabolčna pita, apples, fresh apples, apple pure, sweet shortcrust pastry
Adriatic Recipe, Autumnal dish, Autumnal recipe, baked dish, baking, bite-sized nibbles, breakfast, Canapés, child friendly dish, dessert, easy baking, Easy recipe, Finger food, Istrian cuisine, Istrian dish, Istrian food, Istrian gastronomy, pudding, Rustic dish, simple recipe, Slovenian cuisine, Slovenian food, Slovenian gastronomy, Small bites, Snacks, sweet course, sweet finger food, sweet nibbles, Sweet Things
Comment
Share

Sautéed Mushrooms with onions, garlic and fresh parsley Istrian Recipe

Beans and Sardines
October 26, 2022 by tina oblak in Adriatic Recipe, Appetizers, Autumnal dish, Autumnal recipe, bite-sized nibbles, breakfast, brunch, Canapés, casserole, child friendly dish, child friendly meal, dinner, Easy recipe, entrée course, family friendly dish, family friendly meal, Finger food, first course, first course dish, first course meal, foraging, Healthy, healthy mael, hearty dish, Istrian cuisine, Istrian dish, Istrian food, Istrian gastronomy, main course, main dish, main vegetarian course, main vegetarian dish, main vegetarian meal, Nutritious, Nutritious dish, Rustic dish, savory nibbles, Side Dishes, simple recipe, Slovenian cuisine, Slovenian food, Slovenian gastronomy, Small bites, Snacks, supper, Vegan, Vegetable side dish, Vegetables, Vegetarian

Sautéed mushrooms in olive oil with onions, garlic and fresh parsley is super delicious in its simplicity, it is vegetarian and vegan friendly, and one of the most versatile dishes.

The Slovenian coast, where I come from, this is the most traditional way of eating sautéed mushrooms. It can be served on a bed of soft cooked or grilled polenta or with scrambled eggs and some rustic crunchy bread to go with it.

This nourishing delicacy with its intense flavour is a fantastic side dish alongside roasted chicken, pan fried chicken breast, steaks or other grilled meats.

Mushrooms, in terms of flavour and texture, are a great substitute and alternative to a meat dish and therefore make a very satisfying main course served with mashed potatoes or cooked rice, on toasted bread or bruschetta, as topping on a pizza, as a base for a risotto, a soup, a stew, or a sauce, used in a sandwich, and is a great topping for a canapé.

This dish would be traditionally cooked with wild mushrooms picked by the locals in the late summer and in early autumn in the fields and in the shadows of the dense woods and forests.

Most commonly picked mushrooms would be porcini, chanterelles and parasols, the latter being a real treat when coated in breadcrumbs and shallow fried. Wild mushrooms would also be preserved in olive oil, dried and frozen to be enjoyed during the months when they are no longer in season and impossible to forage.

Slovenians are a very keen and passionate mushroom hunters and local authorities impose increasingly strict limitations about the quantity of the mushrooms allowed to be foraged.  

I carry with me very fond  childhood memories of long walks with my maternal grandparents, close relatives, or family friends, and returning home with a wicker basket full of wild mushrooms. It was rather magical, despite the fact, that as a small girl, I never quite managed to encounter in the woods any wizards, elves, or dwarfs featured in many European folk tales for the children.

I am sharing here this simple but super tasty recipe that you can make with wild or store bought mushrooms.

Recipe

Ingredients

Serves 4-6

  • 800-900g mixed mushrooms of your choice (I used a combination of chestnut mushrooms, baby button mushrooms, Oyster, Shiitake, King Oyster and Portobello mushrooms), cleaned and sliced

  • 3 Tbsp extra virgin olive oil

  • onion (about 90g), peeled and finely chopped

  • 1 clove of garlic, peeled and crushed

  • fresh flat leaf parsley (about a handful),  finely chopped

  • sea salt

  • black pepper

Method

Put olive oil in a fairly large shallow cast iron dish or frying pan, add finely chopped onions, crushed garlic, a pinch of sea salt and cook for a few minutes on a gentle heat until the onions become soft and translucent, stirring occasionally.

View fullsize Sauteed Mushrooms 5.jpg
View fullsize Sauteed Mushrooms 6.jpg

Add sliced mushrooms and stir in with the onions and garlic. Add sea salt and black pepper.

Cook the mushrooms on a medium heat, for about 20 minutes, stirring frequently, or until all the liquid evaporates and the mushrooms are fully cooked, but still firm (al dente).

Taste and adjust the seasoning with sea salt and black pepper.

View fullsize Sauteed Mushrooms 7.jpg
View fullsize Sauteed Mushrooms 8.jpg

Turn the heat off and sprinkle with finely chopped fresh flat leaf parsley.

Serve hot or at room temperature on a bed of soft cooked or grilled polenta, mashed potatoes, on a toasted bread or bruschetta, as topping on a pizza, as a base for a risotto, a soup or a sauce, and excellent with scrambled eggs and some rustic crunchy bread. 

Just a thought

Keep sautéed mushrooms in an airtight container in the fridge for no longer than 2-3 days.

This dish is not suitable for freezing.

October 26, 2022 /tina oblak
Sautéed Mushrooms, Sautéed mixed Mushrooms, woodland mushrooms, wild mushrooms, store bought mushrooms, cultivated mushrooms, chestnut mushrooms, frozen mushrooms, mixed frozen mushrooms, baby button mushrooms, Oyster mushrooms, Shiitake mushrooms, King Oyster mushrooms, Portobello mushrooms, pan fried mushrooms, mushrooms with scrambled eggs, mushrooms with soft cooked polenta, mushrooms with grilled polenta, Sautéed mushrooms with mashed potatoes, Sautéed mushrooms with cooked rice, Sautéed mushrooms on toasted bread, Sautéed mushrooms on bruschetta, Sautéed mushrooms on pizza, Sautéed mushrooms as a base for a risotto, Sautéed mushrooms as a base for a soup, Sautéed mushrooms as a base for a stew, Sautéed mushrooms as a base for a sauce, Sautéed mushrooms in a sandwich, Sautéed mushrooms for canapes, porcini mushrooms, chanterelles, parasols
Adriatic Recipe, Appetizers, Autumnal dish, Autumnal recipe, bite-sized nibbles, breakfast, brunch, Canapés, casserole, child friendly dish, child friendly meal, dinner, Easy recipe, entrée course, family friendly dish, family friendly meal, Finger food, first course, first course dish, first course meal, foraging, Healthy, healthy mael, hearty dish, Istrian cuisine, Istrian dish, Istrian food, Istrian gastronomy, main course, main dish, main vegetarian course, main vegetarian dish, main vegetarian meal, Nutritious, Nutritious dish, Rustic dish, savory nibbles, Side Dishes, simple recipe, Slovenian cuisine, Slovenian food, Slovenian gastronomy, Small bites, Snacks, supper, Vegan, Vegetable side dish, Vegetables, Vegetarian
Comment
Share

Traditional Istrian Fig Strudel made from sweet yeast dough Recipe 

Beans and Sardines
October 12, 2022 by tina oblak in Adriatic Recipe, Autumnal dish, Autumnal recipe, baked dish, baking, breakfast, celebratory desserts, dessert, easy baking, Enriched dough, festive bakes, festive dessert, festive sweet things, Istrian cuisine, Istrian dish, Istrian food, Istrian gastronomy, Rustic dish, Slovenian cuisine, Slovenian food, Slovenian gastronomy, Small bites, Snacks, summer dish, summer recipe, Sweet bread, sweet course, sweet finger food, sweet nibbles, Sweet Things

This rustic bake is one of the most traditional and authentic sweet treats in the cuisine of Slovenian Istra, it is called by the locals kvašen štrudelj s figami or kvašen štrukelj s figami, and it is made from soft, brioche like sweet yeast dough and fig filling. 

It is usually baked towards the end of summer and early autumn, when the figs are in abundance, and although fig filling is the most common and most traditional, other fruits can be used like apples, pears or plums, and different type of nuts can be added too.   

This sweet fig log is a bit of a “gastronomic hybrid”, it looks like a strudel in a way that is rolled into a log like a strudel, but it is made from yeast dough, resembling quite strongly, in terms of flavour, to the dough that is used to make a traditional Slovenian nut roll, Potica. 

This sweet bake used to be prepared and offered for special occasions as a dessert at the end of a big meal, and given to children as a snack and a special treat. Nowadays, it is also eaten for breakfast and offered with tea and coffee, but it is not commonly found in the restaurants and almost exclusively baked in the household. 

Istrian cuisine is a no waste cuisine, so juicy figs, with their delicately perfumed flavour, when fully ripen and plentiful, would get picked, chopped, cooked down in a frying pan with some butter to bring out their innate sweetness, cooled completely and then frozen to be used during late autumn and winter season, when fresh figs are no longer available. 

As a child, on the Slovenian coast, where I grew up, I would eat figs straight from the tree and the common sight of ripe figs slowly started to mark the end of summer and the start of cooler days, back to school days... 

I am sharing here this slightly off the beaten track, very special recipe, passed to me by my nona Nada and her dear friend Arnanda. It was truly touching listening to them, deep in  conversation about the recipe, and its different variations, even when the villages only a few kilometres apart from each another. 

Celebrate this wonderful fruit that marks the transition into autumn and try this delicious bake,. However, if you cannot get hold of fresh figs, you can just use fig jam, or any other jam of your preference for the filling. Your friends and family will be seriously impressed. 

Recipe 

Ingredients for the dough 

  • 500g plain all purpose white flour 

  • 7g fast-action dried yeast (also called instant yeast) or 20g fresh yeast 

  • 100g unsalted butter, melted 

  • 100g caster sugar 

  • 250ml lukewarm milk or water or a combination of the two (125ml milk and 125ml water) 

  • 2 eggs, room temperature, slightly beaten 

  • grated lemon zest of 1 unwaxed lemon   

  • 1 Tsp sea salt 

Ingredients for the filling 

The filling is made from fresh figs, you can use other fresh fruit like apples, pears, plums or fig jam instead, or any other jam of your preference. 

  • 1kg, roughly, of fresh figs   

  • 20g unsalted butter 

  • grated lemon zest of 1 unwaxed lemon 

  • 200ml single cream or ricotta

Method 

The dough 

In a fairly large bowl, sift the flour, make a little well in the centre and add lukewarm milk, instant yeast melted butter, sugar, lightly beaten eggs, grated lemon zest and a pinch of sea salt on the side of the bowl. 

View fullsize Fig Strukelj 4.jpg
View fullsize Fig Strukelj 5.jpg

Mix and combine well all the ingredients with the fork or a wooden spoon. 

(If using fresh yeast, place it into a small bowl and slightly break it down into smaller pieces with your fingers. Add a few tablespoons of tepid milk, ¼ tea spoon of sugar, gently stir and leave for about 15-20 minutes or until gentle bubbles form on the surface). 

Transfer the mixture onto a well floured  working surface and start kneading, for about 10 minutes, adding a little flour at a time if the mixture is too wet and sticky (this will partially depend on the flour and the size of the eggs)

Alternatively, use a mixer fitted with a dough hook and leave running for about 5 minutes. 

View fullsize Fig Strukelj 6.jpg
View fullsize Fig Strukelj 7.jpg

The dough is ready when it ends up being really smooth and elastic. It should not stick to your hands or working surface and should leave the bowl clean, if using a mixer. 

Transfer the dough back into a very lightly oiled bowl and cover with cling film (I use a shower cap, works really well). 

Put the bowl in a warm room free of drafts for at least one hour and leave the dough to rest and rise, the dough should increase in volume and double in size. 

While the dough is resting and rising start preparing the filling. 

View fullsize Fig Strukelj 8.jpg
View fullsize Fig Strukelj 9.jpg

The filling 

Wash the figs and pat dry them. 

Transfer the figs onto a chopping board, half them, quarter them and then roughly chop them. 

In a fairly large frying pan melt the butter and add chopped figs. 

Cook them for a few minutes on a gentle heat, stirring occasionally, until they become completely soft and break down. (if the skin of the figs is still a bit hard, break it down with the help of a wooden spoon). 

Cool completely and set aside. 

View fullsize Fig Strukelj 11.jpg
View fullsize Fig Strukelj 13.jpg

Transfer cooked figs into a bowl, add the cream and the lemon zest, stir and mix until all the ingredients are well combined. 

View fullsize Fig Strukelj 14.jpg
View fullsize Fig Strukelj 16.jpg

Flour well your working surface and rolling pin. Put your dough onto a working surface and roll it out to a more or less rectangular shape (40cmx50cm) to the thickness of about or not more than 1cm. 

This will give you a one big loaf, this is how it is traditionally made, and this is the size I made for this recipe. 

Because of its size, it could be a bit tricky to handle if you are not familiar with the recipe. 

I suggest you might want to divide the dough and the filling in half and make two logs instead.  

Take the fig mixture and spread it evenly on the rolled dough but leave some space around the edge so the filling does not come out when rolling the dough. 

View fullsize Fig Strukelj 17.jpg
View fullsize Fig Strukelj 18.jpg

Gently roll the filled dough quite tightly into a log and tuck well in the edges. 

View fullsize Fig Strukelj 19.jpg
View fullsize Fig Strukelj 20.jpg

Place the log onto a baking tray, previously lined with baking parchment. 

Cover with a clean kitchen towel , place it in a warm, draft free room and leave to prove for the second time for about 30 minutes or until well risen, not necessarily doubling in size. 

Take a toothpick and make a little holes in the dough on the whole surface and brush with either some melted butter or beaten egg. 

Bake in the preheated oven at 180C static, or equivalent, for about 50-60 minutes. Halfway through baking, tent the roll with the aluminium foil to prevent it browning too much and starting to burn. 

Leave on a baking tray until completely cool. 

Transfer on a serving plate, dust with icing sugar and serve. 

Just a thought 

For a more modern version of this traditional fig based sweet treat you can use ricotta instead of the single cream for preparing fig mixture filling and adding a splash of vanilla extract to both the filling and the dough mixture. 

Fig roll tastes at its best the day after has been baked. 

You can store it in an airtight container for up to five days and is suitable for freezing. 

Wine suggestion

Alto Adige Moscato Rosa Passito DOC 2018 - Laimburg

October 12, 2022 /tina oblak
kvašen štrudelj s figami, kvašen štrukelj s figami, fresh figs, fig jam, fruit strudel with sweet yeast dough, Istrian fig strudel, sweet yeast dough strudel, Apple strudel made from yeast sweet dough, plum strudel made from sweet yeast dough, Pear strudel made from sweet yeast dough, Istrian sweet treats, strudel with enriched dough, enriched dough, sweet enriched dough
Adriatic Recipe, Autumnal dish, Autumnal recipe, baked dish, baking, breakfast, celebratory desserts, dessert, easy baking, Enriched dough, festive bakes, festive dessert, festive sweet things, Istrian cuisine, Istrian dish, Istrian food, Istrian gastronomy, Rustic dish, Slovenian cuisine, Slovenian food, Slovenian gastronomy, Small bites, Snacks, summer dish, summer recipe, Sweet bread, sweet course, sweet finger food, sweet nibbles, Sweet Things
Comment
Share

My mum's easy Pear Traybake Recipe

Beans and Sardines
September 14, 2022 by tina oblak in Adriatic Recipe, All year round recipe, Autumnal dish, Autumnal recipe, baked dish, baking, bite-sized nibbles, breakfast, Central Europe cakes, Central European recipes, child friendly dish, dessert, easy baking, easy cakes, Easy recipe, Finger food, home baking, Istrian cuisine, Istrian food, Istrian gastronomy, pudding, Rustic dish, simple recipe, Slovenian cuisine, Slovenian food, Slovenian gastronomy, Small bites, Snacks, sweet course, sweet finger food, sweet nibbles, Sweet Things

This pear tray bake is made with simple, everyday, ingredients found in your pantry, it is moist, light, soft, super delicious, and incredibly easy and quick to prepare. You will want to make it over and over again, and it will become your number one recipe for a traybake.

This recipe covers it all when it comes to sweet treats, it is perfect for any occasion and it can be enjoyed any time of the day. You can serve it at room temperature or cold as a snack, it goes really well with tea and coffee, it can be made in advance and taken to the picnics; but, it also can be equally served warm as an elegant dessert when “dressed up” a bit and accompanied with cream, whipped cream, fromage frais, yoghurt, or a good quality vanilla ice cream or gelato.

This sumptuously moist pear traybake is incredibly popular back home on the Slovenian coast and baked in the households on a regular basis all year round. In fact, the idea behind this traybake is to use the same basic sponge recipe and add different fresh seasonal fruits or their combinations, so you always end up with a slightly different cake. And of course, using jarred or tinned fruit in this recipe is perfectly fine too.

In the autumn you can use for example pears, apples, plums and blackberries and add ground cinnamon and clove and orange zest to enhance that characteristic autumnal flavours, on the contrary, in the spring and summer months the use of peaches, cherries, nectarines and lemon zest will add freshness to the sponge base.

View fullsize Pear Traybake 1.jpg
View fullsize Pear Traybake 2.jpg

I am sharing here my mum's recipe for a tray bake she used to make, and still does, it will become a staple in your sweet things repertoire to bake.

Ingredients

Serves 12

  • 3-4 ripe pears (about 500g), tinned pears also work well in this recipe

  • lemon zest and juice of ½ small unwaxed lemon

  • 3 medium eggs (room temperature)

  • 150g caster sugar

  • 130g plain white all purpose flour

  • 6g baking powder (1 Tsp)

  • 5 Tsp neutral tasting oil (75ml)

  • ½ Tsp vanilla extract

  • ¼ Tsp ground cinnamon, optional

  • ¼ Tsp ground cloves, optional

  • icing sugar, for dusting

Method

Pre-heat the oven to 180C/Fan 160C/Gas 4.

Lightly grease a tray bake or roasting tin, approx 30 x 23cm (12 x 9), then line the base with baking parchment.

Peel, core and thinly slice the pears. Transfer into a bowl, add lemon zest and squeeze the lemon juice over them. This will help the pears from turning brown and discolouring but also adds a bit of of extra flavour.

Crack the eggs into a mixing bowl, add the sugar and beat with a free-standing or hand-held mixer for about 7 minutes or until the mixture has thickened, becomes slightly pale in colour and foamy.

View fullsize Pear Traybake 11.jpg
View fullsize Pear Traybake 12.jpg

Add sifted flour and baking powder along with oil, vanilla extract, and ground cinnamon and clove, if using. Stir with a wooden spoon to incorporate well all the ingredients.

View fullsize Pear Traybake 13.jpg
View fullsize Pear Traybake 14.jpg

Add pears to the mixture and stir with a wooden spoon or spatula.

View fullsize Pear Traybake 15.jpg
View fullsize Pear Traybake 16.jpg

Transfer the mixture into the tray.

Bake in the pre-heated oven for about 40-45 minutes or until the cake is golden, firm to the touch and and when inserting the knife into the centre should come out clean.

Leave to cool then turn out, remove the parchment, dust with a bit of icing sugar and cut into 12 pieces.

You can also serve it warm as a dessert with cream, whipped cream, fromage frais or a good quality vanilla ice cream or gelato.

Just a thought

In this traybake you could use other fruit such as apples, peaches, nectarines, cherries or plums or a combination of the fruits that your prefer, and all of the fresh fruits can be replaced by jarred or tinned alternative.

You can freeze this tray bake for up to three month.

Wine suggestion

Moscato di Trani DOC Dolce Naturale "Dulcis in Fundo" 2019 - Torrevento

September 14, 2022 /tina oblak
Traybakes, fresh fruit, tinned fruit, jarred fruit, fruit sponge cake, fresh pears, ground cinnamon, ground cloves, lemon zest, pear cake, pear traybake
Adriatic Recipe, All year round recipe, Autumnal dish, Autumnal recipe, baked dish, baking, bite-sized nibbles, breakfast, Central Europe cakes, Central European recipes, child friendly dish, dessert, easy baking, easy cakes, Easy recipe, Finger food, home baking, Istrian cuisine, Istrian food, Istrian gastronomy, pudding, Rustic dish, simple recipe, Slovenian cuisine, Slovenian food, Slovenian gastronomy, Small bites, Snacks, sweet course, sweet finger food, sweet nibbles, Sweet Things
1 Comment
Share

Šataraš - Bell peppers, onions and tomato Balkan inspired stew with scrambled eggs Recipe

Beans and Sardines
July 13, 2022 by tina oblak in Adriatic Recipe, Appetizers, Balkan dish, breakfast, brunch, child friendly dish, child friendly meal, dinner, Easy recipe, entrée course, family friendly dish, family friendly meal, first course, first course dish, first course meal, Healthy, healthy mael, hearty dish, Istrian cuisine, Istrian dish, Istrian food, Istrian gastronomy, main course, main dish, Nutritious, Nutritious dish, Rustic dish, simple recipe, Slovenian cuisine, Slovenian food, Slovenian gastronomy, Spring dish, Spring recipe, Starters, stew, Vegetable side dish, Vegetables, Vegetarian, summer recipe, summer dish, vegetarian summer stew

Šataraš (pronounced Satarash) is a stew like dish made with fresh bell peppers, ripe sweet tomatoes, onions, and scrambled eggs, it is similar to Shakshuka which has a sunny-side up eggs and makes a perfect main meal choice in the summer when the vegetables used for the dish are in full season. This dish is very well known in the Balkan regions but not so much to the rest of the world.

Eating šataraš just make you happy, and it feels like having a sunshine on a plate, as the addition of the eggs makes this dish colourful, extra flavourful and filling, it is also healthy and fresh.

This is one of my absolute favourite childhood dishes and if you like bell peppers this recipe is one of those you will come back to it time and time again as the recipe is very easy to make and the base can be cooked well in advance.

This dish is normally homemade and not found in the restaurants, it is typically served for lunch or dinner but it is also a great choice for breakfast or brunch.

Šataraš travelled from the neighbouring Balkans and stayed in Slovenian Istra, where it has been a very welcomed guest and has been enjoyed by the generations of locals in the area where gastronomy has been strongly shaped and enriched by the Balkan culinary traditions as well as Venetian and Austro-Hungarian.

I am sharing here my mother's recipe for šataraš with which she has delighted us during long hot summer months. If you do try it, then I think you will soon realize how delicious this dish truly is in its humble simplicity.

Ingredients

Serves 4

  • 4 bell peppers, a combination of yellow and green (each bell pepper weighing about 200g), wash, dry, remove the seeds and white filaments, and cut into strips (you can use more or less peppers according to your preference)

  • 4 vine tomatoes (each weighing about 150g) or other types of sweet and ripe tomatoes, washed and roughly chopped (use more or less tomatoes according your liking)

  • 1 onion (about 170g), peeled and finely sliced

  • 4 Tbsp extra virgin olive oil

  • 4 eggs

  • sea salt

  • black pepper

  • fresh flat leaf parsley, roughly chopped, for serving, optional

Method

Place extra virgin olive oil in a fairly large frying pan, add sliced onions, a pinch of sea salt and cook for about 10 minutes on a gentle heat until the onions become soft and translucent, stirring occasionally.

View fullsize Sataras 5.jpg
View fullsize Sataras 6.jpg

Add strips of bell peppers and stir in with the onions. Cover with the lid (the steam will help to cook down and soften the peppers) and cook on a gentle heat for up to about 30 minutes.

View fullsize Sataras 7.jpg
View fullsize Sataras 8.jpg

Add chopped tomatoes, cover with the lid, and cook on a gentle heat, stirring occasionally, for about 20-30 minutes, or until tomatoes are cooked down and soft.

If the mixture has too much liquid (this will depend on how watery the tomatoes you are using are) take the lid off and cook further for a few minutes or until all of the liquid evaporates.

View fullsize Sataras 9.jpg
View fullsize Sataras 10.jpg

In a small bowl crack the eggs, slightly whisk, add sea salt and pepper.

Pour the egg mixture over the pepper stew, mix and stir and cook until desired consistency.

View fullsize Sataras 11.jpg
View fullsize Sataras 12.jpg

Sprinkle with roughly chopped fresh parsley, optional, and serve immediately with plenty of rustic crunchy bread.

Just a thought

This dish is best served hot, equally delicious at room temperature.

You can prepare pepper, onion and tomato stew well in advance, keep it in a fridge in an airtight container for about 3 days, and pour the whisked eggs on a pepper base just before you want to complete the dish and ready to serve it.

The pepper stew (without the egg) is also great served with grilled and barbecued meats, a great base for a risotto or a pasta dish, and it can also be enjoyed with polenta or an egg frittata.

Pepper, onion and tomato base is suitable for freezing.

Wine suggestion

Salento Negroamaro Rosato IGT “Calafuria” 2021 - Tormaresca

July 13, 2022 /tina oblak
bell peppers, fresh bell peppers, yellow peppers, green peppers, tomatoes, scrambled eggs with peppers, peppers stew
Adriatic Recipe, Appetizers, Balkan dish, breakfast, brunch, child friendly dish, child friendly meal, dinner, Easy recipe, entrée course, family friendly dish, family friendly meal, first course, first course dish, first course meal, Healthy, healthy mael, hearty dish, Istrian cuisine, Istrian dish, Istrian food, Istrian gastronomy, main course, main dish, Nutritious, Nutritious dish, Rustic dish, simple recipe, Slovenian cuisine, Slovenian food, Slovenian gastronomy, Spring dish, Spring recipe, Starters, stew, Vegetable side dish, Vegetables, Vegetarian, summer recipe, summer dish, vegetarian summer stew
Comment
Share

Cherry strudel Istrian Recipe

Beans and Sardines
June 29, 2022 by tina oblak in Adriatic Recipe, All year round recipe, Austrian inspired dishes, baked dish, baking, breakfast, child friendly dish, dessert, easy baking, Easy recipe, home baking, Hungarian inspired dishes, Istrian cuisine, Istrian dish, Istrian food, Istrian gastronomy, Mitteleuropean cuisine, Mitteleuropean dish, Mitteleuropean food, Mitteleuropean recipes, pudding, Rustic dish, simple recipe, Slovenian cuisine, Slovenian food, Slovenian gastronomy, Snacks, sweet course, Sweet Things, sweet nibbles

Cherry Strudel is a variation of a traditional and well known Viennese Apple Strudel, it is a very scrumptious dessert made with very thin elastic pastry, and the filling contains fresh cherries, a bit of sugar, lemon zest and breadcrumbs. If you are thinking that you cannot be bothered pitting the cherries and making your own dough, I can guarantee you an equal delicious results using store bought pastry and jarred, tinned or frozen cherries, no hassle involved!

Apple strudel dates back to1696, when it was first mentioned, and “conquered” all the countries that were once part of Austro-Hungarian Empire, but it is believed that strudel originated from baklava (a famous Turkish pastry based dessert) and travelled to Austria with Ottoman's Empire and through Hungarian cuisine.

Apple strudel has been a big hit in all the countries that were once ruled by Austro-Hungarian Empire, but it is in the North Adriatic that this new variation was created giving originality to a very unique and less known type of strudel. A cherry strudel, is a very much loved seasonal dessert in Slovenian Istra, (Češnjev štrudelj or Češnjev zavitek) where I come from, and neighbouring Trieste in Italy.

Cherry strudel has always been very popular, and when fresh cherries are in season, this dessert is regularly baked in the households, and if you are lucky enough, sometimes you can find it on the menus of informal family run restaurants.

This irresistible dessert really takes me back to my childhood. My mother frequently baked it with fresh cherries picked by ourselves in the garden, or were very generously given by our neighbours, it is the garden where I, as a child, spent a lot of time when my parent were working in the restaurant. Along with the girl next door, who was only a year older than me, we used to pick cherries from the tree that had the reddest and ripest cherries, climbed up it, found a comfortable branch to sit on and munch on cherries until we were completely full, chatting and giggling...

When we were called for lunch, there was little appetite left for it, no matter how delicious it was, and my mother would only looked at us and had the answer, our T-shirts were stained, our lips and mouths deep red in colour from the cherry juices...she never got cross with us, just smiled and shook her head...since my mother used to do exactly the same when she was small...

Looking back, it just made me realize how lucky I was, the first time I ever had the chance to buy fresh cherries was when as an adult I moved to England...

Cherry strudel is traditionally served warm and generously dusted (there is no sugar in pastry) with regular icing sugar or vanilla flavoured icing sugar.

You can turn this simple and rustic pudding into an elegant dessert and serve it with whipped cream, vanilla ice cream or vanilla sauce.

I am sharing here my mother's recipe, which is slightly off the beaten track, for cherry strudel made with home-made pastry and fresh cherries, however you can still indulge yourself and cut corners a bit by using a store bought ready made puff pastry and frozen, tinned or jarred cherries.

Ingredients

Serves 10-12

You can use store bought ready made puff pastry, shortcrust or filo pastry.

Ingredients for home-made strudel dough

  • 250g all purpose flour

  • 1 egg, lightly beaten

  • 3 Tbsp neutral tasting vegetable oil (I used sunflower oil)

  • 2 Tbsp white wine vinegar or lemon juice

  • sea salt, a pinch

  • 50ml-60ml lukewarm water, or as needed

Ingredients for cherry filling

  • 700g fresh cherries, washed and pitted (can also use tinned or jarred cherries or store bought frozen cherries, defrost and drain well)

  • 100g caster sugar

  • 1 unwaxed lemon, grated zest

  • 20g butter plus, some extra for brushing

  • 80g dry fine breadcrumbs

  • sea salt, a pinch

  • icing sugar, for dusting

Method

To make the dough

Place the flour in a big mixing bowl and make a well.

In a separate, smaller bowl, mix slightly beaten egg, oil, vinegar or lemon juice, (the acidity will help to relax gluten in the flour making the dough more stretchy) a pinch of sea salt and lukewarm water. Pour the mixture into a flour well.

With the fork, stir the mixture with the flour until well combined. Add a little bit of flour at a time, until the dough comes nicely together, then work the dough with your hands.

Transfer the dough on a lightly floured working surface and knead the dough for about 10 minutes or until nice and smooth.

After this time, the dough should be moist and elastic and not sticky. Add a little more flour if the dough is too sticky to knead.

In order to further encourage the development of the gluten, resulting in a very elastic dough, slam the dough onto the working surface a few times.

Shape the dough into a smooth ball and place it in a clean bowl, previously brushed with oil.

Cover the bowl with cling film and let the dough rest for about 1 hour at room temperature (strudel dough has no yeast, so do not expect the dough to rise or double in size, it needs to rest for gluten to relax).

View fullsize Apple Strudel 4.jpg
View fullsize Apple Strudel 5.jpg

To make the filling

In a small pan melt the butter over medium-low heat. When the butter is melted add breadcrumbs, toast them, stirring constantly until golden-brown in colour. Remove from the heat, cool and set aside.

Wash the cherries, dry them a bit, take the stalks off and pit them. Place them in a colander and leave them to drain until needed.

Preheat the oven to 200C static or equivalent.

Divide the dough in half to make two separate strudels as easier to work with.

Place half of the dough on a clean and lightly floured table cloth. Flour the rolling pin and start rolling out the dough. While rolling, to prevent sticking, flour the dough and the surface every now and then.

When the dough reaches about 20 cm in diameter pick it up and keep stretching it. The best way to do so is to use the back of your hands and in particular the knuckles but make sure you remove any sharp jewellery first.

When the dough becomes difficult to handle as it becomes bigger and thinner, place it on a lightly floured tablecloth.

With your hands (tip of the fingers) keep stretching gently the dough on the tablecloth to paper thin consistency, from the inside to the outside working your way round the sheet of dough.

Keep stretching until the sheet of dough starts to look almost translucent and you will be able to see a pattern of your tablecloth through it.

You should end up with a thin sheet of dough stretched more or less into a rectangular shape with a diameter of approximately 40 cm which will fit into a standard 40 cm baking tray.

If you notice that the edges are still a bit thick, stretch them further very gently or cut them off. If you leave the edges thick, when rolling the strudel, they will form quite a thick layer at the very centre of the strudel risking to remain slightly underbaked.

View fullsize Apple Strudel 9.jpg
View fullsize Cherry Strudel 16.jpg

Transfer the cherries into a bowl, add sugar, breadcrumbs mixture, lemon zest and mix well to incorporate all the ingredients.

View fullsize Cherry Strudel 11.jpg
View fullsize Cherry Strudel 12.jpg
View fullsize Cherry Strudel 13.jpg
View fullsize Cherry Strudel 14.jpg

Place and spoon evenly the cherry mixture over one half of the dough sheet leaving about 2-3cm to the edge. Fold in the side ends of the sheet to prevent filling coming out during rolling.

View fullsize Cherry Strudel 17.jpg
View fullsize Cherry Strudel 18.jpg

Using the tablecloth to help you, roll the dough all the way and roll it directly onto a sheet of baking parchment, seam side down.

View fullsize Cherry Strudel 19.jpg
View fullsize Cherry Strudel 20.jpg

Transfer very gently the baking parchment with the rolled strudel on a baking tray.

Repeat the process with the other half of the dough.

View fullsize Cherry Strudel 21.jpg
View fullsize Cherry Strudel 22.jpg

Brush it with a bit of melted butter.

Bake on the middle shelf for 40-45 minutes.

View fullsize Cherry Strudel 23.jpg
View fullsize Cherry Strudel 24.jpg

Cherry Strudel is ready when the crust turns nice and golden.

Take it out of the oven and let it cool completely. Dust it with icing sugar, cut into slices and serve it on its own or with vanilla ice cream or cream.

Just a thought

You can make the strudel dough ahead and keep it refrigerated for up to two days. Before using the dough take it out of the fridge allowing it to come to a room temperature.

Cherry strudel is best eaten the day is made. You can keep cherry strudel in an airtight container in the fridge for 3-4 days or overnight on the counter.

Wine suggestion

Friuli Colli Orientali Verduzzo Sottozona Cialla DOC "Verduzzo di Cialla" 2016 - Ronchi di Cialla

June 29, 2022 /tina oblak
fresh cherries, Češnjev štrudelj, Češnjev zavitek, jarred cherries, tinned cherries, frozen cherries, store bought pastry, filo pastry, ready made puff pastry, shortcrust pastry, strudel pastry, strudel dough, homemade strudel dough, strudel di ciliege
Adriatic Recipe, All year round recipe, Austrian inspired dishes, baked dish, baking, breakfast, child friendly dish, dessert, easy baking, Easy recipe, home baking, Hungarian inspired dishes, Istrian cuisine, Istrian dish, Istrian food, Istrian gastronomy, Mitteleuropean cuisine, Mitteleuropean dish, Mitteleuropean food, Mitteleuropean recipes, pudding, Rustic dish, simple recipe, Slovenian cuisine, Slovenian food, Slovenian gastronomy, Snacks, sweet course, Sweet Things, sweet nibbles
Comment
Share

Elderflower fritters Recipe

Beans and Sardines
June 22, 2022 by tina oblak in Adriatic Recipe, Appetizers, Austrian inspired dishes, breakfast, Central European recipes, child friendly dish, child friendly meal, dessert, Easy recipe, family friendly dish, family friendly meal, foraging, Istrian cuisine, Istrian dish, Istrian food, Istrian gastronomy, main course, main dish, main fish course, Rustic dish, Slovenian cuisine, Slovenian food, Slovenian gastronomy, Small bites, Snacks, Spring dish, Spring recipe, sweet course, sweet finger food, sweet nibbles, Sweet Things, Vegetarian

Bring the sunshine and the scent of summer in your kitchen with these elderflower fritters which are lightly fried elderflowers in a pancake batter like, they are golden, crunchy and a delicious dessert with a difference, they are a real treat and a delightful seasonal delicacy.

The culinary use of elderflower has been revolutionized in the past few years, but in the whole of Slovenia, including the Slovenian coast where I come from, elderflower fritters are a dish that is very old and traditional.

Those of you that have been reading my posts on this blog for a while, will know that I come from a family of very passionate foragers, and so there should be no surprise that this fragrant flower ends up on a plate. My maternal grandmother, stara mama Iva, would make them when we were little.

We children got away with eating just that, with a glass of milk, and skipping altogether a main evening meal, which is quite a common practice in neighbouring Austria.

If you are not too familiar with the elderflower, please go and read my page with the recipe for elderflower cordial where I explain a bit more in detail where, when, and how to pick this edible, fragrant, and sweet flower.

What can be better than going on a walk on a sunny day and bring home a free meal...try these elderflower fritters, you will be hooked, and will have another reason to look forward to a following spring/summer.

Ingredients

Serves 4-6 as a dessert (2-3 heads per person)

  • about 10-14 elderflower heads with their stems

  • 100g all purpose (plain) flour

  • 1egg

  • 70ml milk

  • 70ml very cold sparkling water

  • sea salt, a pinch

  • 2 tsp caster sugar, optional

  • oil for frying (neutral tasting, I used sunflower oil)

  • icing sugar or vanilla icing sugar, for dusting

Method

Prepare elderflower heads by cutting the stems with the scissors but leaving at least 5cm of stem for easy handling (in other words enough stem to hold them by). Very gently shake any insects and dirt off your flower heads, but do not be tempted to wash the flower heads as you will loose the flavour.

In a mixing bowl, using a hand whisk, whisk the egg, add milk, sea salt and sugar, if using, and mix until well combined.

Add the flour gradually and whisk until smooth with no lumps, then add sparkling water which will help lighten the batter, set aside an leave it to rest for about 30 minutes.

Heat about 5cm of oil a pan (big enough to accommodate the largest elderflower head) until hot (180C on a temperature probe). You will know the oil is ready when a drop of batter bubbles immediately and turns golden in about 5 seconds.

Holding the elderflower by their stems, dip each elderflower head into the batter, so they are coated all over, gently shake off excess batter.

View fullsize Elderflowers fritters 10.jpg
View fullsize Elderflowers fritters 17.jpg

Drop the flowers into the pan with hot oil (flower side down) and fry for about 30 seconds. Fry one flower at a time.

They should be lightly golden in colour and not too brown.

Remove with a slotted spoon and dry on kitchen paper.

Dust generously with icing sugar, serve and eat while still warm and crunchy.

Delicious also drizzled with honey, accompanied with vanilla ice cream, lemon sorbet or fresh strawberries, cherries or other seasonal fresh fruit of your choice.

Just a thought

Elderflower fritters ideally should not be made well in advance as the batter, which should be crisp, will become soft.

Wine suggestion

Friuli Colli Orientali Traminer Aromatico DOC 2021-Zorzettig

June 22, 2022 /tina oblak
edible flower, elderflower, deep fried desserts, deep fried elerflower, fiori di sanbuco fritti, ocvrti bezgovi cvetovi
Adriatic Recipe, Appetizers, Austrian inspired dishes, breakfast, Central European recipes, child friendly dish, child friendly meal, dessert, Easy recipe, family friendly dish, family friendly meal, foraging, Istrian cuisine, Istrian dish, Istrian food, Istrian gastronomy, main course, main dish, main fish course, Rustic dish, Slovenian cuisine, Slovenian food, Slovenian gastronomy, Small bites, Snacks, Spring dish, Spring recipe, sweet course, sweet finger food, sweet nibbles, Sweet Things, Vegetarian
Comment
Share
  • Newer
  • Older