
Pinca
(sweet Easter bread)

Pinca is a type of egg enriched bread that is not very sweet, but is flavourful, soft and fluffy. It is similar to a brioche, but contains less butter, and is therefore lighter. It is eaten especially during Lent and Easter, but is also prepared all year round.
It is widely available in bakeries, food stores and supermarkets, but nothing compares to the one baked at home. It is so easy to make; yes, it is a bit lengthy, perhaps because of the proving times, but give it a go. When you taste the real thing you will never want to buy it again.
Traditional Italian Pinza is very popular in the province of Trieste and Gorizia. It became an essential part of culinary tradition in Istria where is called Pinca and along the Adriatic coast and Dalmatia.
Pinza bread is often mistaken for Venetian Pinza, which is very different, as the dough has distinct consistency, and it is well seasoned and flavoured, for example, with walnut kernels, sultanas soaked in rum or Marsala, soft dried figs, pine nuts and apples.
My nona Nada always made pincas for Lent, and she baked quite a few, and then gave them to the family to be enjoyed. As soon as you entered the main entrance porch of her house, the aromas were unmistakable, I instantly knew what she had been making that day, and I also knew Easter was coming soon.
Sadly, her 93 years old hands have no longer the strength to knead the dough. I bake pinca today for my family, using her exact recipe, and when I cut a slice of it, close my eyes and smell the aroma of it, I get immediately transported to her kitchen, and the vision of a pile of pincas on a wooden table, covered with hand embroidered white linen tea towels appear in my mind.
She also told me that the tradition wanted the pinca to be blessed in the church. People would fill their wicker baskets with pinca, cooked ham and hard boiled eggs and take it to the mass on Holy Saturday or early on Easter Sunday to be blessed.
Only after being blessed, it was served either for breakfast on Easter day with coffee, a selection of cured meats, cooked ham, cheese and hard boiled eggs and different types of jams and preserves or as a dessert after Easter lunch where a slice of pinca would be very commonly dunked into a sweet wine or Muscat, locally known as muškat.
The tradition is very strong and this is how it is still served today.


Pinca has a typical incision on the surface either in the shape of a 'cross' that symbolizes the suffering of Jesus Christ, or a the 'letter Y,' dividing the pinca into three sections, symbolizing the Holy Trinity in Christianity.
It is believed, that the incisions represent Jesus as a martyr, and that the Pinca itself represents a kind of Holy Sponge from which Jesus, according to the Gospels, was offered a drink during the Crucifixion (Matthew 27:48, Mark 15: 36, John 19:29).
Pinca is enriched with eggs, which also has symbolic significance, since it is a kind of constant reminder of Christianity, and the resurrection of Christ, and can also be linked to perhaps other old traditions that celebrate the arrival of spring after the bleak winter period.
Ingredients
500g regular plain flour
1 cube of fresh (brewer’s) yeast 42g or 14g of dry yeast
100g unsalted butter, melted
150g caster sugar
2 medium eggs, lightly beaten
2 egg yolks, lightly beaten
100 ml tepid, lukewarm milk (semi skimmed or full fat)
2 Tbsp dark rum or grappa (alcoholic, fragrant, grape-based pomace brandy of Italian origin)
finely grated lemon zest of 1 unwaxed lemon
pinch of sea salt
1 small egg, lightly beaten for glazing (you can use lighly beaten egg whites, it will result lighter in colour after baking)
Method
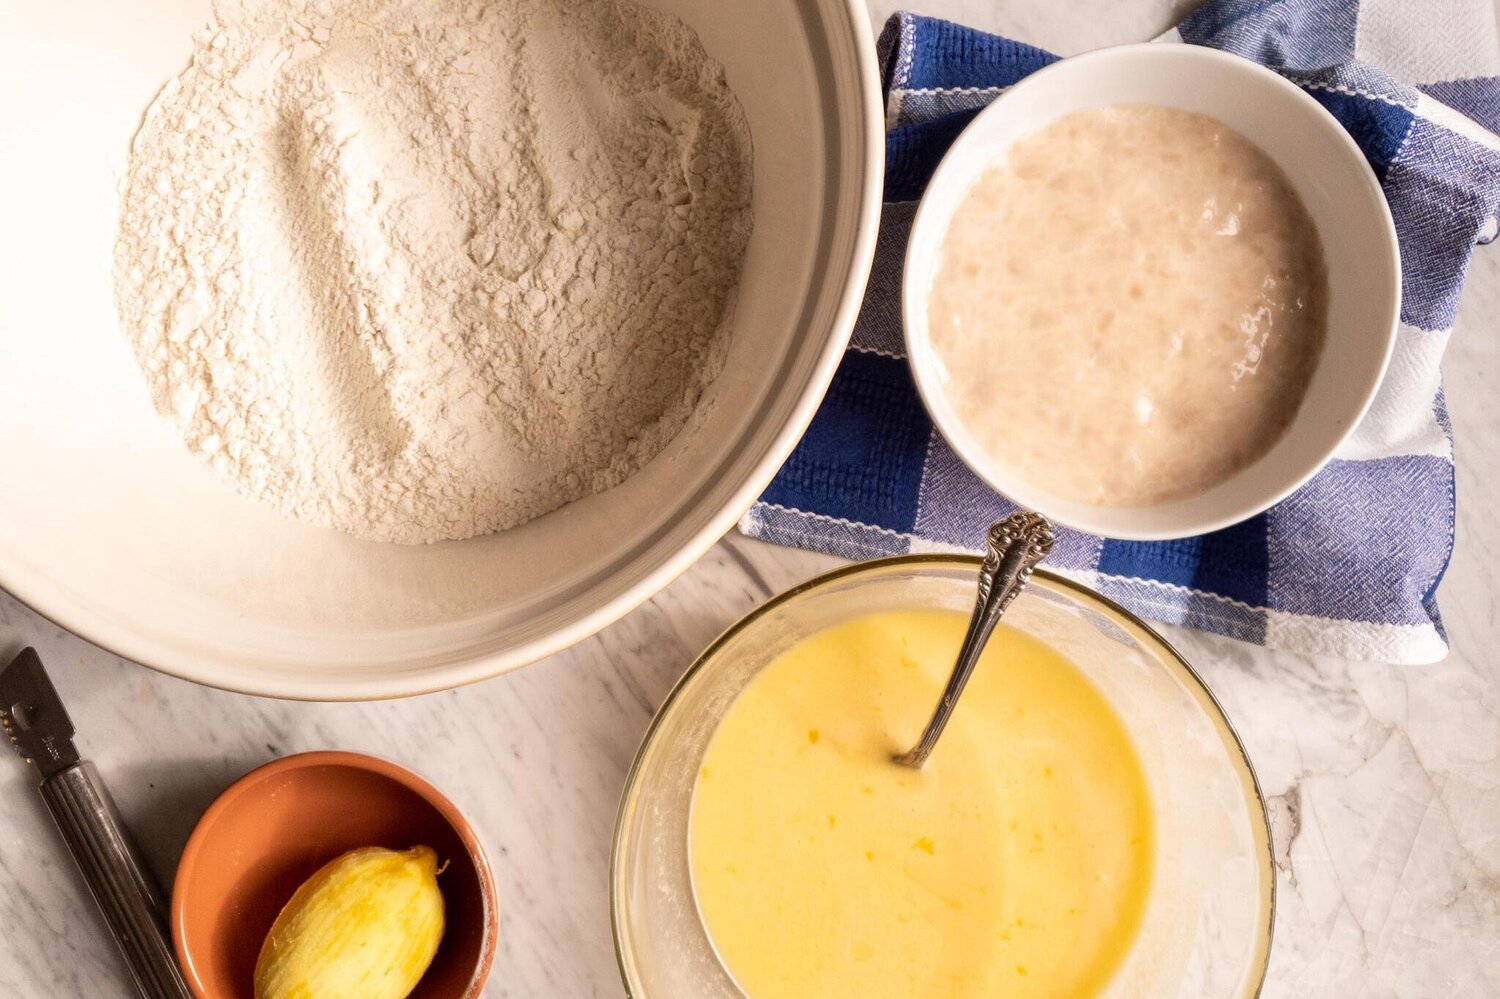
In a small bowl place fresh yeast and slightly brake it down into smaller pieces with your fingers. Add 100ml of tepid milk and ¼ Tsp of caster sugar. Gently stir and leave for about 20min or until gentle bubbles form on the surface.


In a separate mixing bowl put the egg, egg yolks and beat them gently. Add melted butter, sugar, rum or grappa, grated lemon zest, 100ml of milk and a pinch of sea salt. With the fork mix well all the ingredients.
In a large mixing bowl put the flour, add egg mixture and the yeast mixture. Combine well all the ingredients with the wooden spoon or spatula to start with. When all the ingredients are well combined transfer the mixture onto a clean, very well floured surface.

Work with your hands, adding a little flour at the time if the dough is too sticky, kneading the dough until you get a very smooth and soft dough with all the ingredients completely incorporated.
The dough will be at first quite wet and sticky, be very patient and do not be tempted to add too much flour too soon.
During the kneading, on the contrary, if you think the dough is too hard and dry add more tepid milk.
Knead the dough for about 10-15min, stretching it and folding it, until the dough is smooth in consistency and does not stick to the surface.


Shape the dough in a ball, place it back into a previously oiled big mixing bowl. Cover with cling film, leave to rest and proof in a draft free space at a warm room temperature for a minimum of 2h. After this time your dough should be at least double in size.


Take the dough out of the mixing bowl, place it on a floured surface and knead the dough once again. Divide the dough into two equal parts or three, if you wish a slightly smaller size bread and shape them into a sphere or other shapes if you prefer, maybe a plait.
Lay big baking tray with baking parchment or use a paper panettone mould if you prefer. Place the divided parts of the dough onto the baking tray. Cover with clean tea towel and put it in a warm place away from drafts and let them rest and proof for further 2h hours. I usually put the tray in the oven, by doing this I do not have to worry about the drafts or the room being too cold. Just make sure you take the tray out of the oven before turning it on in order to preheat it!


Towards the end of proofing time, heat the oven to 180C static.
With the very sharp knife decisively cut the cross on the surface or Y, making sure you do not drag the dough. The cut should be quite deep but not to the point of touching the bottom of the tray. Brush with the beaten egg and put in the preheated oven to bake for about 30-40 min or until nicely golden brown in colour on the surface.


I suggest you check the colour of your pinca after about 20-25min, if it is browning too quickly, tent it with the aluminium foil and bake further.
You might want to double check if it is baked completely by pricking the centre with a clean wooden skewer (the skewer should come out clean) or use an instant food thermometer if you have one (it should register a temperature between 195C and 200C). If still wet, cover the pinca with the aluminium foil and bake for further few minutes.
It is a good idea to make sure that pinca is thoroughly baked as it browns quite quickly during the baking and therefore it is easy to undertake.

Remove from the tray and let cool completely on a cooling rack. Slice and serve.

Pinca can be stored for about 2-3 days or frozen for later use. You can also serve it sliced and slightly toasted.
Just a thought
Pinca dough can be also shaped into a plait.
Nowadays, a bit of a vanilla extract is often added to the pinca dough for extra flavour. However, it is important to remember that pinca is a humble bread, and originally only has lemon zest and dark rum or grappa added to the dough for the aroma. My nona Nada also told me that in her days vanilla was not very common to use, simply because it was a very difficult ingredient to get a hold of, and far too expensive.
